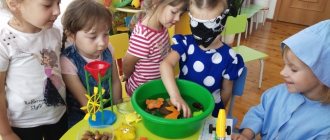
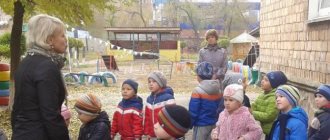
Organization of experimental activities in the senior group
Experimental activity in the senior group is a particularly important process that allows preschoolers to form or expand existing ideas about objects of inanimate and animate nature, which is possible through independent knowledge.
This technique is characterized by its implementation in almost all cases of the teacher’s work, from walks and extracurricular activities, to certain leisure activities based on the topic of the conversation.
Such a research process significantly increases the overall motivation of students, because in this case there is a scientific methodology - preschoolers experience bright and positive emotions that develop as a result of a sense of self-worth and responsibility within the framework of a certain work.
In addition, the preschooler enthusiastically expects visible results from his own work and tries to gain more information and experience from the teacher and the world around him.
Objectives of experimental activities
Qualities characteristic of research activities are observed in a child from the age of 2. In this case, experiments with objects or phenomena are carried out using the simplest actions: smear paints on a sheet, test something for strength, taste it.
The child reaches out to each object with only one purpose - to explore it.
The development of fine motor skills and general coordination of movements allows the child to conduct his own research much more intensely, while the factor of spontaneity in the experiment is preserved in children up to 5-6 years old.
Preschoolers in the middle group are distinguished by longer observations, through which they can develop vocabulary, due to which there is a desire to use independent activities with the help of which they learn acquired skills.
Therefore, the main goals pursued by experimental activities in a children's institution are characterized and subsequently introduced into the pedagogical process based on the main typology of the task.
Task description:
| Task | Description, details |
| Educational | The child develops a general idea of certain objects and phenomena, which allows them to identify their main qualities and properties. Also, the preschooler begins to determine the presence of any relationship between the objects under study. The ability to draw conclusions or discoveries is formed. |
| Developmental | In this case, the main emphasis is on the development of cognitive or intellectual abilities, the child begins to generalize and analyze. The preschooler also develops fine motor skills, better understands visual, sensory or auditory sensations, improves memory, attention and speech skills. |
| Educational | The teacher creates a unique atmosphere in which the child’s motivation to independently explore the world around him increases. The preschooler develops the skill of working within a team or group and begins to feel mutual assistance. The skills of accuracy and perseverance are also improved. |
During direct exploration, preschoolers acquire important skills that allow them to experiment with objects or the environment. They also learn to draw various conclusions and conclusions based on the experiments performed.
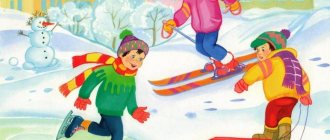
Experiments with water for children
Experiments with water can be carried out with children of any age - such experiments are simple, spectacular and safe. Children can carry out most of the experiments independently under the guidance and supervision of an adult.
Storm (tornado) in a bottle
For children from four years old.
The kid will see how a spiral funnel-shaped vortex forms in a bottle of water - a child of preschool or primary school age is unlikely to understand such complex terms, so you can simply say that now you yourself will make a storm using ordinary water.
What you will need:
- two plastic bottles with a volume of 1-1.5 liters;
- insulating tape;
- water.
Step-by-step instruction:
- Pour water into one bottle so that there is about 1 centimeter left to the neck.
- Using electrical tape, attach the second one on top of the first bottle - the necks of the bottles should coincide with each other.
- Turn the resulting structure over and shake it well - the water will rush into the bottom bottle, simultaneously forming a water vortex.
- By constantly turning the bottles over, the experiment can be repeated many times.
Video instruction:
Experiment with water, oil and salt
For children 4 years and older.
The experience will demonstrate to the child the properties and features of the interaction of substances that we use every day.
What you will need:
- water;
- vegetable oil;
- salt;
- food coloring;
- cup.
Step-by-step instruction:
- Fill the glass two-thirds full with water.
- Pour in a little vegetable oil - it is lighter than water, and a layer of oil will remain on top without sinking to the bottom of the glass.
- For greater clarity, pour food coloring into the glass.
- Slowly pour salt into the resulting solution - about one teaspoon.
- You will see how the oil and tinted salt sink to the bottom - although the oil is lighter than water, the heavier salt drags the oil down with it.
Video instruction:
Walking Rainbow
For children from 4 years old.
During the experiment, the baby will study different colors and simply admire the unusual phenomenon. Using an example, a school-age child can be told a little about the principle of communicating vessels: that identical liquids in interconnected vessels are always at the same level at rest.
What you will need:
- seven disposable cups;
- water;
- multi-colored food colors;
- paper towels.
Step-by-step instruction:
- Pour water into four glasses: the glasses should alternate - full, empty, full again, empty again, the row ends with a glass filled with water.
- Add food coloring to cups of water.
- Fold the paper towels 4-5 times to make tubes - make six paper tubes in total.
- Using paper tubes, connect adjacent glasses: each glass, except the first and last, will contain parts of two tubes.
- Wait until the stripes turn different colors - you will get an unusual walking rainbow.
Video instructions for the experiment:
Methods and techniques of experimental activities in preschool educational institutions
Experimental activities in the senior group are characterized by the presence of many techniques and methods that make it possible to improve teaching activities, as well as develop children’s independence skills.
The most relevant of them are:
- Search-problem technique. In this case, through the efforts of the teacher, a problematic situation is created that the preschooler must solve, including putting forward his own hypotheses and methods. This technique is one of the leading methods, which characterizes the high efficiency of modern education. Thus, by searching for a problem, children’s motivation is improved through direct communication with the teacher. The child strives to obtain a high-quality result, thereby increasing his activity in research.
- Observation activity of the object. The perception or sensation of certain objects can be organized both on the street and in a preschool institution. So, directly on a walk, the child begins to immerse himself in the environment, exploring new visual, auditory or tactile images. Such observation refers to one of the most active methods of interaction.
- Experiments and experiences . With the help of various experiences and experiments (throwing things on the floor, trying to break something, make a sound, etc.), the child learns to understand the basic features, properties and qualities of objects or individual phenomena. Students are very enthusiastic about the substance being studied, especially if they already know it. In this case, the preschooler begins to take the initiative and tell other peers about his own experience. This technique can effectively develop activity, observation and independence in a child. It also helps create a friendly, team atmosphere.
The above methods and techniques must be used together. When they are used separately from each other, the main pedagogical goal is significantly lost, which leads to a deterioration in the research process.
Modern pedagogical practice indicates the high efficiency of using these methods in relation to various natural phenomena. In this case, it is especially effective for children to observe living plants, animals or various phenomena.
A good teacher will definitely try to introduce such a feature into educational topics, which will significantly increase the quality of education.
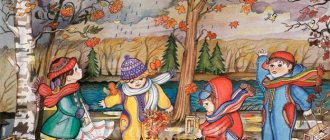
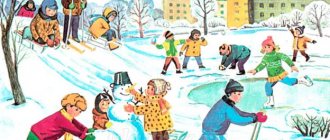
Card index of experiences on a walk at different times of the year
Galina Satosova
Card index of experiences on a walk at different times of the year
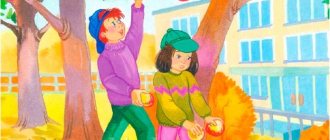
Autumn
"The sun dries things out"
Goal: observe the sun's ability to heat objects.
Procedure of the experiment : Hang the doll's underwear in the sun and observe how quickly it dries; wet the sand in the sandbox and watch how it dries during the walk . Touch the bricks from which the kindergarten building is built, on the sunny and shady sides.
Conclusion: the sun heats objects.
"Properties of wet sand"
Purpose: to introduce the properties of sand
Material: sand, molds
Procedure of the experiment : pour dry sand into the molds, turn them over, see what happens. Sprinkle a stream of sand onto your palm. Then wet the sand and do the same operations.
Conclusion: wet sand can take any desired shape until it dries. When sand gets wet, the air between the sand grains disappears and the wet sand sticks together.
"Rainbow"
Goal: to introduce rainbows as a natural phenomenon.
Material: basin with water, mirror
Progress of the experiment : the teacher places a mirror in the water at a slight angle. It catches a ray of sunlight with a mirror and directs it to the wall. Turns the mirror until a rainbow appears on the wall. Water acts as a prism, decomposing the white color into its components. What does the word "rainbow"
?
What is an "arc"
? What is she like? Show the arc with your hands. From the ground, a rainbow resembles an arc, but from an airplane it appears to be a circle.
"Storm"
Goal: to prove that wind is air movement.
Progress of the experiment : children make sailing boats. Place them in containers with water. Children blow on the sails, the boats sail. Large ships also move thanks to the wind .
Questions: What happens to the boat if there is no wind? What if the wind is very strong? (a storm begins, and the boat may suffer a real shipwreck)
Conclusion: wind is the movement of air.
“There is air in the soil, there is air in the water”
Goal: to reinforce the idea that there is air in soil and water.
Procedure : take two glasses of water . Throw a piece of soil into one glass. Air bubbles will appear on the surface. Take another glass and a straw: lower one end of the straw into the water, and gently blow on the other.
Conclusion: we exhaled air, it is visible in the water in the form of bubbles.
"Air is invisible"
Purpose: to introduce the properties of air (it has no specific shape, spreads in all directions, has no odor of its own); develop the ability to establish cause-and-effect relationships based on basic experimentation.
Progress of the experiment : the teacher offers to take (consistently)
scented napkins, orange peels, garlic and feel the odors spreading in the room.
Conclusion: Air is invisible, but it can transmit odors over a distance.
"Flying Seeds"
Goal: to introduce children to the role of wind in plant life
Progress of the experiment : give the children one “flying”
and one
“flightless”
seed each.
Offer to raise your hands as high as possible and simultaneously release both seeds from your hands (for example, beans and maple, birch seeds)
Conclusion: seeds have different adaptations for flight, the wind helps the seeds move
"Plant water requirements"
Goal: to form children’s ideas about the importance of water for the life and growth of plants
Progress of the experiment : one flower is selected from the bouquet, you need to leave it without water. After some time, they compare a flower left without water and flowers in a vase with water: how are they different? Why did this happen?
Conclusion: plants need water, without it they die
"Street Shadows"
Goal: to show experimentally how a shadow is formed, its dependence on the light source and the object, and their relative position. Children look at their shadows. When does the shadow appear?
(When there is a light source)
.
What is a shadow? Why does it form (This is a dark spot)
It is formed when light rays cannot pass through an object, there are much fewer light rays behind this object, so a spot appears)
Conclusion: A shadow appears in the presence of light and an object; the outlines of the object and the shadow are similar; the higher the light source, the shorter the shadow; the more transparent the object, the lighter the shadow.
"Flight of Dandelion Seeds"
Goal: find out what determines the direction of flight of dandelion seeds.
Carefully pick the head of a white dandelion and blow on it, see how the dandelion's air parachutes fly away, how far they will fly; blow harder and determine which seeds fly further.
Conclusion: the flight of dandelion seeds depends on the strength of the blow; those seeds that are on top fly further.
“Why don’t ships sink?”
Goal: determine the properties of objects.
Place metal objects into the puddle and watch them sink. Place a tin can in the water, gradually filling it with metal objects. The bank remains afloat.
Conclusion: the jar does not sink because the area of contact between the bottom of the jar and the water is greater than the area of contact of any object with the water, so individual objects placed in the water sink.
"Steam is also water"
Goal: to introduce children to some of the properties of water.
Take a mug of boiling water so the children can see the steam. Place glass over steam. Water droplets form on the glass.
Conclusion: Water turns into steam, and steam then turns into water.
"Air Movement"
Purpose: to show that although air is invisible, it can be felt.
Invite children to wave their hand in front of their face. What does it feel like? Blow into your hands. How did you feel? All these sensations are caused by air movement.
Conclusion: air is not “invisible”; its movement can be felt when fanning your face.
“Air - where does it come from?”
Goal: make sure there is air everywhere.
Slowly release the air from the balloon. If you put your hand under the stream of escaping air, you can feel it. Air is constantly moving. Air movement is wind. When inflating a balloon, we ask the children a question: what do we inflate the balloon with? (by air)
. Where does it come from? Invite the children to cover their nose and mouth with their hands and not breathe. Find out what they felt during this?
Conclusion: A person also has air with which we fill a balloon when we exhale. If a person stops breathing for a while , he experiences discomfort and begins to suffocate, which means it is impossible to live without air.
“Soil condition depending on temperature”
Goal: to identify the dependence of soil condition on weather conditions.
On a sunny day, invite the children to look at the earth, touch it with their hands, what it is like: warm (it was heated by the sun, dry (crumbles in their hands, color (light brown)
.
Water the soil with a watering can (conditional rain)
and offer to touch it again and examine it. The earth has darkened, it has become wet, and when you press on it, it sticks and gathers into lumps. The cold water made the soil as cold as cold rain.
Conclusion: Changes in weather conditions lead to changes in soil conditions.
"Flight of Feathers"
Goal: find out if all feathers are capable of flying.
Offer the children two feathers. The flight feather is for flight. Down - for keeping birds warm. Children throw feathers into the air and watch them fly.
Conclusion: A down feather stays in the air longer and is lighter than a flight feather.
"Hello, wind!"
Purpose: to show children the movement of air, its ability to be invisible.
The children approach the puddle. This is the Sea"
. Children are “winds”. They blow on the puddle. What happens? The stronger you blow, the bigger the waves. Children lower boats with sails into the water, blow, and the boats float. What happens to boats if the wind is very strong?
Conclusion: Air is invisible, but its movement can be felt and felt.
Winter
"Transparency of Ice"
Purpose: to introduce the properties of ice
Procedure the window overnight. In the morning, examine with your children how frozen objects are visible through the ice.
Conclusion: objects are visible through ice because it is transparent
"First snow"
Goal: find out how quickly the same amount of snow on your palm or mitten will melt.
Make two snowballs, put one in your mitten and hold the other in your hand. Draw a conclusion.
Conclusion: Snow in your palm will quickly turn into water from the warmth of your palm.
"What is ice"
Goal: Find out how water turns into ice.
Take two containers with the same amount of water. One container is taken outside, and the other is left in the group. The next day - in one container the water turned into ice, so it stood on the street; in the other container the water was at room temperature and no ice formed.
Conclusion: Water turns into ice at low air temperatures.
"Transparency of Ice"
Purpose: Observing ice, identifying its properties.
Invite the children to walk along the edge of the ice and find out why it crunches. (Where there is a lot of water, the ice is hard, durable, and does not break underfoot)
. To make sure that the ice is transparent, you need to place various objects in a container with water and put them outside. In the morning we examine it and come to the conclusion that all the objects that were lowered into the water are visible through the ice.
Conclusion: Objects are visible because the ice is transparent.
"Water and Snow"
Goal: through an experiment, to consolidate children’s knowledge that water can have different states.
Add ice and snow to the group and find out which melts faster. Take three containers with loose snow, compacted snow and ice.
Conclusion: Loose snow will melt first, then compacted snow, and ice will melt last.
"The protective properties of snow"
Goal: to introduce children to the properties of snow.
Place containers with the same amount of water on the surface of the snowdrift, bury them shallowly in the snow, and bury them deep in the snow. Observe the containers during the walk and draw a conclusion .
Conclusion: The deeper the container with water is, the warmer the water will be. The coldest water will be in a container standing on the surface of a snowdrift. The roots of plants under the snow and soil are warm. The more snow, the warmer the plant.
"The Melting and Freezing of Water"
Goal: to develop observation skills, the ability to compare, analyze, generalize, and establish experimentally cause-and-effect relationships.
Children (one of them wearing mittens)
suggest taking an ice cube and watching the ice melt and turn into water.
Compare who melts the ice faster - who held it in mittens or with bare hands. Find the cause of ice melting and different melting rates .
Conclusion: ice melts and turns into water upon contact with heat. Ice melts faster in bare hands, and slower in mittens, because the mittens separate the heat and cold of the ice.
"Properties of Snow"
Goal: to continue to introduce children to the properties of snow, to develop the ability to see beauty in winter nature.
Consider the snowflakes. What are they? What are they like? What is the best way to view them?
Conclusion: There are no identical snowflakes in nature.
"Make a Snowball"
Goal: to lead to an understanding of the relationship between the state of snow and air temperature (plasticity depends on humidity, and humidity depends on air temperature)
On a frosty day, invite children to make snowballs (note that this is impossible)
.
Bring this snow to the group on the same day, after a while make snowballs and it turns out that it is easy to do.
Conclusion: The snow has become sticky because its humidity has changed.
"Depth of Snow"
Goal: to establish a connection between the strength of the wind and the shape and location of the snowdrift; measure the depth of the snowdrifts before and after snowfall using a conventional yardstick.
After a snowfall, measure the depth of the snowdrifts in different places . Explain to the children that people have established the meter as a conventional measure of length, show the children and measure the depth of the fallen snow in different places .
Conclusion: The higher the snowdrift, the greater the depth.
"Ice is solid water"
Goal: continue to become familiar with the properties of water.
Bring icicles to groups. Place them in containers, each separately. Watch the icicles melt. If the icicles are of different sizes , then pay attention to which one will melt faster.
Conclusion: Ice is solid water.
"Whose traces"
Goal: broaden horizons, cultivate curiosity.
Walk, run, jump on one leg, on two legs, on toes, on heels in fresh snow. Look at the tracks of birds and animals.
Conclusion: Different people leave different traces . The tracks of birds and animals also differ from each other.
"White birch"
Goal: to continue to introduce children to the tree, which has become a symbol of Russia.
Draw the children's attention to the birch trunk, determine in which place the trunk is widest, in which place it is narrowest. The children hug the tree, try to pull the tree out, but it doesn’t work. If you stick a twig in and try to pull it out, it’s easy to do.
Conclusion: the tree stands upright and is firmly held in the ground by its roots, so the birch does not fall.
Spring
"Water and Snow"
Goal: experimentally fix various states of water.
Add snow and ice to the group. Where will the water melt faster? In one bucket there is loose snow,
in another - compacted, in the third - ice.
Conclusion: Loose snow will melt first, then the snow in the compacted bucket will melt, the ice in the last bucket.
“Dependence of the growth of grass and trees on the illumination of the habitat”
Purpose: to show the dependence of plant growth on plant illumination.
Draw the attention of children that on trees and shrubs located in well -warmed and protected from the wind places, leaves and flowers bloom earlier than on similar plants located in the shade. The same pattern is observed for grasses: in places warmed by the sun , grass appear earlier and grow faster.
Conclusion: The more sun, the faster the grass grows and the leaves bloom on the trees.
"The sun dries things out"
Purpose: to identify the ability of the sun to heat objects.
Hang the doll's clothes to dry in the area, wet the sand with water, and spill the water on the asphalt. Touch the kindergarten building on the sunny and shady sides.
Conclusion: The brighter the sun shines, the faster the laundry, sand, and asphalt dry.
"Water permeability of sand and clay"
Goal: to develop the child’s cognitive interest in the process of experimentation.
Pour water into the hole with sand. What has he become? (Wet, wet)
.
Where did the water go? (She hid between the grains of sand). Which sand is easier for a stick to penetrate? (In dry)
.
Pour water onto the ground. How is water absorbed? (Slower than in sand. Some of the water remains on the clay.)
It is easier to stick a stick into wet clay than into dry clay.
Conclusion: Sand allows water to pass through faster than clay.
“Green grasshopper on green paper. Green grasshopper on white paper"
Try to catch a grasshopper and examine it on green paper and then on white paper. Draw a conclusion.
Conclusion: The body shape and color of an insect are the insect’s protective devices.
“Finding out the reason for the emergence of worms during rain”
Goal: to establish why worms crawl to the surface when it rains.
Pour water into the box with soil, stones, sticks and earthworms. Water displaces air from the free space, worms begin to crawl to the surface of the earth.
Conclusion: Worms crawl out due to lack of oxygen in the soil.
"Insect Traces"
Goal: to continue to expand children's knowledge about the diversity of insects.
Invite the children to carefully catch a cockchafer and a large ant (after the experiment, put the insects back in place)
.
Spread a thin layer of sand onto a sheet of cardboard .
Allow the caught insects to run across the sand. Compare what traces insects leave on the sand. Conclusion: The larger the insect, the deeper the mark in the sand.
"Sand Cone"
Purpose: To demonstrate the properties of sand through experiment.
Release a handful of sand in a stream so that it falls in one place. Gradually, a cone forms at the site of the fall, growing in height and occupying an increasingly larger area at the base. If you pour sand for a long time, drifts appear in one place and then in another. The movement of sand is similar to a current.
Conclusion: Sand can move.
Summer
"Watching the Sun"
Purpose: to test the degree of heating of objects using an experiment.
Invite children to touch stones and metal objects in the morning, afternoon and evening, to find out the difference between objects .
Conclusion: Objects are hotter at noon.
"No Wind"
Take a balloon and throw it up
Conclusion: If there is no wind, the ball will fly only under the influence of the hand.
"Plant Smells"
Goal: broaden horizons, cultivate curiosity.
Rub the plucked mint leaves, onion feathers, and dill leaves with your fingers, feeling the smell.
Conclusion: Each plant smells differently.
"Water Evaporation"
Goal: to verify through experiment that the rate of water evaporation depends on the container.
Pour the same amount of water into a saucer and a transparent glass. Draw a conclusion.
Conclusion: water in a saucer evaporates faster, since the evaporating surface area of the saucer is larger than that of the glass.
"Flower"
Goal: to cultivate a kind, compassionate attitude towards nature.
At the beginning of the walk, pick one flower . At the end of the walk, see what happened to him. Compare it with the flowers in the flowerbed.
Conclusion: A plant dies without water.
"Sunny Bunny"
Goal: to show through an experiment how you can repeatedly reflect the light and image of an object, that is, see it where it should not be.
Invite the children to use the “sunny bunny” to see how it turns out. Using another mirror in the place where we saw a ray of sunlight on the wall, we get another “sunny bunny” and
Conclusion: To reflect sunlight several times, you need to have several mirrors.
Main types of experimental activities
Types of preschool experimentation differ based on the main purpose and purpose or problem that needs to be solved.
Also, experimental activity may differ in the case of the method of application, stage or characteristic features of cognitive operations:
| View | Description, nuances |
| By the nature of research activities | In this case, the activity can be illustrated, search, or used to solve everyday problems. |
| Based on the stage of implementation in educational terms | Experiments and experiments differ in the quality of the primary, final, secondary or final cycle. This feature is especially important when constructing a specific plan of tasks based on the characteristics of the preschool group. |
| By the nature of cognitive operations | In this case, the following types of research activity are distinguished: ascertaining (observation of the properties of an object or phenomenon), comparative (the process of studying an object during its interaction with another process), generalizing (the ability to determine properties or patterns between phenomena). |
| Based on application method | Here the frontal and demonstration methods are determined, the use of which differs based on certain characteristics of cognitive thinking in preschoolers. |
Experimental activities in the senior group are carried out through the systematic improvement of the child’s intellectual and practical skills.
If, during the process of observation, the preschooler was able to obtain new information and knowledge, the experimental work is identified as a cognitive system.
In addition to the main types of classes, based on the methodology, there are varieties in pedagogical practice that directly take into account the process of experimentation.
These are the following classes:
- Game experiments. Since the main activity of preschoolers is gameplay, research can be carried out in conjunction with it. These classes often feature a character from a favorite cartoon or fairy tale who provides children with important information or asks for help. Through this technique, students understand what is said better and act more responsibly.
- Modeling. An understanding of the basic properties or features of an object can be obtained through the process of constructing small copies of real-life objects or phenomena. Most often, children build volcanoes, rivers or small construction complexes. So, a teacher can invite preschoolers to model a vortex flow using pieces of paper.
An example of experimental activity in a senior group - modeling a volcanic eruption - Experiments. Conducting various studies or experiments is the basis of a child’s activities. Absolutely all skills acquired in kindergarten are taught through this teaching method. Preschoolers can perform various experiments with liquid, air, magnets or earth. All this can quickly expand your understanding of certain features of the world around you.
The formation of important skills or abilities through experimentation allows you to teach your child how to work with various devices and tools . In this case, experimental activity significantly accelerates the learning process.
It is important that the approach to research activities is exclusively comprehensive. In this case, the child can strengthen the existing basic knowledge about certain phenomena and objects. This pedagogical method is the basis of any preschool education.
Motivating start to class
Preschoolers, by their nature of thinking, have a strong desire for the process of observation or direct study of the objects and phenomena being studied. It is also especially interesting for children to carry out experiments and experiments on their own.
If the group lacks the necessary motivation for learning, the teacher must organize a lesson on experimental activities in such a way that the main incentive is the desire to acquire new knowledge or skills.
Particular attention should be paid to the fact that the practical side of learning often causes too vivid experiences in a preschooler, which can reduce the overall value and joy from the result of the study.
Based on this, it is best, before starting the lesson itself, to emphasize that the main thing in the experience is the end result, and not the implementation itself.
For such purposes, various visual materials can be used: maps, posters, illustrations or individual images. The teacher should use didactic or outdoor games that will significantly increase the motivational component.
Many experts in the field of pedagogy have proven that short physical education breaks have an effective effect on the learning process itself, which is why preschoolers learn the material better and strive to complete the task.
This is due to the release of additional energy reserves.
Safety regulations
But if you plan to conduct more complex experiments, for example, using matches, a gas burner, or chemical reagents, be sure to follow the safety rules:
- put on both yourself and your child the necessary protective equipment: gloves, mask, gown, goggles;
- Tell your child that you should never lean too close to potentially dangerous reagents or fire, and always follow this rule yourself - such precautions will help avoid burns and other injuries;
- cover the table or other work surface with material that will protect the furniture from damage.
Recording the results of experimental research activities in kindergarten
The process of recording the result when conducting experimental or research work is a particularly important component of any educational activity. Thus, the teacher needs to gradually accustom preschoolers to draw the conclusion of the study, which will significantly reduce the risk of losing the motivational principle.
Recording is especially important to ensure that the entire research process is imprinted in the child’s memory for a long time, including sensory, auditory, motor or visual.
The main recording methods often used in teaching practice:
- Graphic or visual . It is the simplest recording technique, in which the results are presented in the form of cards, diagrams, images or photographs. Despite the fact that this method is best used with younger groups, its use also shows significant effectiveness with older students. The teacher should provide the preschooler with the opportunity to choose the form of fixation that he likes best.
- Mental. In this case, various methods are used to influence the function of the child’s speech apparatus. Thus, a preschooler can tell the teacher about his own research results or point out any errors and discuss them further. This allows you to form a personal opinion and develop the quality of speech. During this process, the senior group improves the skill of generalizing and systematizing the information received about a phenomenon or object.
- Practical. It is characterized by recording the results of the study on paper, in which the child writes down or sketches the conclusion obtained. In this case, they most often resort to using drawings or simple symbols. To increase efficiency, you can keep a journal of observations, a diary of experiments, and also create a special calendar.
Experimental activities in the older group must be carried out in accordance with all the described methods of note-taking and recording, which systematically develops the child in all areas.
Consultation with parents
In order to increase the effectiveness of teaching, the teacher is recommended to hold comprehensive meetings with parents of preschoolers several times a year, which highlight their achievements, the conclusions of experiments, as well as other important aspects.
The teacher must inform each of the parents about the main tasks and goals of setting up experiments and research, which will allow them to understand the significance and importance of such development for the child. It is best to conduct similar experiments at home, which will significantly strengthen the preschooler’s knowledge.
The experimental type of activity of preschoolers of the senior group can be supported by using the following tasks:
- motivating the child through personal example, which helps increase the authority of the parent;
- manifestation of real interest in classes at a preschool educational institution, which is characterized by frequent questions from the child about exercises, acquired knowledge and methods of conducting experiments;
- Stimulating the curiosity of a preschooler by creating experiments at home.
As part of the consultation, the teacher should present to parents the most effective or popular topics for conducting home experiments and research, including outdoor activities.
The parent also needs to point out the importance of reinforcing skills through dialogue or making joint decisions, as well as by taking notes on the results obtained. In this case, the child must choose for himself exactly how he should visualize the experiment.
Many psychologists point out that conducting experimental activities in the family circle, which includes not only parents, but also all relatives and friends, is not only the acquisition of important knowledge, but also bright, positive emotions and experiences for a preschooler from senior group.
Entertaining physics
Using the example of fascinating experiments, you can introduce a school-age child to the laws of physics - it will turn out to be much more interesting than simply learning a rule from a textbook.
Be careful: some physics experiments involve fire, and it is the responsibility of an adult to light matches or a lighter.
Forks and balance
For children 10 years and older.
The experiment proves that bodies can maintain balance even in a position where it would seem impossible to maintain balance - this is due to the fact that the center of mass of bizarrely shaped bodies shifts lower than that of geometrically simple bodies.
What you will need:
- two forks;
- toothpick;
- matches;
- wooden stick.
Step-by-step instruction:
- Place the wooden stick so that it is as stable as possible - for example, you can stick the stick into an orange or other dense fruit or vegetable.
- Connect the forks to each other with the tines.
- Place a toothpick in the gap between the tines of the forks.
- Place a toothpick on a wooden stick: if done correctly, the structure will maintain balance.
- Try rotating the structure and burning part of the toothpick - the forks will continue to maintain balance.
Video for the experiment:
Experience with alcohol and oil
For children 10 years and older.
The child will see from his own experience that each liquid has a different density.
What you will need:
- tall glass tumbler;
- liquid soap;
- vegetable oil;
- water;
- alcohol (ask your parents what kind of alcohol you can take for the experiment)
- a spoon with a long handle or a glass rod;
- coloring (food coloring or any color) – optional.
Step-by-step instruction:
- Pour liquid soap (approx. 100 ml) into a glass glass.
- Add a few drops of dye to a container of water and mix with a spoon or glass rod.
- Add the colored water very slowly to the liquid soap container so that the water does not mix with it.
- Also gradually add oil. Each layer should be approximately 100 ml.
- Pour alcohol into the last layer.
Video instruction:
Experiment with a candle and a glass
For children 10 years and older.
The child will see that the fire burns oxygen, and due to the lack of air, the pressure inside the container decreases and a vacuum is formed.
What you will need:
- candle;
- flat plate;
- two glasses;
- water;
- one package of food coloring;
- syringe;
- pipette;
- matches or lighter.
Step-by-step instruction:
- Fill one glass halfway with water.
- Using a pipette, add two drops of dye to the water - you can do without dye, but with colored water the experiment will be more visual.
- Place the candle in a plate and add colored water there.
- Light a candle.
- Cover the burning candle with an empty, clean glass.
- Due to the decrease in pressure, a vacuum is formed under the glass, water from the plate is “drawn” into the glass and rises to the top, and the candle goes out due to the lack of oxygen.
Video instruction:
Balloon and fire
For children over 10 years old.
Using an example of an experiment, you can show what thermal conductivity is: explain to your child that water conducts heat faster than air, and that is why a balloon filled with water under the influence of fire will not burst immediately, but only when the water warms up enough.
What you will need:
- two balloons;
- candle;
- matches or lighter;
- a measuring cup, preferably with a spout (you can use an iron dispenser);
- water.
Step-by-step instruction:
- Using a cup with a spout, fill the balloon about halfway with water.
- Inflate a balloon filled with water.
- Inflate an empty balloon.
- Light a candle.
- Bring a ball of water to the fire for 10-15 seconds, during which time the ball will not burst.
- For comparison, bring an empty balloon to the fire - it will burst instantly.