A spring paper applique can convey many signs of the awakening of nature: the warmth of the sun's rays, melting snow, the murmuring of a stream, the appearance of thawed patches, the first snowdrops, even the frisky chirping of birds. Each child feels and depicts her arrival in his own way. The presented options for crafts and applications on a spring theme are suitable for creativity lovers of different ages. They will inspire new ideas and add a spring mood.
- How to make a spring applique: general recommendations
- Craft options with step-by-step instructions depending on the age of the children
- Sun applique made from palms for the little ones
- Spring tree applique made of colored paper and cardboard for kids
- Applications on paper plates for creative activities in kindergarten (senior and preparatory groups)
- Applications of spring bouquets made of colored paper
- Tulips in a vase
- Daffodils
- Dandelions
- Spring landscapes for elementary school students
- Templates
- Volume craft: spring bouquet
- Postcards with the first spring flowers
- Video: master classes from the creators of spring applications
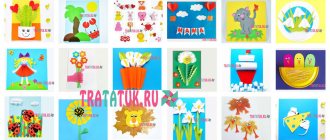
- Photo examples of ready-made children's applications and crafts
How to make a spring applique: general recommendations
Gone are the days when the word applique meant gluing (overlaying) traditional materials onto a base: cardboard, colored paper, fabric. Now for these purposes they use: rhinestones, beads, buttons, cotton pads, leftover yarn. Often: cereals, bark, birch bark, twigs, leaves, plant seeds, etc. Due to what the picture acquires volume. When creating spring-themed applications, many of them will find a place. For example: cotton pads imitate snow, a damaged CD disc imitates the sun, and buckwheat imitates thawed patches. A non-standard approach to design adds individuality to crafts.
In addition to the above, you will need:
- Base material: disposable paper plate, cardboard, empty box, toilet paper roll (duct tape).
- Glue.
- Scissors.
- Pencil, felt-tip pens (markers).
- White and colored paper.
- Stapler.
Gifts for parents
By the way, it is not at all necessary to decorate the group with these crafts. The “Spring” applique in the second junior group can also be a wonderful gift for parents, for example, for a mother on March 8th. You just need to glue the sun, flowers, grass on which bunnies and squirrels bask, and leaves with butterflies and insects grow on the trees.
Parents always appreciate gifts from their children. Moreover, they are made by yourself! Therefore, do not forget about the spring holidays! Adults should see what their little ones have been taught and how hard they try!
Craft options with step-by-step instructions depending on the age of the children
Sun applique made from palms for the little ones
Step 1. Children place their own palms on sheets of colored paper in yellow, orange and blue. Outline them with a simple pencil. They cut it out.
Step 2. Ray-shaped palms are placed in a circle on the base.
Step 3. Draw a circle and cut it out.
Step 4. Glue all the parts to the canvas. Use a marker to draw eyes and a smile.
Spring tree applique made of colored paper and cardboard for kids
Step 1. Cut out 1 large oval from thick multi-colored cardboard, and 1 smaller circle from colored paper. Made of brown cardboard - a stripe-barrel.
Step 2. Glue a paper circle onto the large oval, then the trunk. A simple spring application for the kindergarten is ready.
If you replace the top crown blank with a cotton pad, the tree will look as if it was covered with snow.
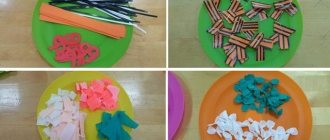
Applications on paper plates for creative activities in kindergarten (senior and preparatory groups)
Spring primroses are one of children's favorite themes. Despite their age, children know many interesting facts about them. They talk about the characteristics of a particular species. They are having fun working on applique snowdrops on a paper plate.
Step 1. Place a paper plate on a sheet of blue paper, outline the bottom, and cut it out. Glue the resulting circle onto the inside of the plate.
Step 2. Cut out blanks from white paper that are shaped like bells with rounded petals (6 pieces). Bend them along the midline. Glue 2 parts together. This way you get 3 identical elements.
Step 3. Cut out pointed leaves from green paper. Made of white felt - a figure with smooth curves, similar to a snowdrift.
Step 4. Leaves and stems are glued to the center of the blue circle, and formed snowdrop flowers are glued to them. An improvised snowdrift is attached at the bottom.
An unusual, round panel can be given to friends, relatives or to decorate their room.
Using a similar technique, paper plates are decorated with lilacs, daffodils, tulips, and bird figures.
Applications of spring bouquets made of colored paper
Tulips in a vase
For making three-dimensional flowers, only double-sided colored paper is suitable. Tulip heads are cut out of it. To form a “book”, 6-10 identical elements are prepared. Using a stapler, they are fastened together (along the midline). Bend, straighten. It turns out to be a mini-book. As many flowers as they plan to make, so many volumetric preparations will be required.
Stems and leaves are cut out of green paper. From paper of any other color - a vase. Everything is glued onto the base.
Even more instructions on how to make such a paper flower are shown here.
Daffodils
Making a bouquet of daffodils is very simple. When forming each flower, it is enough to follow the order of the scheme:
Flowers are good in a vase and as wall arrangements.
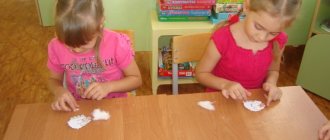
Dandelions
Dandelions are little suns. The easiest way to make them is from paper napkins, which are available in every home. Yellow and white colors are suitable. Napkins folded into four are fastened together with a stapler, as shown in the figure:
Cut out a circle. Shallow cuts are made around the circumference. Straighten, adding volume. For stems and leaves, regular green double-sided paper will do.
Even more instructions on how to make such a paper flower are shown here.
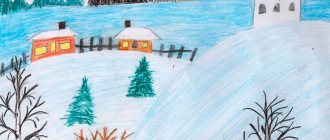
Night in winter
A wide variety of materials are used for winter nights. Therefore, this application is suitable for schoolchildren. For better results, just watch the video and repeat the finished master class. The result will be a nice decoration for your apartment.
At the initial stage, you should decide what will be depicted in the picture. On a winter night there is always a birch tree with a house and a fence, and everything is covered with snow. The desired idea should be sketched on cardboard.
The next step is to prepare a mass of papier-mâché. To do this, napkins are manually crushed and filled with hot water and finally beaten with a blender. Excess moisture is removed by normal squeezing.
PVA glue is added to the finished material until a plastic consistency is formed. The mass is thoroughly mixed and oil is added.
Using plasticine, snowdrifts, logs and branches are formed. The entire drawing is processed with the finished mass. The top of the product is coated with PVA glue. The work must dry well.
The final stage will be painting with gouache. Blue or black would be perfect for it. For snow, you should choose white, and light blue should be used as a shadow. Draw black stripes on white birch. For the house and fence you should choose the desired shade of brown.
Spring landscapes for elementary school students
To create an applique landscape, first make a sketch of the future painting on a blank sheet of paper, or select a ready-made template, which is first printed on a printer. Gradually fill the drawing with prepared materials: glue cotton wool, twigs, cereals, etc. Something that will help convey the effect of the riot of spring nature.
Looking at such works, you can’t help but feel the scent of snowdrops. You can hear the ringing of spring drops, the cry of a crane wedge.
Winter house
The white sheet is torn into small pieces - this will be snow. This activity is great for developing fingers. Ready-made house templates are printed and cut out. The house is pasted onto the main background, the roof is decorated with cotton wool. Nearby, snowdrifts are created with cotton material.
And at the final stage it is decorated with a previously prepared paper snowball.
Templates
Volume craft: spring bouquet
Step 1. Cover the tape sleeve with light green paper.
Step 2. Cut out stems and leaves of primroses from dark green paper, and flowers from white and yellow paper.
Step 3. All elements are glued to the sleeve. Decorate with braid or narrow ribbon.
You can add fluttering moths, bees, bumblebees, etc. If you put a small heavy object inside, the decorated sleeve will become a good pencil holder.
This craft is a great gift idea for any occasion.
Bullfinch
Draw the details of the birds on a separate sheet, cut them out and assemble them into the overall picture. For the background, blue paper is selected or a regular sheet is painted blue. Snow is formed using glue and cotton wool.
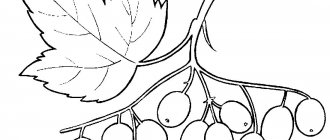
A bird branch is cut out of brown paper and glued to the main background. There is a bullfinch on a branch. Rowan is created from red balls of paper.
Postcards with the first spring flowers
There is always room for imagination when designing postcards. Suitable for decoration: lace, openwork paper napkins, confetti, ready-made scrapbooking elements, etc. You just need to select the cardboard of the desired size and color, bend it in half and decorate the front part as you wish.
Postcards made from quilling elements turn out incredibly beautiful. Each piece is neatly rolled from a narrow strip of double-sided colored paper and has its own name. It comes in both tight and loose forms. Later, elements of different types are glued to the card, forming a design.
Panel with flowers made using the quilling technique.Photo examples of ready-made children's applications and crafts
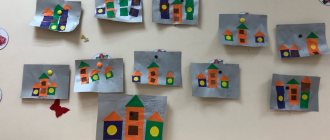
Work of middle group children.
Exhibition works of children of the senior group.
Willow in a vase.
Willow branches.
For children, spring applications made from colored paper and other materials are an opportunity to express their vision of nature. Adults should respect their views and encourage creativity.
To teach your child about the seasons of the year, you will probably need instructions and guides for creating crafts in the form of “seasons”.
Winter ball
The glass ball is a popular souvenir. Using a minimal set of decorative paper, cotton wool and glue, you can create a paper version. Inside the winter ball, using colored paper, it is easy to arrange fairy-tale scenes: houses, Christmas trees, a palace or a snowy landscape.
Note!
New Year's decorations for windows 2022: 150 photos of beautiful templates for do-it-yourself window decorations for the New Year