Types of appliqués on clothes
Before starting work, you need to choose one of the types of appliqué on clothes and draw or select an image with your own hands. The beauty and originality of the sewn picture will depend on these simple steps.
All types of fabric appliques are quite easy to make. With their help, you can decorate outdated things and give them another chance to serve people. Among them the following stand out:
- Traditional . For this type of appliqué, you can use simple materials, for example, scraps of different fabrics. They are sewn to clothes using a sewing machine or by hand, but before this some steps are performed: individual parts of the image are pinned to the base, and then one by one they are sewn to the selected clothing. In this case, a neat invisible seam is used, and the edges of the workpieces are tucked.
- Two-layer . This type involves applying an image in the form of abstraction or various geometric shapes. In the process of working on such an application, two identical parts are cut out and fastened together. Only after this are they transferred to the wardrobe item.
- Negotiable . This method is effective only when using non-flowing fabrics. An image is selected for work and transferred to a napkin. A template is cut out of it, according to which the seam is applied on the wrong side of the garment.
- Glued . This type of applique is ideal for those people who hate sewing. To make it, a special material is used, which melts when heated with an iron and reliably glues the picture to clothing.
- Volumetric . This technique of decorating clothes is the most popular. It allows you to get not only beautiful, but also three-dimensional images. This effect is achieved by placing material (sintepon, down) under each individual element of the applique.
Applique autumn forest from other materials
You can use many materials to create a beautiful and unusual applique. It all depends on the desire and capabilities of the master.
Application from plasticine
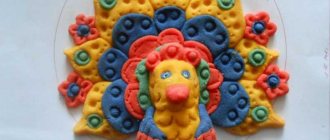
Since plasticine is quite heavy, applique requires a solid base, such as cardboard or fiberboard. You can use a disposable plate. You need the softest plasticine so that it spreads easily.
For the background, roll out two green sausages and one light brown one, then assemble them into one sausage without kneading. Tear off pieces and spread where the soil should be.
There is no need to mix the colors into one; let the effect of chaotic spots remain, as if part of the grass has already dried out. Smear blue across the sky, occasionally adding white.
Sculpt or paint with gouache. Roll many 5mm balls in the color of autumn foliage. Each ball must be attached to the base and squeezed to form a flat cake.
Use these flatbreads to fill the space of the tree crown. You can make mushrooms from white and brown plasticine and place them between the trees.
Cereal application
For the “Autumn Forest” applique you need buckwheat, millet, wheat and other cereals. The paper should be thick enough, since you will have to use a lot of PVA glue, and the thin paper will get wet.
It is better to paint the background and contours of the trunks. Apply glue to the tree crowns and sprinkle with cereal. You can use a separate type of grain for each tree or mix all grains together. The work should lie until the glue dries completely.
A craft with seeds is made in a similar way. Pumpkin seeds are painted with gouache in the colors of the autumn palette, and then glued to the base.
To develop children's imagination, invite your child to choose his own materials for crafts. For example, paper can be replaced with fabric or felt. Let your child get acquainted with different textures and materials.
It is in early childhood that the child’s imagination develops most actively. Don't miss this moment and grow a creative person.
Applique autumn forest made of colored paper
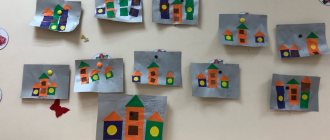
Crafts on this topic can be made even with children in the younger group of kindergarten. At this age, children already know the features of the seasons and can create the correct color palette for the appliqué.
To practice fine motor skills, it is best to use torn paper technology. Choose soft colored paper, as tearing thick paper can cause your child to cut himself.
First make the background. Cover the bottom half of the sheet with green paper with a torn edge. The green should not be too bright as it is an autumn grass. You can add accents by drawing individual blades of grass. Stick blue clouds on the sky.
Cut out tree trunks from brown paper and arrange these objects on the background sheet. There is no need to require the same arrangement; let the children show their imagination and make original compositions. Glue the trunks.
Take colored paper in autumn shades (red, orange, yellow, light brown) and tear it into pieces about 1x1cm. Then randomly glue them onto the top of the trunks, as well as onto the ground, like fallen leaves.
Children from the preparatory group can make a more complex application “Hedgehog in the autumn forest” in this way. From gray paper, cut out the shape of a hedgehog (an oval with a nose), and use a black felt-tip pen to draw needles, eyes and a nose for the hedgehog. Cut out apples from red paper and stick them on the back of the hedgehog.
Forest applique of autumn leaves
Working with natural material is quite complicated; it requires preparation and careful handling of fragile leaves. Typically, an application of leaves on the theme “Autumn Forest” is done in 2nd grade.
The material for this craft must be prepared in advance by drying the leaves. To prevent the composition from looking sad, find leaves that retain a bright color after drying. For example, red wild grape leaves or yellow linden leaves.
The collected raw materials need to be laid out with newspapers and weighed down with something heavy, leaving in this form for three to four days. If the material is needed urgently, it can be quickly dried with an iron. To do this, the sheet is placed between two sheets of paper and ironed for ten minutes.
Cut out or draw a tree trunk from paper. Glue the leaves using PVA glue.
Older children can cut the leaves into small pieces and make a craft using the collage technique.
