07.08.2019
Modeling from plasticine step by step is the best educational technique for preschool children (from 2-3 to 7 years old)! Children love modeling with clay because they can create anything!
Most of all, children love to sculpt: animals, people, cars, cities. Nowadays it is very popular to sculpt Smeshariki, unicorns, cats, hedgehogs and dragons. Sculpting is very useful. Step-by-step modeling develops creative thinking, imagination, fine motor skills, speech, and logical thinking several times faster.
Children from 3 to 7 years old are especially passionate about modeling. Therefore, we have selected interesting craft ideas that are very popular among children. Stock up on plasticine of different colors to make it even more interesting for your child!
How to make a caterpillar and a bee step by step
How to make a ladybug
Snail step by step for children (spiral modeling)
How to make a teddy bear
An interesting idea for sculpting: a bird in a nest
We sculpt flowers and compositions step by step
How to make a car from plasticine
Bicycle step by step
Modeling should be interesting for a child. Therefore, choose the most interesting ideas for modeling. Let the child choose what he will sculpt. When the baby is engaged, discomfort, excitement and anxiety go away. When a child creates a favorite cartoon animal, be it a bunny or a kitten, a giraffe or a unicorn, he feels good and proud of his achievements. Therefore, mommies, do not forget to praise your baby for any achievement!
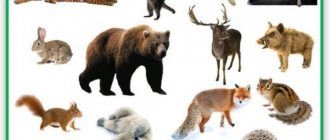
Funny animals from the zoo: monkey, snake, sloth
You can create your own zoo from ordinary plasticine. A variety of forest, wild and domestic animals will happily settle in it. Modeling will bring a lot of fun, and the made figures will be excellent toys for kids.
How to make a monkey: step-by-step instructions
An unusual monkey is made from brown and yellow plasticine mass.
It is molded according to the following scheme:
- Prepare a part for the head from a brown mass and a couple of small yellow elements to form the face.
- Attach yellow cakes to the head, placing them as closely as possible to each other.
- Draw eyes, mouth, nose and wrinkles in a stack.
- Make ears.
- Make a body in the shape of an egg and stick a yellow cake to it.
- Using a match, connect the body to the head.
- Make four long tubes from the brown mass.
- Attach yellow circles to each of the tubes and make cuts on them in a stack.
- Attach the monkey's limbs to the main part.
Monkeys come in different colors
Finally, attach a long tail to the animal.
Snake: sculpting in stages
A very realistic snake is made according to the following instructions:
- Roll the plasticine mass into a sausage of the required length.
- Select the head, giving more volume in this place.
- Draw the eyes and nostrils.
- Make slits along the entire back in a stack - you get scales.
- Attach a long red tongue to the front of the head.
- Bend the snake's body.
You can apply an additional pattern to the snake's body
Tip: to make the snake's body flexible, you need to lay wire inside.
How to make a sloth from plasticine
Sculpting a sloth comes down to the following steps:
- Form the head and body of the animal.
- Sculpt the paws and claws.
- For the future face and tummy, roll into balls and flatten them into flat cakes.
- Make eyebrows in the shape of droplets.
- Make eyes and a nose from small pieces.
- Assemble all the design details together.
- Draw a mouth in a stack.
Mental and personal development while sculpting
When doing sculpting step by step, do it in a fun and playful way. Create a story for the beast you create, and then act it out. Use ideas from fairy tales and cartoons, and act out stories from everyday life.
What do you need for a modeling lesson?
You need high-quality plasticine. For kids, choose very soft plasticine. If it is difficult for the baby to sculpt awkwardly, then his interest in such an activity will quickly pass.
Tools for modeling from plasticine:
- modeling board;
- stacks;
- rolling pins, including those with patterns;
- molds for modeling.
How to teach children to sculpt?
Many parents think that children will begin to sculpt and develop on their own. This is wrong. You will need to be shown how to do it, go through basic lessons. In the future, the child will come up with his own characters, but initially show him how to do it.
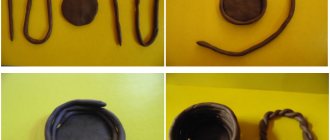
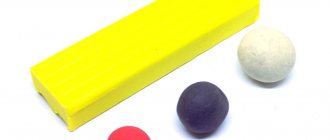
Learn how to sculpt basic shapes:
- ball;
- egg (ellipsoid);
- hemisphere;
- cake;
- sausage;
- cylinder;
- cone;
- brick;
- tourniquet;
- spiral.
After this, mold the figures step by step. Choose an interesting animal and make it together. Help the child, praise him!
Modeling in this age group usually takes no more than 20 minutes.
GCD move:
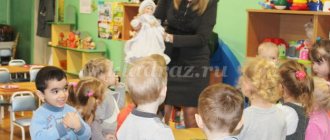
Educator: Guys! Do you know who came to visit us today?
The teacher pulls out a big hedgehog
. The children gather in the middle of the room.
The children answer.
Educator: Hedgehog
!
Children looking at a hedgehog
.
Educator: Guys, hedgehog
came to us from the forest. He lives in the forest.
Educator: He is friends with bears, bunnies, and squirrels. And he is afraid of the wolf and the fox. When he sees danger, the hedgehog curls up into a prickly ball and no one can touch him.
Educator: What does he like to eat? The children answer.
Educator: Hedgehog loves mushrooms
, apples, pears and milk
Educator: At home, the hedgehog drinks milk. In winter, the hedgehog sleeps in his hole. That is, in your house.
Educator: Guys, you can’t offend animals. We must love them and treat them with reverence. Look how sad the hedgehog is
.
Let's cheer him up. Children's answers The teacher reads a poem, and the children repeat after him
The hedgehog stomped along the path
And he carried mushrooms on his back (walking in place)
The hedgehog stomped slowly
Quietly the leaves rustle
(we rustle with our palms)
And a bunny gallops towards us,
Long-eared one, jump around.
Something clever in the garden
I got hold of a sideways carrot (jumping in place)
.
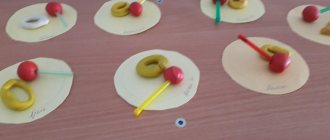
Educator: Guys, I invite you to the table. Children sit at tables where there are blanks with the image of a hedgehog without needles
. –
Educator: These are the pictures with the image of a hedgehog lying in front of you
.
Consider the hedgehog. Oh! He's kind of weird! The hedgehog is missing something
. Children's answers.
Educator: That's right, there are no needles! Let's quickly give the hedgehog some needles
!
Like this! The teacher shows how to make hedgehog needles. The teacher invites the children to make plasticine balls for needles: pinch off small pieces of plasticine with the thumb and forefinger of their right hand and roll them into balls. Children roll 2-4 balls each (the rest of the balls are prepared in advance)
.
Then invite the children to place a plasticine ball over the outline of the hedgehog's
, press it with their finger and pull their finger down.
Educator: It turned out to be a needle! Let's give the hedgehog a lot of needles
!
on a hedgehog
. Children and teacher make needles. The teacher helps those who are not doing well. When the work is ready, everyone admires their pictures and the pictures of their comrades.
Educator: Now I suggest you turn into hedgehogs. The teacher shows the kids how to draw a hedgehog
, clasping your fingers together.
The teacher reads a poem, and while reading, the children repeat
the teacher’s movements.
The little hedgehog is frozen
(press your fingers -
the hedgehog removes the needles )
And curled up into a ball.
The sun warmed the hedgehog
(Straighten your fingers -
the hedgehog showed the spines )
The hedgehog turned around
.
The teacher praises the children for their work and says that we will place our hedgehogs at the exhibition so that they will please us and their parents.
Educator: And now it’s time to say goodbye to our hedgehog
, he goes back to his forest.
Children say goodbye to the hedgehog
.
Educator: Guys, we helped make the hedgehog
?
Did you help the hedgehog?
How did we help him?
Publications on the topic:
Notes on sculpting in the second junior group “Who visited us in our garden?” Integration of educational areas: “Cognition”, “Reading fiction”, “Artistic creativity”, “Communication”, “Socialization”.
Abstract of GCD in the second junior group for modeling "Owl" Educational area: Artistic and aesthetic development Integration of educational areas: Artistic, aesthetic, cognitive,.
Abstract of educational activities for modeling in the second junior group “Multi-colored balls for a hedgehog” Integration of educational areas: “Cognitive development”, “Artistic and aesthetic development”. Objectives: 1. Educational: - teach.
Tasks. Develop plot-game concept and imagination. Make chicken figures from individual lumps. Using pulling and pinching techniques.
Program content: Learn to convey the shape of an object (sparrow, divide plasticine into two unequal parts, learn to fasten two parts in order to...
Notes on object modeling in the second junior group “Gift for Dad” Purpose: to make a gift for Dad (tie). Objectives: Educational: Reinforce modeling techniques: develop the ability to separate a piece of plasticine.
Plasticine is a magical material with which you can make incredibly beautiful figures. These can be fairy-tale and cartoon characters, buildings and plants. Animals made from plasticine deserve special attention. For children, modeling will be an incredibly exciting and educational activity, from which it is impossible to escape for a minute.
Plasticine is a magical material with which you can make incredibly beautiful figures.
Sea inhabitants made from plasticine turn out to be extraordinarily beautiful.
Even a child can make such crafts with his own hands. Making a crab requires just a little attention and patience.
Sea inhabitants made from plasticine turn out to be extraordinarily beautiful
Sequencing:
- Make blanks for the body, a pair of claws and eight legs.
- The largest ball from which the body will be made needs to be pressed down a little.
- To make the paws, make sticks from eight blanks.
- Attach four tabs on one side and four more on the other.
- Form claws from the two remaining blanks and attach them to the crab's front legs.
- Place small circles of a lighter material on the body.
- Make eyes.
Birds
Sculpting birds is quite difficult, but you can try to make a white swan:
- A body with an elongated tail is sculpted from an oval.
- Attached to the sides are two flat, smaller ovals, pointed at one end - wings.
- The long piece is used to make a curved neck and a larger head.
- Eyes are made on the head, the beak is made from a small piece of red color.
If you take black plasticine, you will get a swan of a rare shade.
Notes on educational activities for modeling "Penguins in the North" in the senior group.
Summary of a modeling lesson in the senior group “Penguins in the North.”
Target
: develop in children the ability to convey the figure of a penguin in sculpting, highlighting some characteristic features, use various sculpting techniques - rolling, unrolling, stretching, smoothing, etc.
Program content:
— Continue to teach children to sculpt from plasticine, using previously learned techniques;
— Develop the ability to convey the proportional relationship of parts;
— Strengthen the ability to connect parts by pressing them together;
— Continue to teach how to bring the product to match the intended image, giving it expressiveness;
— Learn to create a collective scene from crafts made;
- Continue to teach to understand and analyze the content of the poem.
Demo material:
Picture with penguins.
Progress of the lesson:
Penguin riddle
In Antarctica, among the ice, he walks around in a tailcoat. He has wings, but doesn’t fly, He dives dashingly into the hole, A very important gentleman Minces here... (penguin)
Reading the poem "Penguin"
At the South Pole, among many ice floes, lives a clumsy feathered penguin. The bird is indeed very funny: It swims quickly, but does not fly. The whole penguin is a huge flock of penguins waddling, wings spread, across the ice. No nests are made - there are no trees on the ice floes! How do penguins hatch babies? It’s not easy to keep children at the pole - the frost there is about ninety degrees! They managed it! Penguin dads carry the egg and chick on top of their paws, hiding them from the cold under folds of fat. There's enough heat there for his “passenger”!
Making a "penguin"
Educator: Penguins are no taller than you. The back and head of penguins are black, and the chest and belly are white. The eyes help penguins see fish underwater, and the beak helps them grab this fish. Although penguins cannot fly, they do have small wings. The penguin needs wings not for flight, but for swimming. The penguin also has a tail in the lower part of its back. Penguins have webbed feet. Why do you think a penguin needs such flipper-like paws? (Children's answers).
What birds do you know that have the same paws? (Children's answers).
In geese and ducks. Webbed feet help the penguin to row and swim quickly when swimming. On land, penguins are clumsy and clumsy, but in water they are fast and agile - because otherwise you won’t be able to catch a fish.
Teacher: (shows the children the ice floe on which the penguin is sitting) - Guys, I have a penguin, he sits on the ice floe and is very bored. Why do you think? (children's answers)
Indeed, he is completely alone and he really wants to have friends.
Let's help the penguin find friends? (Yes)
I invite you to go to the tables and make him the same penguins.
Pug in a sweater
What you will need for sculpting:
- plasticine;
- mat or board;
- matches and toothpicks;
- plastic knife or stack.
How to make a pug figurine from plasticine
Make a ball-head from light plasticine (yellow or beige). And by mixing this color with black you will get material for the future ears and muzzle of the dog.
Use the round side of the stack or your finger to mark a place for the muzzle. Make a small dark semicircle and two drop-shaped ears.
Connect the muzzle and ears to the head, carefully pressing the parts.
Use the round end of a match to make indentations for the eyes. Make a neat oval nose from black plasticine and press it to the muzzle. Use a stack to highlight the mouth.
Make round eyes and insert them into place. Add a brown spot and a black center to the center. Use a match to highlight the nostrils on the nose. Stick on the pink tongue.
Use red to make a roller for clothes. From one edge add a semicircle of the main light color. Make thin “pancakes” from white and green plasticine and cut out triangles with a stack or small scissors. Roll a flagellum from white plasticine and press it along the edge of the sweater. Lay out the triangle pattern on the sweater.
Add four legs and a tail to the body, as in the illustration.
Insert a piece of toothpick at the junction of the head and body and connect the parts. Add an elegant bow tie.
Fashionable pug is ready!
With such a dude you can go on holiday, for a walk or to a restaurant! This is how you can make a wonderful pet from multi-colored plasticine, with a little diligence! All you have to do is come up with a nickname for this dog and you can start the game.
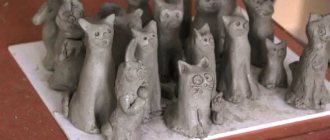
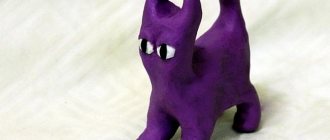
Master class on making a cat
A cat is an animal that walks on its own, which does not prevent such a freedom-loving creature from being a favorite of most children. Invite your child to make a cat out of plasticine; he will definitely enjoy this activity.
Performance:
- Warm up the plasticine (of different selected colors) in your hands until it becomes soft.
- Roll out the oval body and use a stack to divide the ends of the oval into 4 legs, as shown in the picture.
- Bend the resulting figure so that it rests on its feet.
- Roll a ball-face, from a different color roll out a round protrusion for the face, a small ball-nose and 2 balls-eyes, also of a different color, triangles-ears and 6 thin sausages-whiskers. Connect all the parts of the head one by one.
- Connect the head and body, draw a mouth on the muzzle using a stack.
- Roll up a sausage-like tail, thicker at the end, and attach it to the cat’s body.
- Make 5 sausage strips and attach 3 to the back of the cat and 2 to the tail.
- The cat is ready!
Sea turtle
We will show you in detail with photos how to make a positive turtle.
Related article: How to grow Aglaonema flower
Before starting work, the plasticine base is softened. Let's make two circles, one from darker plasticine, the other from light green.
We flatten the dark circle and connect it with the brown blank, making small stripes, as in the photo:
We also make the shell embossed.
Small light green balls are prepared for the head and limbs.
They are given a slightly flattened shape and are now ready to be bolted into place. On the limbs themselves we draw the fingers. We attach eyes to the head and give our turtle a charming smile.
Plasticine unicorn
The pattern of the unicorn, deer and giraffe is the same as in the case of the lion. The figurine is seated, so the parts are attached to the back, and the remaining parts are attached to the front, almost on the colored “collar”.
As an option, a unicorn can wear a decoration in the form of a motley mane, which is obtained by mixing several shades. Knead several pieces for five minutes, no more, otherwise you will get a dirty color instead of clear multi-colored stripes.
Making an octopus: step-by-step instructions
The octopus is one of the most unusual inhabitants of the seas
. Naturally, the process of sculpting it has its own characteristics, but it does not cause any difficulties. Following step-by-step instructions, even a small child can cope with this task.
The octopus is one of the most unusual inhabitants of the seas
Progress:
- Make a small circle and eight long sausages - you get a head and paws.
- Place bright circles on each paw.
- Connect the head with the paws.
- Bend each limb.
- Use a toothpick to squeeze out the mouth.
- Blind the eyes and glue them to the head.
Place a small object into the tentacles.
Crafts from photography
If you have a photo of a craft made by a specific animal, for example, from a book or the Internet, you can try to make the figurine you like with your child. It could be a panda - a cute two-colored bear. The panda has many elements:
- A white head with a small white muzzle and a black nose, black circles around the eyes, white eyes and black pupils, and black round flat ears on top.
- One elongated part is made from black plasticine - the upper part of the body plus two legs on the sides.
- An oval white part is attached below - this is the lower part of the body.
- Finally, two small black balls are attached to the lower white part of the body - the second pair of paws.
This is a complex figure due to the abundance of elements, but the result will please you.
Choosing plasticine
When purchasing plasticine, you need to carefully read the instructions from the manufacturer and make sure that it is appropriate for the child’s age and suitable for modeling purposes.
Classic hard plasticine is a durable material, crafts made from which are durable, but this property can also be a disadvantage, since very young children may not be able to handle it.
Light plasticine is a soft, bright material with natural dyes, easy to clean, suitable for children of any age;
The modeling compound is a very practical and easy-to-use material, it doesn’t stick, it retains its plasticity for 12 hours; the downside is the high price.
Ball plasticine is an excellent material for small children’s hands; it is often used for additional decoration of ready-made figures; it is fragile, but due to its characteristics, the child must be under the constant supervision of adults while sculpting.
Floating plasticine will give children a lot of pleasure, as it is soft, does not stain hands and clothes, and figures made from it float on the water.
Modeling paste - resembles clay, ideal for creating solid figures, since parts made from paste do not stick to each other, suitable for painting.
Thus, for playing with children, it is better to take light plasticine in bright colors, as well as hard material to create more durable and long-lasting crafts. You should not choose sets with strong flavors and artificial colors - they can cause allergies.
Figures and crafts made of light plasticine
To sculpt figures from light plasticine, you can take the most popular brands. For example, lightweight Chaka-Zak plasticine, made from safe raw materials and polymer binders:
Vibrant colors, a pleasant tactile feel, and easy-to-shape details—everything you need for fun sculpting.
The variety of figures and themes will allow every little sculptor to create a masterpiece. Girls will be interested in making small cakes, kittens, birds, and kawaii figures (cute in Japanese). We hope these photos will inspire you to new interesting ideas:
With the boys we sculpt dinosaurs, cars, and make slimes.
Mouse step by step
Here's how quickly and easily you can make a cute mouse.
For the body we form a white ball, then roll it into a short roller and form a pear. For the muzzle we prepare:
- Three small pink balls and two very small black balls. These will be the eyes and ears.
- Roll out two pink balls into flat cakes (ears), and use the remaining mass to make the nose in the form of a small short roll.
- We attach the nose to the narrow part of the pear and form the muzzle of the mouse.
For paws and tail:
- Make three pink pea-sized balls.
- We make a roller out of one ball, and form the remaining balls into two thicker rollers. These will be the paws.
- From the first roller we make a tail, twisting it a little.
- We attach the tail to the body and place the mouse on its paws.
This is how we make simple, funny figures. Believe me, a real fairy-tale world will open before you, amazing and creative. My daughter and I, having acquired skills in working with plasticine, tried to apply them in working with dough. Today, instead of it, special dough is often used for modeling. If a child accidentally swallows it or decides to eat it, it’s okay, it’s completely edible. Of course, the dough is more difficult to roll; it is not so elastic. However, we came up with another useful thing. I decided to bake those animals from the dough for my daughter’s birthday that we have already learned how to make well (you need to take fresh dough so that it does not rise and spread). Added food coloring for brightness. It turned out well. We decorated salads and main courses with salty dough animals, and a holiday pie with sweet ones. So get creative and experiment. Learn something new in your life, and it will become much more interesting and colorful!
Cartoon characters
Peppa Pig is a popular pig from the children's cartoon and a good exercise for developing motor skills:
- Two balls are molded - pink and red.
- The pink ball is given the shape of a head with an elongated snout, and the red one should make a dress with a hem, the resulting parts are connected.
- Two thin arms, two thicker legs and a curled tail are sculpted from pink plasticine.
- Two pink ears are attached to the head, white eyes with black pupils, and the snout, cheeks and mouth are made of dark pink so that they stand out.
Making your own favorite cartoon character with so many small details is a real achievement and creative success for a child.