Middle group. Junior preschool age. Children 4 - 5 years old
Notes on modeling "My funny ringing ball" for children of the middle group
Greetings to all. Dear readers, I bring to your attention a summary of direct educational activities for preschool children (4-5 years old)
"My funny ringing ball." Goal: to teach children to sculpt round objects from plasticine using circular movements of their palms...
Summary of an open lesson on sculpting in the middle group “Magic Forest” Purpose: To systematize children’s knowledge about trees and animals, to consolidate sculpting . Objectives: 1. Expand children’s understanding of the flora and fauna. 2.To consolidate ideas about clay. 3.Repeat sculpting . 4. Develop the ability to competently and logically - to build coherently...
Tasks.
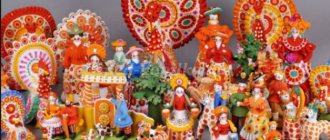
To clarify children’s understanding of the specifics of the Dymkovo toy: what, how, by whom it was made; how it is decorated (decorated); what kind of character (cheerful, festive). Introduce children to the variety of toys and the specifics of decor - characteristic elements and color combinations. To create conditions for children’s creativity based on the Dymkovo toy. Form generalized methods of creating images (sculpting animal figures based on a cylinder).
Attention:
2-3 days should pass between modeling and drawing classes so that the sculpted toys have time to dry.
Preliminary work.
Examination of Dymkovo toys.
Conversation about folk crafts.
Decorative drawing in the album for children's creativity “Dymkovo Toys”.
Materials, tools,
equipment.
Clay, rotary disks, planks or oilcloths, stacks, paper and cloth napkins. The teacher has a Dymkovo toy (horse), a diagram showing the method of modeling, and an unfinished model for a partial demonstration of fine art techniques.
Contents of the lesson.
The teacher reads the story to the children by K.D. Ushinsky “Horse”:
The horse snores, curls its ears, moves its eyes, gnaws at the bit, bends its neck like a swan, and digs the ground with its hoof. The mane is in a wave around the neck, the tail is a pipe at the back, there are bangs between the ears, and a brush on the legs; the wool shines silver. There’s a bit in the mouth, a saddle on the back, golden stirrups, steel harnesses.
- Sit down and let's go! To distant lands, to the thirtieth kingdom! The horse runs, the ground trembles, foam comes out of the mouth, steam comes out of the nostrils.
- Now you and I will sculpt horses so that they are just as beautiful: “the neck is like a bent of swans, the tail is like a pipe, the mane is a wave along the neck, there are bangs between the ears...”
The teacher invites the children to once again look at the Dymkovo toy - a horse (or its image) - and determine the best way to make it. He clarifies the children’s answers and advises them to try to make a horse the way folk craftsmen do.
- First you need to create the initial shape - a cylinder (roll out with straight movements of your palms). We cut one end of the roller (cylinder) about a third of the length with a stack, pull off the resulting parts and make a neck with a head from one part, and legs from the other. We lift the neck up and bend it a little to form a head. We make the legs from another part: we cut the stack into two equal parts, each of which is pulled back and rounded. We slightly extend the other end of the roller (cylinder) so that the hind legs are the same length as the front ones (see picture). Based on this shape, you can create any figurine: a horse, a ram, a goat, a cow, a deer, etc.
The teacher invites the children to sculpt the figurine so that it becomes a beautiful horse: “Children, let’s decorate the sculpted figurine so that it becomes a beautiful horse. We look at it from all sides and smooth it out. We slightly pull back the mane and tail and pinch it.” You can complicate the details by sculpting them separately: roll up flagella or rollers and weave a tail and mane from them.
The teacher shows the basic methods of modeling and encourages children to create independently. As the lesson progresses, he helps children with advice, individual demonstrations, and guiding questions.
All fashioned crafts are combined into a composition. The teacher informs that at the next lesson the children will continue to work - they will decorate the sculpted figures with beautiful patterns.
Attention!
It is very important to show children the possibility of creating a variety of images based on one model (shape and method of sculpting). Many folk toys are created based on one model. This model in each specific image varies, changes, is supplemented with new details and takes on a new look. For example:
• if you lightly pinch the mane on the neck and pull the tail back, a horse will come out (you can complicate the details by sculpting them separately: roll up flagella or rolls and weave a tail and mane from them);
• if you blunt the muzzle, make the horns in the shape of a crescent, and stick a flat udder to the belly, you get a cow;
• if the horns are wrapped in the shape of pretzels or snails, a steep-horned ram will appear.
Afterwards it’s interesting. Exhibition.
Modeling. All materials for modeling - Open GCD for modeling in the middle group “Beads for Matryoshka”
Publication “Open GCD for modeling in the middle group “Beads for...” Progress of GCD: 1. Motivational part Educator: Here are my guys! Look at us, How good we are. How beautiful we are. We smile at each other And we feel so good After all, we have guests today. Educator. Guys, let's say hello to our guests and give them our smiles and...
Summary of a modeling lesson in the middle group "Tit Birds" Summary of a modeling lesson in the middle group "Tit Birds" Purpose: To develop an interest in working with plasticine, to develop fine motor skills, attention, speech, imagination, creativity. Objectives: To develop children’s skills in sculpting a bird sequentially, observing the ratio of body parts and their...
Open modeling lesson in the middle group “Filimonov toys - whistles” Lesson for middle-aged children. Theme of the week: “Toys”. The goal is to teach how to sculpt a bird whistle. Zaachi: - introduce children to the Filimonovskaya toy as a type of folk decorative and applied art. - to form an understanding of the craft of toy makers, knowledge...
Summary of a modeling lesson with children of the middle group on the topic “Traffic Light” Modeling lesson “Traffic Light” (middle group) Purpose: to continue acquainting children with traffic light signals; Objectives: • learn to sculpt a traffic light from a whole piece of plasticine; • display three colors of signals by applying them; • consolidate children’s knowledge and skills in sculpting an object consisting of...
LiveInternetLiveInternet
Modeling is necessary for the development of sensations, perceptions and visual representations in children. It is believed that vision is leading in the knowledge of objects in the real world, but in the first stages of image formation in children, the support for vision is the touch of an object.
THEM. Sechenov O.
In modeling, the child must reflect the material properties of bodies - their volume, shape, density, texture. This is possible only when there are already tactile traces in the child’s experience, since the visual reflection of these qualities of an object, unlike the tactile one, is indirect.
Children's visual activities include activities such as drawing, modeling, and appliqué. Each of these types has its own capabilities in reproducing the child’s ideas about the world around him.
The working material for modeling can be clay, plasticine or salt dough. The uniqueness of modeling lies in the fact that with the help of this type of activity the shape of an object is conveyed in three dimensions.
Children enjoy sculpting people, animals, dishes, vehicles, vegetables, fruits, and toys. The items they create are used in play activities.
During preparation for modeling, the child receives a lot of knowledge about the subject (name, shape, structure, color, purpose). At the same time, his vocabulary and coherent speech are enriched and developed, with the help of which he can describe the image from memory. This contributes to the development of his thinking, attention, imagination and other processes.
During classes, the child receives information about modeling methods and learns how to do it himself. Based on his experience, he tries to independently solve educational problems, and over time, this independence develops into creativity.
In the process of sculpting, more than in any other activity, you can achieve maximum activity of both hands, develop and strengthen your fingers, especially the thumbs, index, and middle ones. To master the sculpting technique, a child needs to develop special movements regarding their strength, accuracy, tempo, direction, smoothness, and rhythm. These qualities will help the preschooler master various types of educational and work activities in the future.
While familiarizing yourself with an object, the child learns to understand its beauty. He himself begins to convey in the sculpting its individual expressive features, tries to carefully treat the surface of the product, decorates it with ornaments, etc.
Modeling helps to cultivate curiosity in the visual arts. The child sets a definite goal for himself and brings the work he has started to the end, and this contributes to the development of organization, determination and perseverance, and disciplines him.
Adults need to remember that they must teach a child to sculpt, and not make him a sculptor, and sculpting is not an end in itself, but only a means of comprehensive development and education.
For children three to four years old, it is recommended to sculpt: columns, oranges, cherries, bagels, pretzels, pies, dumplings, etc. Modeling techniques, such as rolling out plasticine with straight and circular movements of the hands, flattening plasticine (sticks, bagels, pretzels, birds, tumblers, mushrooms), pulling back small parts (beak, tail, etc.).
To work with children of five years old, it is recommended to sculpt: an apple, a carrot, a bowl, a plate, a cup, a glass, etc., where the sculpting of objects is based on the shape of a cylinder, a cone (vegetables, fruits, toys, etc.), sculpting techniques such as rounding and pointing (carrot, airplane), pressing (basket, cup, saucer), bending edges, connecting parts, dividing plasticine into parts and connecting them by applying, pressing, smearing.
For children six to seven years old, it is recommended to sculpt: parsley, chicken, duck, bird, cat, dog, fox, bear, etc., which show different methods of sculpting: constructive, plastic, combined; techniques for smoothing and tightly connecting parts.
Three types of modeling are used for activities with children:
- subject;
- plot;
- decorative.
Object modeling in kindergarten is intended to recreate individual objects. Children enthusiastically sculpt figures of people and animals. Only the fastest they master the image of objects of plant and structural form. In connection with this fact, kindergarten teachers are faced with the task of teaching children the ability to depict the key shape of objects in modeling and the most striking features characteristic of them.
Subject modeling in kindergarten is accompanied by a large amount of work, because it is necessary to sculpt each individual object included in the composition, give it the desired position on a stand or without, and then supplement the modeling with some details.
The teacher needs to teach children the ability to make a dense, fairly voluminous stand and logically, beautifully distribute objects on it. This will make it possible to successfully complete the task of creating a compositional plot.
Most often, the plot for modeling is episodes from the surrounding environment, individual episodes of certain fairy tales and narratives. The expressiveness of plot compositions is given not only by how skillfully the children depict the form, but also by the way they combine the figures into one composition by depicting the action.
Decorative modeling in kindergarten. Introducing children to folk applied art is one of the ways of aesthetic education; in the process of learning its various types, in particular the small decorative plastic arts of folk craftsmen, children can acquire many useful skills. For example, beautiful assembled forms representing animals, dolls, birds with a specific colorful painting amuse children and have a positive effect on the formation of their artistic taste, enriching children's judgment and imagination.
When working with children of different ages, you can use the following modeling methods: constructive, plastic and combined.
Constructive is the simplest of them. The object is molded from separate parts. For example, a bird: first the body, head, and stand are sculpted, and then all the parts are connected and the figurine is given characteristic features. Children use the constructive method of modeling in the younger group of kindergarten. This method is used in the future in all age groups, but the number of parts increases, and the methods of connecting parts become more complicated.
The plastic method is more complex. This modeling is made from a whole piece of plasticine, from which all the small details, parts of the product, etc. are pulled out. Children begin to sculpt in this way from the middle group (vegetables, fruits, toys). For example, while sculpting a mouse from a common piece of plasticine, a child creates the desired shape, draws out its muzzle, ears, tail, paws and, using a stick, gives it characteristic features. Children sculpt using plastic methods throughout preschool age. The collection presents examples of making objects using this method, such as a duck, a pig, etc.
The combined method combines modeling from a whole piece of plasticine and from individual parts or parts. For example, from a piece of plasticine we sculpt part of a chicken: the body, the head, and we prepare the small parts and the stand separately, then we connect them.
In addition, when making birds, animals, and people, relief modeling techniques are used: small pieces of clay or plasticine are placed on the main form, and then smeared with a stick or fingers. After which the product is given the desired shape, these are: tit, bullfinch, snow maiden, grapes, etc. The working material for modeling can be clay, plasticine or salt dough.
Basic sculpting techniques
Modeling techniques
Description
Pinching off
Separating small pieces from a large piece of plasticine using the thumb and index finger. To do this, first pinch a small piece from the edge of a large piece and then tear it off.
Flattening
Compressing a piece to make it flat. A small piece is flattened with two fingers - the thumb and forefinger. The middle piece is pressed down using the palm of your hand and a flat surface.
Rolling up
Forming large or small balls by using circular movements between straight palms or palm and table.
Indentation
By pressing the thumb or index finger on the lump, a small indentation is made
Sharpening
With one or two or three fingers, press the piece on all sides until you get a sharp end.
Rolling out
Forming a piece into “sausages” (cylindrical shapes of different sizes) by rolling it back and forth between straight palms or palm and table.
Compound
Pressing the parts of the craft one against the other, then lightly pressing them together and carefully smoothing the joint.
Topping
Using the thumb and forefinger, a small edge is pulled back and sharpened.
Recommendations for working with plasticine:
Before class, warm up hard plasticine in a container with hot tap water (but do not pour boiling water over it).
When working with plasticine, you should use thick cardboard as a base, not thin sheets of paper, so that it does not deform when performing techniques of pressing, smearing, and smoothing the surfaces of the objects being created.
To ensure that the picture does not lose its attractiveness over time, the base with or without a pre-drawn outline should be covered with tape. This will help avoid the appearance of greasy stains, it will be easier to work on a slippery surface, and using a stack it will be easier to remove excess plasticine without leaving marks.
There must be a cloth hand napkin on the child’s desk so that he can use it at any time, and after completing work, first wipe his hands with a napkin and then wash them with soap and water.
Working with plasticine requires physical effort, so in the process of doing it, children need rest in the form of physical education and warm-ups.
In older preschool age, when children have mastered all the traditional techniques of working with plasticine, you can offer modeling on a frame, using a three-core wire as a base.
It is believed that vision is the leader in the knowledge of objects in the real world, but in the first stages of image formation in children, the support is the touch of an object. THEM. Sechenov O. What can give a better idea of an object than to create this object from a nondescript piece of clay or plasticine, making it recognizable and attractive. This explains the great interest of children of all ages in modeling.
Literature.
1. Beloshistaya A.V., Zhukova O.G. - M: ARKTI, 2007.
2. Davydova G.N. Plasticineography for kids. M.: “Scriptorium 2003”, 2008.
3. Davydova G.N. Plasticineography. Animal painting. M.: “Scriptorium 2003”, 2008.
4. Lykova I.A. Visual activities in kindergarten. M.: “Karapuz - didactics”, 2007.
5. Miloserdova N.E. Teaching preschoolers modeling techniques. M.: TsPO, 2008
https://kopilkaurokov.ru/vneurochka/prochee/osnovn...lichnykh-vozrastnykh-ghruppakh
Basic methods and techniques in modeling in various age groups
Modeling is necessary for the development of sensations, perceptions and visual representations in children. It is believed that vision is leading in the knowledge of objects in the real world, but in the first stages of image formation in children, the support for vision is the touch of an object.
THEM. Sechenov O.
In modeling, the child must reflect the material properties of bodies - their volume, shape, density, texture. This is possible only when there are already tactile traces in the child’s experience, since the visual reflection of these qualities of an object, unlike the tactile one, is indirect.
Modeling techniques
| Children's visual activities include activities such as drawing, modeling, and appliqué. Each of these types has its own capabilities in reproducing the child’s ideas about the world around him. The working material for modeling can be clay, plasticine or salt dough. The uniqueness of modeling lies in the fact that with the help of this type of activity the shape of an object is conveyed in three dimensions. Children enjoy sculpting people, animals, dishes, vehicles, vegetables, fruits, and toys. The items they create are used in play activities. During preparation for modeling, the child receives a lot of knowledge about the subject (name, shape, structure, color, purpose). At the same time, his vocabulary and coherent speech are enriched and developed, with the help of which he can describe the image from memory. This contributes to the development of his thinking, attention, imagination and other processes. During classes, the child receives information about modeling methods and learns how to do it himself. Based on his experience, he tries to independently solve educational problems, and over time, this independence develops into creativity. In the process of sculpting, more than in any other activity, you can achieve maximum activity of both hands, develop and strengthen your fingers, especially the thumbs, index, and middle ones. To master the sculpting technique, a child needs to develop special movements regarding their strength, accuracy, tempo, direction, smoothness, and rhythm. These qualities will help the preschooler master various types of educational and work activities in the future. While familiarizing yourself with an object, the child learns to understand its beauty. He himself begins to convey in the sculpting its individual expressive features, tries to carefully treat the surface of the product, decorates it with ornaments, etc. Modeling helps to cultivate curiosity in the visual arts. The child sets a definite goal for himself and brings the work he has started to the end, and this contributes to the development of organization, determination and perseverance, and disciplines him. Adults need to remember that they must teach a child to sculpt, and not make him a sculptor, and sculpting is not an end in itself, but only a means of comprehensive development and education. For children three to four years old, it is recommended to sculpt: columns, oranges, cherries, bagels, pretzels, pies, dumplings, etc. Modeling techniques, such as rolling out plasticine with straight and circular movements of the hands, flattening plasticine (sticks, bagels, pretzels, birds, tumblers, mushrooms), pulling back small parts (beak, tail, etc.). To work with children of five years old, it is recommended to sculpt: an apple, a carrot, a bowl, a plate, a cup, a glass, etc., where the sculpting of objects is based on the shape of a cylinder, a cone (vegetables, fruits, toys, etc.), sculpting techniques such as rounding and pointing (carrot, airplane), pressing (basket, cup, saucer), bending edges, connecting parts, dividing plasticine into parts and connecting them by applying, pressing, smearing. For children six to seven years old, it is recommended to sculpt: parsley, chicken, duck, bird, cat, dog, fox, bear, etc., which show different methods of sculpting: constructive, plastic, combined; techniques for smoothing and tightly connecting parts. Three types of modeling are used for activities with children:
Object modeling in kindergarten is intended to recreate individual objects. Children enthusiastically sculpt figures of people and animals. Only the fastest they master the image of objects of plant and structural form. In connection with this fact, kindergarten teachers are faced with the task of teaching children the ability to depict the key shape of objects in modeling and the most striking features characteristic of them. Subject modeling in kindergarten is accompanied by a large amount of work, because it is necessary to sculpt each individual object included in the composition, give it the desired position on a stand or without, and then supplement the modeling with some details. The teacher needs to teach children the ability to make a dense, fairly voluminous stand and logically, beautifully distribute objects on it. This will make it possible to successfully complete the task of creating a compositional plot. Most often, the plot for modeling is episodes from the surrounding environment, individual episodes of certain fairy tales and narratives. The expressiveness of plot compositions is given not only by how skillfully the children depict the form, but also by the way they combine the figures into one composition by depicting the action. Decorative modeling in kindergarten. Introducing children to folk applied art is one of the ways of aesthetic education; in the process of learning its various types, in particular the small decorative plastic arts of folk craftsmen, children can acquire many useful skills. For example, beautiful assembled forms representing animals, dolls, birds with a specific colorful painting amuse children and have a positive effect on the formation of their artistic taste, enriching children's judgment and imagination. When working with children of different ages, you can use the following modeling methods: constructive, plastic and combined. Constructive is the simplest of them. The object is molded from separate parts. For example, a bird: first the body, head, and stand are sculpted, and then all the parts are connected and the figurine is given characteristic features. Children use the constructive method of modeling in the younger group of kindergarten. This method is used in the future in all age groups, but the number of parts increases, and the methods of connecting parts become more complicated. The plastic method is more complex. This modeling is made from a whole piece of plasticine, from which all the small details, parts of the product, etc. are pulled out. Children begin to sculpt in this way from the middle group (vegetables, fruits, toys). For example, while sculpting a mouse from a common piece of plasticine, a child creates the desired shape, draws out its muzzle, ears, tail, paws and, using a stick, gives it characteristic features. Children sculpt using plastic methods throughout preschool age. The collection presents examples of making objects using this method, such as a duck, a pig, etc. The combined method combines modeling from a whole piece of plasticine and from individual parts or parts. For example, from a piece of plasticine we sculpt part of a chicken: the body, the head, and we prepare the small parts and the stand separately, then we connect them. In addition, when making birds, animals, and people, relief modeling techniques are used: small pieces of clay or plasticine are placed on the main form, and then smeared with a stick or fingers. After which the product is given the desired shape, these are: tit, bullfinch, snow maiden, grapes, etc. The working material for modeling can be clay, plasticine or salt dough. Basic sculpting techniques | |
| Description | |
| Pinching off | Separating small pieces from a large piece of plasticine using the thumb and index finger. To do this, first pinch a small piece from the edge of a large piece and then tear it off. |
| Flattening | Compressing a piece to make it flat. A small piece is flattened with two fingers - the thumb and forefinger. The middle piece is pressed down using the palm of your hand and a flat surface. |
| Rolling up | Forming large or small balls by using circular movements between straight palms or palm and table. |
| Indentation | By pressing the thumb or index finger on the lump, a small indentation is made |
| Sharpening | With one or two or three fingers, press the piece on all sides until you get a sharp end. |
| Rolling out | Forming a piece into “sausages” (cylindrical shapes of different sizes) by rolling it back and forth between straight palms or palm and table. |
| Compound | Pressing the parts of the craft one against the other, then lightly pressing them together and carefully smoothing the joint. |
| Topping | Using the thumb and forefinger, a small edge is pulled back and sharpened. |
Recommendations for working with plasticine:
Before class, warm up hard plasticine in a container with hot tap water (but do not pour boiling water over it).
When working with plasticine, you should use thick cardboard as a base, not thin sheets of paper, so that it does not deform when performing techniques of pressing, smearing, and smoothing the surfaces of the objects being created.
To ensure that the picture does not lose its attractiveness over time, the base with or without a pre-drawn outline should be covered with tape. This will help avoid the appearance of greasy stains, it will be easier to work on a slippery surface, and using a stack it will be easier to remove excess plasticine without leaving marks.
There must be a cloth hand napkin on the child’s desk so that he can use it at any time, and after completing work, first wipe his hands with a napkin and then wash them with soap and water.
Working with plasticine requires physical effort, so in the process of doing it, children need rest in the form of physical education and warm-ups.
In older preschool age, when children have mastered all the traditional techniques of working with plasticine, you can offer modeling on a frame, using a three-core wire as a base.
It is believed that vision is the leader in the knowledge of objects in the real world, but in the first stages of image formation in children, the support is the touch of an object. THEM. Sechenov O. What can give a better idea of an object than to create this object from a nondescript piece of clay or plasticine, making it recognizable and attractive. This explains the great interest of children of all ages in modeling.
Literature.
1. Beloshistaya A.V., Zhukova O.G. - M: ARKTI, 2007.
2. Davydova G.N. Plasticineography for kids. M.: “Scriptorium 2003”, 2008.
3. Davydova G.N. Plasticineography. Animal painting. M.: “Scriptorium 2003”, 2008.
4. Lykova I.A. Visual activities in kindergarten. M.: “Karapuz - didactics”, 2007.
5. Miloserdova N.E.
Teaching preschoolers modeling techniques. M.: TsPO, 2008. https://kopilkaurokov.ru/vneurochka/prochee/osnovn...lichnykh-vozrastnykh-ghruppakh
