April Fool's Day, a themed competition, an exhibition of crafts in a kindergarten or school - for all these “reasons” a clown made with your own hands from paper, cardboard, textiles and any other available materials is suitable. The manufacturing technique is selected according to the child’s age, skills, and degree of perseverance. Such a souvenir, made by mom or dad, can please the child himself, for example, by adding it to the main gift for a birthday or New Year.
How to make a paper clown
Children from 3 to 6 years old can be asked to make a cheerful little man with their own hands in the form of an applique, while older children can make a craft in the form of a three-dimensional figurine with movable spring handles.
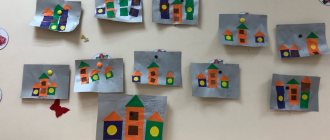
Application
It’s easier for kids to make applique from already prepared parts.
Before starting classes on how to make a clown with your own hands, parents or teachers should cut geometric figures and prepare everything necessary - cardboard for the base of the craft, glue, scissors with blunt tips. 15 parts needed:
- 6 circles of different colors - juggling balls and a face;
- 5 triangles – cap, pants, sleeves;
- 3 ovals – 1 for the body, 1 (in halves) for shoes, 1 (in quarters) for arms;
- 1 star – collar.
Let's start assembling the application. Just below the middle of a bright sheet of colored cardboard we glue an oval body. We “attach” arm triangles to its upper part. The next parts are the collar and head.
Then we “put on” a cap for the cheerful clown, place shoes along the bottom edge, glue on pants and sleeves, arms and legs, and balls at the top in a circle.
The final touch is the design of the face. Eyes, nose, mouth can be drawn with multi-colored pencils or felt-tip pens.
Older children can be encouraged to make a voluminous applique craft with their own hands. Work on it begins with the face. It is better to draw it for parents. We take a sheet of white cardboard as the basis for the volumetric applique.
We color the face with pencils or felt-tip pens.
We cut several sheets of paper of different colors into squares with a side of 5 cm, fold them into sharp triangles.
From the resulting blanks we make a “hairstyle” and a bow.
A voluminous, bright, structured craft for the kindergarten is ready. And if you replace the paper triangles with candy wrappers, and decorate the voluminous eyes and nose with textiles or plasticine, then your handmade clown will be even brighter and more attractive.
Video tutorial:
From corrugated cardboard and a tennis ball
A three-dimensional figurine of a funny circus performer can be made from simple materials in 20-30 minutes, and even a first-grader can cope with the task.
Before you start work, you need to prepare everything you need:
- tennis ball, preferably white;
- corrugated cardboard and bright “tissue” paper;
- small pieces of ordinary colored cardboard;
- multi-colored markers and thin springs;
- glue, scissors, wire.
On the tennis ball we draw cross eyes, a red nose and lips with markers. We glue a cylinder from corrugated cardboard. The diameter of the cylinder should be smaller than the diameter of the head.
We will make clown hair from tissue paper with our own hands - lightly gather the folded strip in half using a thin wooden stick, and cut the edges into “noodles.” Attach the hair to the toy's head using glue.
We put springs on a thin wire. They can be bought at a specialty store or simply taken out of automatic pens. We attach pre-cut palms to one edge of each workpiece, and fasten the other edge (simply bend it) onto the cylinder. We glue the boot legs to the bottom of the cylinder.
The final stage of work is collecting and decorating the crafts. We attach the ball head with glue so that it does not roll off the base. You can decorate the “suit” with real or cardboard buttons or a corrugated paper tie.
Thematic selection of gaming material, theme: “Circus”
Goals:
Expand children's knowledge about the circus. Enrich children's vocabulary on this topic. Form a stable idea of color, quantity, size, geometric shapes. Teach children to determine the number of objects by touch, the heaviness and lightness of objects. Continue to teach children to determine their position in space, to understand the concepts of “top”, “bottom”, “on”, “under”, “middle”, “in a circle”, “next to”. Introduce children to an unconventional method of drawing with toothbrushes. Improve the skills of modeling, gluing, cutting with scissors, designing from building materials and planar geometric shapes. Develop memory, fine motor skills, coordination of movements.
Equipment:
Picture-scheme of a circus tent made of geometric shapes, geometric shapes cut out of colored cardboard. Scissors. Blank for cutting “tickets to the circus”. Background picture “circus arena”, color silhouette images of a zebra, monkey, lion, counting sticks. Background for the “clown head” applique, details for gluing: hat, bow, wig. Bags filled with cotton wool, bags filled with stones. “Weights” toys. Buttons in two sizes: red, white, blue, green and yellow. A picture for laying out buttons with the image of a strongman with weights and barbells. Silhouette images of elephants in four sizes. Silhouette color pictures of animals, their shadows drawn on paper, cages for these animals of different sizes. Small toys “horses”, plasticine, feathers, blocks of small building material. Boxes with lids and laces inside. Animal mask caps, a hoop wrapped in red napkins. A silhouette picture of a clown's head in a cap with a collar and clothespins pasted onto cardboard. Large fabric snake exercise toy. Balloons (not inflated), with one and three pebbles inside. Jars of water covered with lids with paint on the inside, paints, brushes, double pourable bottles with stickers of different colors. Background picture with an image of an arena and a magician, toothbrushes, paint. Ball, cube, toy, scarf. Audio recordings: “Circus” (from the film of the same name), “Love the Circus.”
Textile clowns
The collections of many craftswomen include rag dolls made from scraps of fabric. Using the same principle, you can make a merry fellow from the circus, for example, as a gift for a child or as an additional souvenir.
The head and arms for such a doll can be bought ready-made at a craft store or sculpted with your own hands from clay, plasticine, salt dough, sewn and filled with stuffing.
From pieces of fabric we cut circles with a diameter of 6 cm. The more there are, the better.
We make a “pillow” from each circle. We put a small piece of cotton wool or padding polyester on the scrap, put a running stitch along the edge and tighten the workpiece. We straighten the filler so that it “lays” in an even layer.
We assemble the body from four ovals of bright fabric and stuff it. In the shoulder area we sew “sleeves” of the same fabric - we sew the circles, leaving a window for turning them inside out, turn them inside out, and sew them to the base. We thread a wire through the hangers - we will string round blanks with filler onto it.
We make the tip of the wire sharp, string the pieces onto it one by one, then attach the palms. Using the same principle, we assemble the clown's legs.
All that remains is to sew the cap, the shoe legs and secure them.
We cut out all the details of the shoes from the same fabric as the body of the toy. For each shoe you will need 2 upper parts and 1 sole. We fill the shoes with padding, tighten the tops and sew them to the legs. For the cap, cut out 2 parts, sew them together and attach them to the figure’s head.
Felt Christmas tree toy
Children are happy to take part in creating toys to decorate the New Year tree. Girls can be invited to make a cheerful clown out of felt. You will need:
- felt and embroidery threads;
- needle, scissors, pencil;
- thin ribbon for a loop;
- two beads;
- pattern templates.
We cut out parts from felt of different colors. We make a small hole in the middle of the round element. Let's start designing the face.
We sew ears on the sides of the face. We place the largest part at the bottom and secure it with glue or thread.
The final touch is to sew on the cap and loop. The toy can be hung on the Christmas tree.
Progress of the lesson:
Music from the movie "Circus" is playing.
Hello children. Today we are going to the circus.
Children make a circus tent out of geometric shapes. The teacher asks to name the shapes (circle, triangle, square, rectangle) and their color.
Let's put the elephant on a big stand. Put? Now let’s put the lion on a small pedestal. Walk the horse around in a circle. Place the monkey on the swing. Make a ladder out of counting sticks.
Children use scissors to cut tickets along the line.
A clown performs at the circus. He is cheerful and tries to cheer everyone up.
Look, it's a clown. Let's put makeup on him, make him beautiful. Glue on the clown's hair, hat and bow.
Now we will help decorate another clown. Let's make him a beautiful collar from clothespins.
A strongman performs in our circus. He is very strong and can lift enormous weights.
Experiment “Heavy-light”
Hold the bags in your hands and tell which ones are light and which are heavy. Children are offered bags with cotton wool and pebbles.
In this picture, a strongman in a circus lifts heavy weights and a barbell. Organize buttons by color and size.
Dynamic pause “Playing with weights”
Take the weight in your right hand. Lift it up, put it on your shoulder, lower it to the floor. Grab the kettlebell with your left hand. Lift it up, put it on your shoulder, hide it behind your back. Place a weight on the floor in front of you and jump over it.
In the circus, trainers always perform with their trained animals.
Didactic game “Animals in Cages”
After the performance, the animals return to their cages. Help put the animals in cages. Place a tall giraffe in a tall cage, then select suitable cages for the zebra and monkey.
Children arrange cardboard pictures of elephants from largest to smallest.
Didactic game “Find the shadow”
Children attach colored silhouette images of animals to their black silhouette shadows.
Exercise “Trained Animals”
Children, if desired, put on animal hats and follow the teacher-trainer’s commands: stand, sit, lie down, crawl, crawl into a fiery ring-hoop, walk along a bench, climb over an obstacle.
Construction of “Horse Fences” from building material
Children make fences from bars placed on the side edge: low - from one bar, medium - from two bars, high - from three bars laid on top of each other.
Game "Circus Horse"
A saddle is attached to the fly horse toy - a piece of thick fabric on the back and a decoration - a feather is stuck into a piece of plasticine attached to the horse's head. Then the horse jumps over the fences. To jump over a high fence, the horse must jump high.
Didactic exercise “Snake”
Open the box and take out the snake cord. How long is the snake? The snake is long. Pull the string and show how the snake crawls. Place the string snake back into the box and cover with the lid.
Dynamic pause “Performance with a snake”
Children lie down on the “snake” laid out on the floor with their chests and swing their arms and legs, then turn over, lie on their backs, and raise their arms and legs up. Walking on a snake, crawling, jumping over.
Magicians also perform at the circus.
Didactic exercise “What’s in the ball?”
Children are given balls and asked to determine by touch which ball has one pebble and which has many pebbles.
Didactic game “What disappeared?”
Three objects are laid out in front of the children, covered with a scarf, and one object is quietly removed. Children must name this missing item.
Didactic game “Colored water”
The teacher paints the lid of the water jar in advance. After the words “Hocus Pocus!” The jar is shaken and the water becomes colored. Children name the color the water is colored. Then, using a brush and paint, they paint the water in the non-pouring bottle according to the color of the sticker pasted on it.
Drawing “Fireworks in the circus arena”
Children draw fireworks with paints using toothbrushes, moving them up and to the sides from the image of the magician.
The little one and I did it!
Since our family has an ingrained tradition of remembering everything at the last moment, this case was no exception. My son Vadik told me about the assignment exactly one day before it was due. There was nowhere to go - I had to get to work!
Working with plasticine
An equally original clown is made from plasticine, and even the smallest craftsmen can work with this material under the guidance or together with their parents.
We start work by designing the head.
We will make the body from two oblong elements of different colors, and immediately decorate it with buttons and an openwork collar. We insert a wooden stick into the upper part and place the head on it.
We fashion wide sleeves, attach them to the body, and complement them with yellow “fists”. All that remains is to make boots with plasticine pom-poms.
DIY clown from scrap materials
You can make a fun toy from anything - disposable paper cups, plastic bottles, buttons. The main thing is not to restrain your imagination, to involve your loved ones in creativity, regardless of their age.
Crafts from cups
If you have bright disposable plastic cups, forks or spoons left after the holiday, you can turn them into a cheerful circus performer.
In addition to the basic elements, you need to prepare double chenille wire, double-sided tape and scissors, and print out an image of the clown’s face.
We turn the glass upside down, make two holes opposite each other, thread the wire through them and form handles at its ends. We cut out the face, glue it onto a plastic fork (spoon), and insert it into the hole in the bottom of the glass. We make legs from wire and attach them. The cheerful clown is ready.
