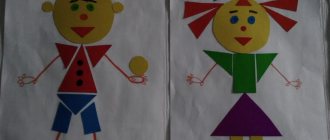
"A man made of geometric shapes."
GCD for design Venue: game room
Topic of the week: “ I am human. (Our body)"
Topic of the lesson: “Man made of geometric shapes.”
Integration of educational areas: “Cognitive development” (construction), “Speech development”, “Artistic and aesthetic development”. “Social and communicative development”, “Physical development”.
Goal: Development of the ability to construct a silhouette of a person from paper.
Tasks:
- Give an idea of the human structure
- To form in children a sustainable interest in constructive activities; desire to experiment, create, invent;
- Develop attention, ability to concentrate, memory, logical thinking; small muscles of the hands (motility);
- Develop the ability to analyze, highlighting the characteristic features of an object, functional parts; establish a connection between their purpose and structure; continue to develop the skills to correctly and quickly navigate in space;
- Cultivate respect for your own and other people’s work.
Materials: geometric shapes, glue, cardboard
Methods and techniques:
- Verbal (conversation, explanation)
- Visual (show)
- Practical (finger gymnastics)
Move
| Activities of a teacher | Children's activities | Planned results |
| Introductory part: Good morning, guys! I am glad to see all the children in our group healthy and cheerful! I really want you to remain in this mood until the evening! And for this we must smile more often and help each other! No ordinary guest came to visit us. I will tell you a riddle, and you must guess it. | Children sit in a semicircle on the carpet Children say hello | Development of cognitive interest. Development of communication skills |
| In this flowery town, summer shines all year round. And the people here are cheerful - they call them shorties. Among them there is Pilyulkin, Buttercup - you can’t count them all. The most important one, guess what? Well, of course (Dunno!) | Children's answers | Development of logical thinking. Vocabulary enrichment |
| Main part: Dunno: good morning guys! I came to you for help. I want to learn how to make a man out of geometric shapes, but I don’t know how. I don't know the names of the figures, and I don't know the body parts. Will you help me? | Say hello to Dunno | Development of communication skills |
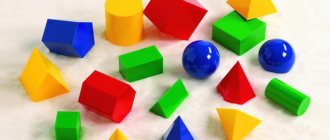
| Q: Guys, can we help Dunno? I will show you geometric figures, and you must name them and say what part of the body this figure resembles. | Children's answers | Development of logical thinking, naming geometric shapes correctly |
| Shows alternately (circle, oval, rectangle, triangle) And now we will show Dunno how to make a little man out of these parts. | Name geometric shapes | |
| Let's stretch our fingers "Our body" | development of attention | |
| Here's a hand, and here's a hand - Clap, clap, clap. | Extend your right hand forward, then your left hand; clap your hands | Development of motor activity, fine motor skills |
| Here's a leg, and here's a leg - Gop, hop, hop. | Put your right foot forward, then your left; walk in place | |
| Well, this is the head. | Hold your head in your hands | |
| You can make two nods. | Perform forward head tilts | |
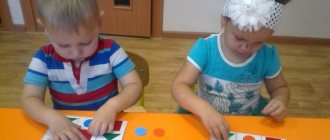
| We sit down at the tables and find the necessary figures for the little man. We lay them out on cardboard and then glue them. Look what wonderful little people we have made. | Sit down at the tables Select geometric shapes, lay them out and glue them onto cardboard | Developing the ability to listen to the teacher and complete the task |
| But something is missing! What do you guys think is missing? That's right, they don't have a face. What do we need to do for this? That's right, draw! Q: Dunno, did you remember what the geometric shapes are called and what parts of the body are there? | Children's answers | Development of constructive skills |
| Dunno: Yes, I remember everything, thank you guys! It's time for me to go home, goodbye! | Saying goodbye to Dunno | Development of communication skills |
| Reflection: Guys, let's remember our lesson. Who came to visit us? What did we do today? What did we make little men out of? How did they turn out? What have you learned? What was difficult for you? | Children's answers | Development of mental and speech activity and the ability to draw conclusions |
Preschool mathematics: designing from geometric shapes
Introducing a preschooler first to geometric figures and then to the basics of geometry opens up new opportunities for organizing effective developmental activities. As part of an entertaining geometry course for kids, offer your little one a design from geometric shapes, the benefits, methods and principles of which we will now tell you about. Interesting? Then let's figure it out together!
The benefits of geometric design
Composing various designs (ornaments, abstractions, simple images or even entire plot paintings) from flat geometric shapes is an effective key to the comprehensive development of imagination:
- introduces geometric figures, expands and consolidates knowledge on this topic;
- creates favorable conditions for mastering the concepts of “color”, “shape”, “size”;
- develops spatial, abstract and figurative thinking;
- stimulates the imagination;
- helps to reveal creative potential;
- promotes speech development;
- trains fine motor skills;
- improves hand-eye coordination.
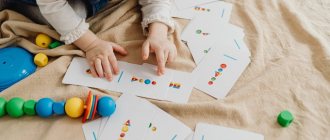
Designing from geometric shapes is a universal activity that can captivate boys and girls of different ages and temperaments. Very young designers can be asked to simply play with the details of the construction set, look at them carefully, and try to sort them according to one or another characteristic (shape, color, size). The level of difficulty of tasks should grow with the child.
Young creators with a rich imagination are attracted to creating images from flat geometric figures by the opportunity to realize interesting images and give vent to their fantasies. Such kids easily cope with creative tasks, sometimes putting together incredibly interesting patterns from existing parts without a given sample.
Calm, reasonable, and logical preschoolers enjoy working with clear forms. They carry out verbal algorithms with pleasure and are happy when they receive a tangible result, a visualization of their work.
By combining different techniques of geometric planar design, you develop both hemispheres of the child’s brain, which has a beneficial effect on the child’s creative and logical thinking.
Do-it-yourself geometric constructor
In children's stores, geometric construction sets are presented in a rich assortment. You can buy magnetic construction sets, insert frames, puzzles... Or you can make a useful educational game yourself. All you need is a ruler, pencil, compass, scissors and, of course, a supply of suitable material:
- colored cardboard (you can use velvet, foil, designer with different textures);
- felt;
- carpet;
- thin linoleum;
- polyurethane mat;
- plastic folders and binders.
Important! To prevent your child from getting hurt, carefully handle the edges of the figures.
If you have a supply of fabrics of different textures, use it for your DIY construction set: prepare a set of figures from thick cardboard, and then cover each of them with jeans, corduroy, velvet, satin, felt... If you attach a small piece to each figure on one side sewing contact tape (in other words, Velcro), you will get an excellent material for geometric design on a flannelgraph.
It’s up to you to decide which specific figures for a homemade geometric constructor to include in the set. The younger the child, the fewer elements he needs. For children 2–3 years old, prepare kits containing:
- circles;
- squares;
- triangles;
- rectangles;
- ovals.
Each figure should be represented in different colors and sizes.
If you wish, you can supplement your set with more complex shaped objects - various arches, stars, irregular figures (resembling clouds, puddles or blots - whatever you like).
To begin with, you can make small sets: 5 variants of each basic figure. Your set will be replenished with new parts as needed. It's not a problem.
Working with geometric figures: instructions for parents
Classes with parts of a geometric constructor can be organized in different ways:
- repeat according to the sample;
- follow the verbal description;
- independent work.
For children 2–3 years old , offer ready-made templates, help the kids repeat the image from the available parts, discuss what shapes you used.
Children 4–5 years old can be given a set of figures and asked to put together simple pictures. For example:
- Make a Christmas tree from three triangles and a rectangle.
- Build a house from three squares, a triangle and a rectangle.
- Use any shapes from your set to make a flower.
When your child completes the task on his own or with your help, discuss what color and size shapes he used. Ask the little designer to justify his choice.
At older preschool age, children are able to create whole plot pictures from geometric shapes. Invite your child to make an original greeting card with their own hands, decorating it with an applique of geometric shapes.
On a note! Geometric applique, like geometric mosaic, are varieties of planar design from geometric shapes. Combine these methods when organizing preschool math classes with children of different ages.
Friends! Don't forget, the best way to teach a child is to set a good example. If you want your baby to grow up creative, enthusiastic and smart, feel free to fantasize by coming up with interesting tasks for him using a geometric constructor.
We wish you happy, creative parenting. See you again!
How to make a paper boat applique with your own hands
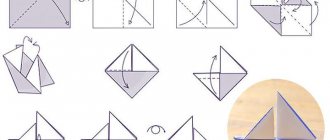
To create such a craft, we prepared:
- square sheet of single-sided colored paper;
- black felt-tip pen.
First, our workpiece needs to be bent along diagonal lines.
Now we bend one of the corners (for convenience, we took the top one) towards the very center of the workpiece.
The same bent corner must be bent upward.
Finally, we make another fold of the same corner, but this time we bend it down.
We fold the blank of the future boat in half lengthwise.
All we have to do is form the side of our ship. To do this, you need to bend the bottom part upward at a slight angle. The width of this fold will determine the height of the side.
Now the fold needs to be straightened so that the colored paper is on the outside.
If necessary, the inner sides of the applique can be slightly secured with glue.
The final stage of our craft will be drawing portholes. We apply them using a black felt-tip pen.
Tangram is an ancient oriental puzzle made from figures obtained by cutting a square into 7 parts in a special way: 2 large triangles, one medium one, 2 small triangles, a square and a parallelogram. As a result of folding these parts together, flat figures are obtained, the contours of which resemble all kinds of objects, from humans, animals to tools and household items. These types of puzzles are often called "geometric puzzles", "cardboard puzzles" or "cut puzzles".
With a tangram, a child will learn to analyze images, identify geometric shapes in them, learn to visually break an entire object into parts, and vice versa - to compose a given model from elements, and most importantly - to think logically.
How to play tangram
Each piece of the game must be made up of seven tangram parts, and they must not overlap.
The easiest option for preschool children 4-5 years old is to assemble figures according to the diagrams (answers) laid out into elements, like a mosaic. A little practice, and the child will learn to make figures according to the pattern-contour and even come up with his own figures according to the same principle.
Level one - download and print the colored tangram, this will make it easier to navigate the diagram.
