General tips for making a birdhouse
Let's talk only about functional birdhouses; there are no general recommendations for decorative ones; everyone is guided by their own preferences and concepts of beauty. As for a real birdhouse, everything should be aimed at creating favorable living conditions for birds.
What to make a birdhouse from?
Important. You need to know that not only starlings, but also many other species of birds live in birdhouses; during manufacturing, the structural features of these inhabitants must be taken into account.
Birdhouse dimensions
| It is used only indoors as an element of interior decoration. Such birdhouses are made from all materials without exception, including those that are not found in nature in their natural form. The main thing in this case is not the physical, but the design characteristics. Decorative birdhouses are made of cardboard and plastic, plywood and fiberboard, paper and metal. You can find options for using straw, bamboo and other plants to make decorative birdhouses. Dimensional proportions are not observed in them; the main function of the products is to serve as decoration. The hole is made large, the internal volume is filled with various objects and becomes accessible. |
| The main difference is that these birdhouses are made not for people, but for birds. They are not familiar with the concept of design; they choose only functional places to live. The more striking a building is, the brighter it is, and the different colors it has, the less often birds settle in it. They prefer the least visible structures and worry about the safety of the chicks rather than the beauty of the birdhouse. In addition, birds are very reluctant to settle in birdhouses made of plywood, OSB and other materials containing formaldehyde and other chemical components. It is strictly not recommended to use them for making birdhouses. In addition, even the most expensive moisture-resistant varieties of plywood or OSB outdoors completely lose their original properties and collapse after a few years. Another problem with such materials is that surfaces that are too smooth create great difficulties for birds to live in. The ideal option for making functional birdhouses is untreated boards. |
| Product element | Values for birdhouse | Size for small birds |
| Tap hole | Ø 5 cm | Ø 2.5 cm |
| Bottom length and width | Approximately 15x15 cm | Approximately 10x10 cm |
| Birdhouse height | 45 cm | 30 cm |
Such differences are explained by the size of the birds; they need to have enough space to freely move while hatching eggs. The height should not be a problem during multiple visits to the birdhouse to feed the chicks. Before you start making the structure, finally decide what kind of house you plan to make and for whom.
You should not hope that birds will settle in any box with a hole; they select nesting sites very carefully. If you make a birdhouse of medium size in the expectation that relatively large starlings and small titmice or flycatchers can live in it, then with a high degree of probability it will remain empty. None of the birds would want to risk their offspring, the instincts to preserve the species are very developed, nature took care of this.
Tits in a birdhouse
The size of the roof must exceed the perimeter of the structure; this is necessary for two reasons.
- This will prevent moisture from entering the nest during slanting rain. Before nailing the birdhouse, you need to orient yourself to the cardinal points and take into account the direction of the prevailing winds. Make every effort to ensure that the microclimate in the birdhouse is stable and favorable for birds.
The birdhouse must have a favorable microclimate
The birdhouse must be protected from domestic predators
To carry out the work, you will need a basic set of tools and equipment; the appearance of the birdhouse, as mentioned above, does not play any role for the birds. On the contrary, the less conspicuous it is, the less noticeable from the ground, the better for the birds, the higher the likelihood that your work was not in vain and the birdhouse will not remain empty.
Step-by-step instructions for making a birdhouse
We will make a birdhouse from natural boards 20x200 mm, tray diameter 5 cm, bottom size 16x16 cm. Wall height 40 cm, perch for sitting with a diameter of one centimeter and a length of 4 cm. House for starlings, corresponding dimensions.
Step 1. Calculate the amount of lumber and purchase it. The calculation is very simple: the length of the four walls is summed up, and the dimensions of the roof and bottom slopes are added to this value. There is no need to calculate everything down to the centimeter; let there always be a few centimeters of the board in reserve. As we said above, the optimal board thickness is 20 mm, width 200 mm, it is advisable to buy unplaned lumber. In stores there are boards immediately after cutting on sawmills, this is an excellent option for a birdhouse. If desired, one side can be machined or processed with an electric plane, but it is better to leave them unprocessed.
The board can be cut into pieces for easy transportation
Step 2. Place the board on a flat table and mark the blanks. The following details should be noted.
- Boards for the facade and back wall. These are the largest boards in our case. The roof of the birdhouse will be gabled with large angles of inclination, this is necessary to increase safety; from such structures it is impossible for cats to reach the nest. Two holes are drilled in the facade board: one for the taphole and the second for fixing the perch.
- Side wall boards. They are slightly shorter than façade ones, the difference in length depends on the angle of the roof. Width 20 cm - 2 cm -2 cm = 16 cm. 2 cm is the thickness of the facade boards.
- Board for the bottom. We recommend cutting it into a 20x20 cm square, then the dimensions will be adjusted exactly. In our case, the estimated size of the bottom in the birdhouse is 16x16 cm, but it is better to leave a reserve and then take an accurate measurement.
- Two boards for roof slopes. If it is difficult for you to calculate their length, then you can not cut off the parts yet, but do this after the facade boards have been fully prepared. The length of the slopes is measured on them and blanks are made according to these parameters.
Summary of a drawing lesson in the first junior group “Birdhouse”
Tatiana Kozlova
Summary of a drawing lesson in the first junior group “Birdhouse”
Kozlova Tatyana Vladimirovna
Summary of a drawing lesson in the first junior group on the topic : “ Birdhouse ”
.
Drawing in the first junior group on the theme “ Birdhouse ”
.
Educational objectives: teach children to convey in a drawing the rounded shape of a window in a birdhouse . Strengthen the ability to squeeze excess paint onto the edge of the dish.
Developmental tasks: develop the expressiveness of performing a short poem, repeating after the teacher.
Educational objectives: to instill in children a desire to help a bird that is frozen. Foster independence and creativity.
Vocabulary work: enrich children's vocabulary: starling , window, teach to pronounce phrases clearly.
Preliminary work: bird watching on a walk in clear weather; observations from the window in the group ; singing the song "Bird"
;
game "Sunshine and Rain"
;
drawing circles .
Teacher preparation: think over the necessary material, learn the text of the poem, prepare a sketch of a birdhouse without a window .
Individual work: check with Maxim, Pasha, Darina where to place the sun (in the middle of the birdhouse )
; support Dima and Vika.
How to properly hang a birdhouse on the territory of a kindergarten
If birds do not settle in the birdhouse, then the work is in vain, and critical errors were made during manufacturing. This is provided that the bird house is located in the forest. But if you hang it on the territory of a kindergarten, then other factors also influence the population of birds. How to hang a birdhouse so that it is not empty on the kindergarten playground?
- The facade board should face south, the warm rays of the sun maintain the optimal temperature. Birds are well oriented by the sun and when choosing a house they pay attention to this detail.
- The hanging height should eliminate the possibility of children damaging the birdhouse. They should not throw hard objects at it, and the negative impact of noise during outdoor games should be minimized.
- The birdhouse does not have to be fixed only to a tree, the main thing is that the support is high and reliable.
You need to hang it so that the entrance of the birdhouse faces south
Attaching it to a tree is not the best option. Why? Firstly, using nails and screws for fixation is strictly prohibited. Although it is not clear what this is connected with, because the alternative method is even more harmful. Secondly, tying the birdhouse to the trunk is also very harmful to the tree. The diameter of the trunk increases over time, ropes or wires grow into the body of the tree and cause big problems for it. Much more significant than a few nails, by the way.
Attaching to a tree with rope
So many people cannot understand why it is strictly forbidden to hammer in two nails, and clamping the entire perimeter of the trunk with wire is considered to be a safe method of fixing a birdhouse.
Birdhouse made of logs
Video - How, when and where to hang a birdhouse, titmouse
It is recommended to make a birdhouse not on your own, but together with the children. This is both education and spending time together and getting used to work. To give children the opportunity to watch birds for a long time, make a comfortable bench. There are detailed instructions on how to do it on our website.
It’s not enough to put together a birdhouse. It also needs to be decorated to make it a real highlight of the garden. There are various techniques that allow you to turn your birdhouse into a real artistic masterpiece with your own hands.
Progress of the lesson
A starling came to visit us . Look how sad he is! What happened (Audio recording starling )
Oh guys! What a disaster! While he was in warm countries, his house was broken down. How can we help him? (Children's answers)
Starlings are the first to arrive from warm regions , what is the name of the house in which the birds live? Now I’ll tell you:
Let’s make a house for the birds
With a small round window.
Here is a starling sitting on a hazel tree ,
We are building it for him. ( Birdhouse )
And the house is called a birdhouse (choir and individual repetitions )
.
Well done guys, look what a beautiful birdhouse I drew for our starling . Let's take a look at it. Here it is a yellow house, a green roof, a black door (entrance, and even
Educator: Starling , do you like your birdhouse ?
Do you guys like it?
starling is still not happy . Let's play with him!
Approaches to decor
The decoration of the birdhouse can be dictated by the very shape of this “structure”. Traditionally, it is created in the form of a hut with a gable roof, although there are options for round “buildings”, intricately contoured fairy-tale towers, and so on.
The design is also selected depending on the material of manufacture. Croakers are often used for birdhouses. If you leave tree bark on its surface, this is already a “claim” for the design. You can decorate the roof in different ways, giving it, for example, a tiled look. People who know how to work with wood decorate such houses with original carvings.
It is appropriate to paint with yellow and brown colors, which look the most natural. The outside of a wooden birdhouse can be painted in other colors. It makes sense to use acrylic paints. Aerosol ones are also suitable.
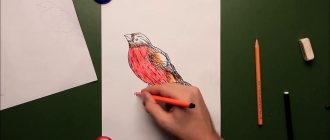
With a child, it is good to decorate such a house, for example, for the New Year, depicting fir branches, New Year's balls, red-breasted bullfinches and other drawings on this topic on the walls.
One of the most spectacular ways to decorate a birdhouse is to decorate it using the decoupage technique. Using ready-made pictures allows you to create beauty even for those people who have absolutely no artistic talent. All you need is accuracy, patience and imagination.
Master class on birdhouse decoupage
In order to decorate a birdhouse using decoupage technique, you need to prepare:
- “home” for starlings;
- paints (acrylic);
- varnish (moisture-resistant);
- sandpaper;
- tassels;
- scissors;
- napkins and decoupage card;
- special glue or regular PVA, diluted with water at a rate of 1:1.
The decoration looks like this step by step.
- Sand the birdhouse with sandpaper so that it becomes very smooth, devoid of the slightest nicks. Remove any remaining wood dust with a damp cloth.
- Paint the walls and roof with the chosen color. Let dry. If necessary, repeat the procedure.
- While the paint is setting, cut out fragments from the decoupage card in the shape of the “sides” of the house.
- Coat the side wall with glue. Carefully place the paper blank on it. Smooth it out, moving from the middle to the edges so that the air comes out and no air bubbles appear under the sticker. Do the same with the second side of the birdhouse.
- For the front part, you can use separate images. For example, gnomes and mushrooms. It is better to cut out pictures with scissors with sharp ends.
- Glue the images onto the facade in accordance with the plan.
- In order for the structure to serve for a long time and not lose its elegant appearance, it should be coated with moisture-resistant varnish in several layers, allowing it to dry after each stage of varnishing.
Design options
If you use craquelure varnish in your work, you can create an aging effect on the facade of the birdhouse, which gives the feeling that the wood is covered with cracks. To do this, the birdhouse blank is first primed with white acrylic paint, and then brown paint is applied in those places where cracks should appear.
Brown spots are covered with craquelure varnish, and when it dries, a layer of white paint is created.
Then all that remains is to stick the desired images on the previously provided places, cover the birdhouse on all sides with varnish (acrylic) - and the beautiful birdhouse is ready.
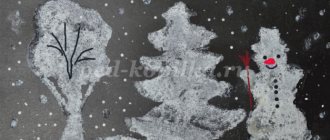
If you want to decorate a birdhouse in a New Year's style, you can choose napkins with appropriate motifs and stick them on the body. To give such a house a snowy look, you need to mix white acrylic paint, PVA glue and semolina in equal proportions. Then cover the roof and individual areas on the sides of the birdhouse with this composition, sprinkle with silver sparkles.
This birdhouse will be a great addition to the winter garden design.
Drawing a birdhouse in the second junior group
Nechaeva Yulia
Drawing a birdhouse in the second junior group
Drawing a birdhouse in the second junior group.
1. Learn to draw an object consisting of a rectangular shape, a rectangular roof and a circle. Correctly convey the size of the parts of an object.
2. Develop an eye; fine motor skills of hands; consolidate knowledge of the primary colors black, yellow, green.
3. Educational: To cultivate a caring attitude towards nature; desire to help birds.
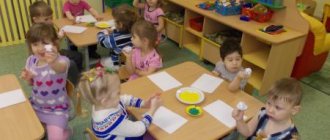
Equipment: sippy cups, watercolor paints, brushes, album sheets according to the number of children, a model of a birdhouse , a dummy bird.
Adviсe
When creating a birdhouse design, you need to take into account that the main thing is the convenience and safety of the birds. In order for them to be able to comfortably settle in such a house, they need to approach the choice of finishing materials wisely.
According to experts, the color of the product can be anything, but the paint and glue should not have a strong odor. Therefore, it is better to choose water-based materials. Otherwise, the birds will not settle in such a “dwelling,” and the birdhouse will remain just an uninhabited decoration in the garden.
Unusual decor
A birdhouse can be made a bright accent in a natural area near the house if you paint it with spray paint in a bright color, leaving only the “false door” white. An “extension with firewood” will give the “building” originality. Such a birdhouse looks beautiful both in summer among the greenery and in winter, standing out as a bright spot against the background of white snow.
The “three-story birdhouse” can be designed as a traffic light. It looks very unusual on a tree, attracting the attention of anyone walking nearby.
An original solution is to make a bird house in the form of a mailbox. You need to paint it in a characteristic blue color, stencil the word “post office”, hang the birdhouse on a tree and the local “forest postal service office” can be opened.
Decorating a birdhouse in the shape of a telephone booth is also an interesting approach to design. Such a decoration cannot get lost in the forest. But it is interesting to watch how birds fly in to “make a phone call.”
Fans of birdhouses can make a real village out of such houses. Each of them creates room for creativity. If you want to maintain a single style, you can “assign” numbers to the houses and paint them in different colors.
People with artistic talent can paint birdhouses to their liking, and if they don’t have such a gift, use a stencil. If you apply paints correctly, the result will be no worse than a real painting.
An elegant bird house surrounded by a fence looks very cute. With it, the whole garden will acquire a fabulous atmosphere. A birdhouse in the shape of an old mill is a wonderful design find for a summer cottage or garden.
Summer residents will appreciate the humorous approach to birdhouse design. The “slate” roof, like a rusty one, the “peeling” paint on the facade and the recognizable shape of the house - a real country toilet with an adjacent “bed”. Simply a miniature embodiment of a typical Russian plot of land outside the city.
If you plan to make a birdhouse part of the design of the veranda, just paint it the same color as the railing of the extension. A beautiful roof in several tiers will give the house an unusual look and artistic completeness.
The birdhouse can be given the appearance of a real gingerbread house. It is enough to carve, properly paint and decoupage. And if the composition is supplemented with a tea pair, similar in design to the birdhouse, you will get a real decoration for the local area.
Using moss and other natural materials, as well as green paint when decorating a birdhouse, allows you to create a structure in an eco-friendly style. Starlings will definitely appreciate the quality of such a home.
Craftsmen, passionate about creating beauty on a birdhouse, create on the facade the effect of brickwork, combined with fine carvings. It is absolutely impossible to pass by such a “structure” and not look back.
To learn how to make a birdhouse with your own hands, see the following video.
Progress of the lesson
A starling came to visit us . Look how sad he is! What happened (Audio recording starling )
Oh guys! What a disaster! While he was in warm countries, his house was broken down. How can we help him? (Children's answers)
Starlings are the first to arrive from warm regions , what is the name of the house in which the birds live? Now I’ll tell you:
Let’s make a house for the birds
With a small round window.
Here is a starling sitting on a hazel tree ,
We are building it for him. ( Birdhouse )
And the house is called a birdhouse (choir and individual repetitions )
.
Well done guys, look what a beautiful birdhouse I drew for our starling . Let's take a look at it. Here it is a yellow house, a green roof, a black door (entrance, and even
Educator: Starling , do you like your birdhouse ?
Do you guys like it?
starling is still not happy . Let's play with him!
Physical education session (turn on music)
Let's go together now (we walk one after the other in a circle)
And let's build a house for the birds
We saw planks with a saw: (Sawed planks)
.
a birdhouse from them : (We work with a hammer)
.
Fly, birds, to the house (one by one, we “fly” in a circle like birds)
Spring has already come to us,
We will hang birdhouses (movement left and right,
Here and there, Here and there.
Educator: Guys, now we’ll sit down at the tables and start working.
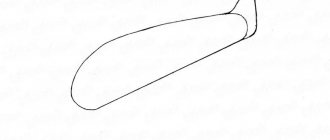
Let's show in the air how we will draw a birdhouse . You need to take the brush so that the stick looks up. So, first we paint the rectangle, then the roof, and when the paints dry, the taphole.
The teacher shows on a large piece of paper, the children look: you need to take a brush, you need to take the brush so that the stick looks up. Collect paint and squeeze excess paint onto the edge of the socket. And make strokes from left to right. When you run out of paint, you need to fill it up again.
- Let's paint the roof. (the teacher shows on his sheet)
— What should you do with the brush? (children's answers)
That's right, you need to rinse it well and then dry it with a napkin.
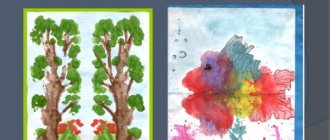
Educator: What great fellows we are! Let's see what beautiful birdhouses we have made ! (Ask the children questions about what each of them liked during the lesson)
.
Do you guys like houses? (children's answers)
and now every bird has its own home! Did you like it? SMART GIRL! Let's give ourselves a pat!
We built a birdhouse -
House of the cheerful starling .
We hung a birdhouse
Near our porch"
Drawing a birdhouse in the second junior group.
1. Learn to draw an object consisting of a rectangular shape, a rectangular roof and a circle. Correctly convey the size of the parts of an object.
2. Develop an eye; fine motor skills of hands; consolidate knowledge of the primary colors black, yellow, green.
3. Educational: To cultivate a caring attitude towards nature; desire to help birds.
Equipment: sippy cups, watercolor paints, brushes, album sheets according to the number of children, a model of a birdhouse , a dummy bird.