Who among us does not like to be photographed and photograph loved ones and loved ones? Over time, a huge number of photographs accumulate in our home, which, of course, we want to preserve and pass on to future generations. That’s why today we will discuss with you ideas for decorating a family photo album with your own hands. It would be nice to make this pleasant activity one of the most basic traditions of the family.
The editors of Colady will tell you how to make a family photo album with your own hands.
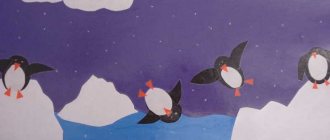
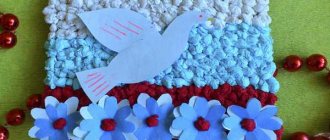
Pixabay Photos
Album "My Family"
Tatyana Korepanova
Album “My Family”
Probably in almost every garden they are working on the “My Family ”
.
After all, this topic is very important for a child. We also developed our own project and worked to bring it into reality. I won’t cite the project itself now - there are many of them on the Internet. I would like to introduce you, dear colleagues, to the final result of this project - the album “My
Family ” .
Of course, before creating it, we read a lot, drew, had various conversations related to family , watched cartoons discussing what we saw. For example, the same “Barboskins”
or
“Belka and Strelka”
family relationships very well .
Homework for parents and children was to search for photographs for the album , as well as a short creative research work on the topic “What’s in your name?”
, in which it was necessary to talk about the meaning of the names of the child and parents and some household names and nicknames. Here are some works.
After the children brought their research papers, we decided to arrange something like a defense, that is, listen to a performance.
Then we put together works, photographs, drawings on the topic “My family "
to
the album .
Now guys often take the album and look at it . And not only your photographs. Every now and then you can hear exclamations: “Oh, I was there too.”
,
“Wow, I have one too”
,
“Wow, a car just like my dad’s”
...
The children will grow up and leave us in a year and a half (we are now the senior group, but the album will remain for us to remember for a long time!
Thank you, dear colleagues, for your attention and votes!
Summary of the final lesson “My family is my fortress” Objectives: to consolidate the idea of a family as people who live together; cultivate a desire to care for loved ones, instill a sense of respect.
Summary of OOD on visual arts together with parents in the middle group “My hand is my family” Program content: • Attract children and adults to the fine arts using non-traditional imaging techniques; • Acquaintance.
Summary of cognitive activities in the second junior group “My family is my Motherland” Topic: My family is my Motherland. 2nd junior group. Goal: to form ideas about the family and its members, about the friendly relations of relatives.
Presentation of the long-term project “My family is my little homeland” Long-term project Moral and patriotic education of preschool children based on spiritual and moral traditions “MY FAMILY IS MY LITTLE.
Presentation for the second younger group “My family is my joy” Presentation for the second younger group on the topic: “My family.” Guys, today I invite you to play a little. (Slide No. 1) Listen to the riddle:.
Project “My family, my home - my homeland!” Municipal budgetary preschool educational institution of the city of Abakan Kindergarten “Nastenka” PROJECT “My family, my home.
The final event of the project “My Family. My pedigree" in the middle group Project on the topic "My family. My Pedigree" in the middle group. Final event. Goal: to cultivate love and respect for the family as people. Project in the senior group “My family is my little country” MBDOU “Kindergarten No. 29 “Golden Key” Project for children in the senior group “My family is my little country” Educator:.
Source
How to make a family album with children's pages - ideas for designing a children's family album
Of course, one of the most important events in every family is the birth of a child. We always want to design this chapter of our lives in some special way. After all, even the smallest detail is important here. We have a great many photographs of growing children, because we want to capture every moment of the little person’s life. And choosing some individual photos from them to put in an album can be very difficult. But try to select the most characteristic photographs that most clearly reflect the important moments in your baby’s life.
At first, these could be photos of you with the baby still in your tummy. Next - discharge from the maternity hospital. A newborn baby meets family members and closest people. First smile. First steps. Walks. Deep sleep. Breakfast. For any mother, all these moments are incredibly important and each one will remain in memory forever.
You can also attach the baby’s first hairs to the photo album, make decorations from the first booties, ribbon, from a lace baby scarf or cap. Don’t forget to describe next to the photographs the events that are depicted in them. Over time, you can add your child’s drawings and various school or sports trophies and certificates to the photo album.
Master class “Creating a group family album”
Natalia Pavlova
Master class “Creating a group family album”
Dear Colleagues! I would like to share with you how I designed a family album for the group . I have 1 junior group , I decided to create it for our children , to form children’s initial ideas about family, to cultivate a sense of affection and love for their parents and relatives. The first stage was collecting photographs and purchasing a regular album . After the photographs were collected, the question arose of what material to make the album . The choice fell on felt. I chose different colors. For the cover I used gray felt in size A4. Using a glue gun, I formed the base, bending the edges inward.
Then I treated the fold of the album with nylon thread
The basis of the album is ready
I wrote the inscriptions for the album
Having cut out the letters, I transferred them to felt
Then I cut out the letters from felt.
I placed the finished letters on the base of the album and glued them with a glue gun.
Then I decided to make a family out of felt, also drawing on plain paper, cutting them out and transferring them onto felt, and also glued the finished figures onto the base of the album using a glue gun
With this the album cover was ready.
All that remained was to decorate the inside, before putting the photographs in their places, it was necessary to sign the names of the children, parents and relatives. I designed this using stickers
Master class “Correctional and developmental work with hyperactive children through group gathering technology” Goal: to introduce teachers to the basic elements of group gathering technology by L. V. Svirskaya Objectives: to create conditions for cognitive and business.
For younger preschool age
A baby book, which is quite easy to make with your own hands, is most often intended for children 3-4 years old. Children are actively engaged in such developmental aids in kindergarten. But it is also important for parents to use them at home. Thanks to the bright colorful pictures, they perfectly captivate children, hold their attention, and arouse interest. As a result, useful activities turn into games.
Topics and content
To captivate a 3-4 year old child, it is important to choose the right topics for a book you create with your own hands. Children are most attracted to fairy tales and cartoons. The thematic direction of the book can be chosen from one work or a whole group of different ones.
For example, little books on the theme of popular Russian fairy tales turn out to be interesting. Another option is to take your child’s favorite cartoon and only use it for decoration. Today, parents and educators often choose the following cartoons as the main theme of children's books: “Little Kids”, “Three Cats”, “Fixies”, “Paw Patrol”, “Blue Tractor”, “Barboskins”. Another interesting option is to come up with a cartoon or fairy tale yourself.
Here you don’t need to be able to draw perfectly and write long, complex stories. It’s enough to come up with a couple of funny characters and a simple story about them. It will be possible to make the fairy tale individual, involving the child himself, who plans to study with it.
In addition to cartoons and fairy tales, you can use many other themes for children's books. The table will tell you which ones exactly.
| Themes | Explanation |
| Animals | You can make the topic of animals general or talk about only one direction in the book. For example, about pets, about the inhabitants of the forest, the zoo. If your child has his own pet, it is important to make him the main character and theme of the book. |
| Seasons | The topic allows you to thoroughly study the seasons and the characteristics of each. When creating such books for babies, you can even use natural materials. For example, dry leaves, acorns, dried rowan. |
| Plants, birds, sea, dinosaurs | Any theme of living nature can be made the main one in a baby book. It is advisable to choose one that the child himself is interested in. |
| Food | If you make food and dishes the main theme of the book, this will introduce your child to healthy and unhealthy foods. And also - to understand how important food is for the body, how it affects it, why it is necessary to have breakfast and be less fond of sweets. |
| Hospital, fire station, garage, library | Using the main theme for a baby book, you can tell your child about different moments in life and professions. Here it is also worth focusing on the interests of the baby at a specific period. |
| Family | If you plan to study a baby book at home, you can make the child’s family its main theme. Then real photographs of the baby and his family will be used. To study in kindergarten, it is better to simply talk about the family in general, explain the name of this or that relative. Here you can talk about warmth and sincerity, about love between loved ones and other important things. |
Selection of texts
The little book, which you can make completely with your own hands, is filled with many texts. The creator himself decides which ones to choose for her. It also depends on the main topic.
The easiest option is to use one short fairy tale. Then it will become the main text in the book. All that remains is to choose suitable pictures and interesting tasks. For example, you can separately draw or paste the characters described in the story and next to them ask questions for reflection: Who is shown in the picture? Was he in a fairy tale? Is this a good or evil character? Did the reader like it?
Another interesting option is to make the fairy tale the main one, and additionally select thematic poems, riddles, and proverbs for it. For example, for “Turnip” there are sayings about this vegetable (“Cheaper than steamed turnips”, “The house is dirty - even this turnip”). Afterwards, each proverb can be discussed with the child and their meaning explained.
This principle can be applied to any topic. For example, for “Animals”, select thematic fairy tales, short stories, riddles, and interesting facts.
A selection of pictures
Today, the process of selecting pictures turns out to be very simple for both educators and parents. If the main theme of the baby book is planned to be a fairy tale or a cartoon, then the illustrations can be taken from the same place. The easiest option is to turn on the cartoon on the computer, “cut” suitable frames, and then just print them. It’s even more convenient to use pages from old books.
Decor
To design a baby book for children 3-4 years old, you need:
- Cut a sheet of cardboard in half and fold each piece in half.
- Iron the fold to make it as even as possible.
- Place the sheets together and make 2 holes in the middle for the tape.
- Securely fasten the workpiece.
- Fill the pages with pictures and texts.
- Add decorations in the form of beads, stickers, appliques.
How to use
Children aged 3-4 years can use the baby book repeatedly. They are used as developmental aids in kindergarten and at home. An adult should be with the baby during classes. It helps you understand assignments, find answers to questions, and read all texts.
Scrapbooking
Scrapbooking is a decorative and applied art. At the moment of its greatest popularity - with the advent of photography, this was the compilation of photo albums from sheets of paper. Now fashion is back. and scrapbooking is interpreted somewhat more broadly. This technique is used to make postcards, notepads, notebooks, and albums for collecting.
Types of photo albums
The key to success in creativity is a good idea. The reason for creating a handmade photo album can be any important event or anticipation of it. Suffice it to recall the huge variety of albums that all conscripts prepare for demobilization.
It’s good to give a homemade gift to a relative or close friend. Such efforts and your sincere feelings will be appreciated. And both the recipient and the giver will enjoy the gift.
Wedding
Wedding album design is at the top of the list of popular scrapbooking ideas. The event of the birth of a family will be immortalized for the spouses, and they will return more than once or twice to touching, dear moments, leafing through the wedding album.
For a newborn
Such an event is never forgotten. But an album with images of the first minutes of a baby’s life, his smile, and his first steps will help preserve the smallest details.
Such an album will also include a tag from the maternity hospital, a lock of hair, a cast of a foot, a handprint, record the first dimensions, stages of growth and maturation of the baby, his popular sayings, funny incidents.
It is better to make the album so that new pages can be added over time. Thus, its creation can be extended in time for several years.
Children's
Thematic children's albums continue the theme of growing up. They reflect certain periods of life - preschool in kindergarten, elementary school. As the child grows up, he will be able to take part in the creation of his personal album.
It will contain drawings, applications, funny notes and other creative works of children. And of course, photographs capturing various important and everyday moments.
It will be possible to truly understand how important all this is only after many years.
From the trip
We bring a good set of photographs from vacations and travels. From them you can create collages or chronicles of impressions and new places explored.
If you bring back from vacation several shells, dried flowers, branches of strange plants, small flat souvenirs, all of them will be useful for decoration.
For the anniversary
You can make an original gift for a relative’s anniversary with your own hands. The main idea of the project will be warm memories that connect you and the hero of the day for many years.
The gift will emphasize your attention, effort and devoted feelings. Rest assured, the birthday boy will be moved to tears.
Family
Everyone probably has a family album with photos. If you think it's time to update it, get to work. Add old greeting cards, newspaper clippings, letters to photos from years gone by, make a list of significant dates, write down your family's motto or mission. The result will be a real chronicle of generations.
To other events
Other ideas include a demobilization album, thematic albums of an athlete, a student, a cook, and handicrafts. An interesting idea is to compile a New Year's chronicle of different years and see how you and the New Year's surroundings around you have changed.
The idea of designing a family album about a vacation with trophies from long journeys
We all love to relax, and from every trip we bring a bunch of photographs. Naturally, these photos also deserve their own photo album. You can decorate such an album with postcards depicting the countries where you have vacationed, trophies from your travels - be it a piece of shell or a dried exotic plant. You can also make an ornament out of sand from the beaches where you sunbathed and took pictures. Do not forget about the descriptions of what is shown in the photographs. After all, your children, many years later, will be very interested in reading about the adventures of their parents on vacation, and looking at the colorful illustrations for this exciting story.
Performance technique
Anyone can make a simple, beautiful and original craft. A ready-made album or creativity kit can be found on sale. But even in its design there is room for imagination, a sense of humor and taste.
Before starting work, it would be a good idea to draw a layout by hand, plan out the pages, and sketch out the design. This will help you save money without buying unnecessary materials, which are quite expensive. And time will not be wasted on a labor-intensive process.
The simplest DIY album
To gain first experience, we offer a simple master class. It describes the standard algorithm of actions. You can make your own adjustments by replacing materials and using various decorations.
Materials and tools
For a simple homemade album we may need:
Cover design
The base is covered with decorative fabric, artificial leather or suede, and designer paper. Decorate to your liking.
Binding
You can connect the album sheets with or without binding. The first option is more labor-intensive, the second is very simple.
Holes are made in the album sheets at equal distances using a hole punch. Thread a ribbon or cord through the holes and tie the ends. You can use special split rings of a suitable size. For a homemade album, two or three of these clips are enough, but you can make more.
If desired, make an album with a classic binding.
Decoration
All kinds of decorative elements are used for decoration: beads, rhinestones, lace, fur, artificial flowers, pieces of leather, curly pendants, decorative tape and much more.
For beginners, ready-made page templates are recommended - sketches with a ready-made layout of pictures, recommendations for color, materials and decor. As you gain experience, you will definitely develop your own taste and style and will create not according to prompting, but according to personal inspiration.
Try this unusual type of creativity, and you will understand how sweet it is: on a quiet, cozy evening, sit back on the sofa, unfold an album with photographs and immerse yourself in the magical world of memories.
Source
Advantages of a baby book
Educational crafts have a huge number of advantages:
- folds easily, does not take up much space, so you can take it with you on trips or for a walk;
- if the book is made of felt, it can be washed;
- it is possible to periodically change pages and add new ones;
- multifunctionality - depending on the content, develops the child’s fine motor skills, teaches writing and other skills;
- if desired, you can make a whole play complex out of the craft, giving it the shape of a house, car, etc.;
- You can use a felt book to play games, construct buildings and much more.
Required materials and tools
For beginners, before making a photo album with your own hands, you need to study step-by-step instructions, be patient, and have the necessary tools and materials. The easiest way is to buy a ready-made kit for creating a photo album in a store, but it is much more interesting and cheaper to create using improvised means. In addition, all family members can participate in this entertaining process.
Looking at the finished album, one gets the impression that it is simply unrealistic to recreate this on your own. But nothing is impossible!
So, to create such a masterpiece you will need:
It is important to use decorative details when decorating. This could be lace, fur or leather details, chains, beads, clasps, etc.
Thematic ideas for designing a photo album
Pleasant memories require beautiful cutting. Selfie, which has become fashionable, allows you to make photo albums with your own hands for almost every occasion, but still more often they are created for more global reasons.
Family Chronicle
It can look like a full-fledged photo book. Its contents will include not only interesting and memorable photographs, but also newspaper clippings, postcards dear to the heart, and things closely related to family history. It’s a good idea to write a motto on the title page that reflects the credo of the family.
DIY family photo album
How to make a photo album about your family with your own hands? For example, in genealogical chronology. Dig into the family archives. There will probably be many photographs of your ancestors that you remember and will be able to tell something to your descendants. These photos will appear on the first pages of the chronicle. The story should continue right up to the present day. In the future, your creativity can lay the basis for a whole galaxy of similar photo albums.
Make a series of family photo albums
If a family leads an active lifestyle and does not forget to record everything that happens in it on camera, then it will be difficult to fit everything into one album. In this case, you should divide all the photos into thematic groups and try to assemble a photo album with your own hands for each occasion.
If you love to travel, take a selection of photos from your most memorable trips. Additional decor for such albums can be postcards depicting excursion places of countries or trophies obtained, such as a dried leaf of an exotic plant. The epic of a sea holiday is perfectly decorated with sand, pebbles, shells from the beaches, seagull feathers, and sprigs of seaweed.
DIY photo album about travel
Don't be lazy to describe what is shown on the pages. It will be interesting for your descendants to read about your adventures.
Start working on a photo album with your own hands, and design ideas will appear in your head. All relatives can be involved in the matter. Give them a page and ask them to decorate it as they wish. You can ask them to compose a poem or write down a life story, or make a drawing with their own hands. In a family photo album, any illustration will be significant.
Make a photo album for the whole family
DIY children's photo album
“Don’t think that the time it takes to create a child’s photo album with your own hands will be limited to one day - it will be a long process”
The birth of a child is probably the most important event in the life of every family, overshadowing even a wedding, so the desire to immortalize every minute of the child’s life is quite natural. How to make a child’s photo album with your own hands so that what is reflected in it evokes affection even years later? Pay attention to details and wisely plan the sequence of filling with photographs. From the heap of photographs, try to select symbolic images that tell about a new milestone in a child’s life.
DIY children's photo album
You can start the story from afar. Let a photo of the last days of pregnancy appear on the first page. An excellent addition to them would be ultrasound printouts. The logical continuation will be shots from the discharge photo shoot in the celebration hall of the maternity hospital. Next will be pictures with relatives. Later they will paste into the photo album with their own hands: the first smile, the first tooth, the first independent breakfast, the first steps. For every mother, these events are simply etched in her memory, and a desire is born to share her happiness with the whole world.
Ultrasound printouts would be a great addition.
There are a lot of ideas for designing baby photo albums. They can be made into a repository of children's heirlooms by gluing inside a strand of the first hair, ribbons from a cap, or a piece of a bow that was used to tie a blanket. Over time, it will be possible to add children's drawings, crafts and greeting cards brought from the garden and school. Then they will be replaced by artifacts of achievements in the form of certificates and awards.
An example of the design of pages for a children's photo album
Don’t think that the time it takes to create a child’s photo album with your own hands will be limited to one day - it will be a long process. Its contents will be replenished as the object grows.
One more thing. Children often delight us with pearls. Don't be lazy to record them in the same album. This will be a great reason for fun years later and will decorate the pages well if it appears on them in color.
Wedding photoalbum
The wedding day is special for both newlyweds. Naturally, you want to save every moment of it in your memory. A huge number of photographs from the celebration will require systematic storage in a decent design. So how can you make a photo album with your own hands as unusual as the event itself?
DIY wedding photo album
It's not trivial to decorate it. The bride's accessories, lace, ribbons, and elements of wedding paraphernalia will help with this. The photo can be decorated with dried flower buds from a young wedding bouquet. Over the years, such little things will become incredibly valuable and touching. Here are some more photo album design ideas.
1. Recreate the historical accuracy of the wedding celebration by grouping photos according to the chronology of its course.
Recreate the chronology of events on the pages of the album
2. Don’t be afraid to put so-called reportage and staged photographs in the album. They can be quite funny.
3. Try to give the design of the photo album a specific stylistic direction. It can be retro or something more modern.
Give the album a general stylistic direction
4. Create personal pages for portraits of heroes of the occasion and VIP guests.
5. When making a photo album with your own hands, supplement it with images of landscapes that served as the background for the wedding event.
Complete the album with landscape images
6. Multi-colored pages in the album will look original.
7. Bet on the originality of the photographs themselves. Let them be highlighted in sepia or decorated like a painting. Dilute color photos with black and white.
Dilute color photos with black and white.
8. In the wedding album, you can use several photos of the newlyweds taken on the eve of the wedding, as well as those telling about the ups and downs of the preparations for it.
9. Separate the official part and the party. This way you will have two albums with photos at once.
10. A photo collage of small-format photographs is also interesting.
Photo collage of small format photographs
Design ideas used when creating a photo album with your own hands can cause a certain imbalance in the perception of compositions due to the overload of frames with characters. When placing close-up group photographs in a photo album you created yourself, try to place them on the spread so that the views of the guests captured in them are directed in one direction. Then you won't get the impression that they are looking at each other. Also, a spread literally “littered” with small photos is not perceived in the best way. Use a compositional approach to their arrangement, dilute the pictures with texts and decorative elements. Let your design talents make a splash!
Dilute your photos with text and decor
How to make an album cover
First you need to decide on the size of the future photo album and choose a design style. There are a lot of interesting original ideas for design. The cover can be soft fabric, leather, paper, decorated with various elements.
To make the back cover of an album measuring 25x25 cm, you must perform the following steps:
The algorithm for making the front cover is slightly different due to the use of decorative elements. For example, you can make a window for a photograph that will tell you in advance about the contents of the future photo album instead of the name.
To do this, the following steps are required:
Then, using a hole punch, neat holes are made in both blanks at a distance of 1.5-2.5 cm from the edge. Rings or tape are inserted into them to connect the parts of the cover.
Creating a photo album with a thick spine
We present a master class on creating a photo album with a reinforced spine. It allows you to compensate for the thickness of photographs and will prevent the product from swelling.
Required materials and tools
To create such an album you will have to stock up on:
- high-density designer paper. You will need 24 sheets with dimensions 19x20 cm;
- special paper for scrapbooking - you will need two sheets for making endpapers;
- 2 sheets of cardboard for binding with a format of 20x18 and a thickness of 2mm;
- 2 sheets of similar material with a size of 19x10 cm
- thin paper to create a binding cover with a weight of 100 grams per square meter;
- thicker paper to create a spine - 140-200 g/m2;
- 2 sheets of felt of the desired color. The thickness of the material should be in the range from 1 to 1.5 mm, the size of the first cut is 23.5x43 cm, the second is 12x12 cm;
- cotton yarn, similar in color to felt, for crocheting - “Iris” or “Snowflake”;
- 2 gypsy needles;
- cotton ribbons;
- a cord with a round cross-section of 1.5 mm and a length of 15 cm;
- office clips 51 mm;
- needle file;
- instant glue;
- narrow double-sided tape, masking tape;
- universal glue, you can use UHU Twist&Glue;
- glue in the form of a pencil;
- silicone sealant;
- a special bone for scoring, a knitting needle or a handle with an empty core;
- soft and voluminous material to create a binding cover, you can use leftover fleece;
- flat thin and wide brushes with hard bristles;
- scissors;
- metal ruler;
- sponge;
- meter-long suede cord, juniper beads.
Let's discuss some of the nuances. The master class will describe the process of creating an album with dimensions of 19x18 cm, consisting of 24 sheets. If you plan to increase the number of pages, the 51mm clothespins may not be able to withstand the stress and break. When creating a product larger than 21 cm, 3 binding tapes will not be enough. It's better to take 4 right away.
Preparing and cutting paper
Regardless of the selected album size, when cutting sheets into a specific format, you need to take into account that the sheets should be 2 cm wider than the planned width of the finished product. This excess is necessary to create a bend, due to which a thickening of the spine is formed.
The fold lines and height of the future album should run in the same direction as the longitudinal line of the paper. This will make the paper easier to bend. On the longitudinal section you can see the gloss, this is especially visible when the paper is in a stack. The longitudinal edge wetted with water will warp and go in waves. But, as a rule, complex tests are not needed, and already when folding the paper, it becomes clear which side needs to be made the height of the album. Maintaining the direction of the tide will help extend the life of the product.
Creasing sheets for a photo album
In order for the folds to be neat, it is necessary to crease the sheets. This operation consists of applying straight grooves to the paper, which are necessary for bending thick sheets - more than 175 g/m².
To create grooves, you can use a special board, a scoring bone, a knitting needle with a diameter of 3.5-4 mm, or a pen with an empty rod. It is better not to use the latter option, since the quality and width of the line formed by them are not sufficient for working with thick paper. Since not every home has professional tools, you will have to limit yourself to a metal ruler and a knitting needle. First you need to apply a ruler and make invisible marks two cm from the edge. Then press the line with a knitting needle, not allowing the ruler to move away from the marks.
If you have stocked up on a special mat for cutting paper and a scoring bone, you can speed up the process by marking on the mat using a bone and a metal ruler.
Use just enough force to create a groove, but do not rip through the paper. Bend the paper along the formed line and iron the fold with force with a creasing bone.
Formation of notebooks
You need to wrap a sheet of paper prepared using scoring on a flat piece of paper - you get a notebook. While doing this work, try to align the cuts as carefully as possible. Repeat this procedure 9 more times. You will have 10 notebooks. The two remaining sheets will be useful for combining with the endpapers. When cutting out the latter, take into account the direction of the print on sheets of scrap paper. Remember that the fold line on one endpaper should be on the right side, and the fold line on the other should be on the left.
Form a stack of notebooks and tap it on the table on three open sides to align the sheets of paper as much as possible. Next, we fix the future album with clamps, having previously placed thick cardboard on both sides for binding with a size of 19x18 cm, so as not to damage the paper and not leave marks on it. We leave the preparation until the morning. During this time, it will have time to compact well. This will make it much easier for you to stitch your notebooks together, and the finished work will look much neater.
How to properly sew notebooks into a block
To stitch the album, use prepared ribbons. The ribbons should be made of fabric that is not too smooth, moderately thin and not too loose. 3 tapes will be enough for work. To make the album presented in this master class, two-centimeter cotton ribbons with a length of 15 cm are suitable. These products are optimal for a given number of notebooks. They are long enough and at the same time do not interfere with stitching.
The tape width of 2 cm was chosen as a result of the following calculations:
- we retreat 1.5 cm from each edge of the 19-centimeter album - 16 cm remains to be divided;
- with a tape width of 2 cm, the remaining free areas will measure 2.5 cm.
Calculations may differ depending on the height of the album and ribbons of a certain width. The main thing is to step back 1-1.5 cm from the edges and prepare the required number of tapes.
The order in our case is as follows: 1.5-2.5-2-2.5-2-2.5-2-2.5-1.5. It is necessary to mark the cardboard in which the notebooks were kept at night, according to this formula. When connecting cardboard to a stack of shaped notebooks to form cuts, you need to make sure that the sides where you started marking are directed in the same direction. This is very important when using cardboard that is not perfectly cut, when a shift of even 0.5 mm prevents you from making even, perpendicular cuts relative to the length of the spine.
After this, you need to make shallow cuts along the applied markings. Additional alignment of the notebooks before starting this procedure will not be superfluous. Cover the stack with cardboard on both sides, secure with clamps along the short edges closer to the spine, and begin making cuts. For this operation, a needle file is required, which allows you to form a wedge-shaped depression. It will not be possible to make such a cut using a knife.
You should not cut into the paper too deeply - pages with such indentations look untidy, and glue may leak through the holes. This creates a hole that is too large for the thread, in which it will not fit snugly. If the holes are made too small, it will be inconvenient to sew the notebooks together. You need to saw through the spine enough to completely pierce the fold of the first sheet and only slightly touch the second. After completing the procedure, the clips and cardboard can be removed.
Stitching notebooks
Place the stack with the back side facing up. Insert a cotton thread up to 1 m long in one fold into a thick needle with a large eye. There is no need to tie a knot. With this length of thread, it is convenient to sew; it does not get tangled or tied into knots.
Place the top notebook with the flyleaf on the table on which the prepared tapes lie. Insert the needle into the hole on the right side from the outside inwards and pull the thread through, leaving a tail 5-7 cm long.
Take the top notebook and turn it over so that the endpaper is in contact with the surface of the table (first place the ribbons under the notebook). From the outside in, insert the needle into the right hole, leaving a tail of 5-7 centimeters.
It will be more convenient to work if the notebooks are placed on a raised surface.
We thread the needle through all the holes one by one with a snake. When the needle comes out of the last hole, tighten the thread and at the same time hold the tail.
We take the second notebook, turn it over and do the same steps in the opposite direction. In places where the spine is covered with ribbons, the thread must be placed under the previous stitch. Having sewn the second row, tie the tail with the working thread with several knots.
We lay the third notebook and stitch it, having reached the tape, we put the thread only under the previous stitch. We squeeze the notebooks with our fingers in the area of the last hole and insert the needle between the first two notebooks immediately after the cross stitch. We thread the needle through the formed loop and tighten the thread. We continue to work in this manner until the thread becomes too short. We bring the needle out and free it from the thread. We tie a knot in such a place that it falls into the gap on the spine, covered with ribbons. We insert a new thread into the needle, make a loop on it, throw it over the knot and tighten it tightly so that the new knot does not slip off at the moment of tension. We continue to sew notebooks.
What mistakes can be made?
- pull the thread too loosely or too tightly while sewing - in the first case, gaps form between the elements of the album, in the second, the thread tears holes and the spine becomes rounded;
- do not align the sheets in height every time you start stitching a new notebook;
- allow the formation of knots and loops on the inside if the thread is cut too long.
After all the notebooks are stitched, you need to pack the stack in cardboard and form a semicircular spine. To do this, you need to move the notebooks so that they line up like a ladder from the edge to the center of the block. It is enough to make a slight smooth shift. If everything works, place the clamp on the finished half and round the other side of the spine. We also fix it with a clamp.
Gluing the spine of a future photo album
To glue the spine, you can use printing glue or silicone sealant, which ensures the flexibility of the dried layer.
Cover the ends of the block next to the spine with masking tape. Apply a small layer of sealant to the spine and distribute it over the entire surface. Next, apply a second, thicker layer and remove the glue from the outer holes. We clamp the product and leave it for 6 hours.
Captal weaving
We cut the ribbons and fix the ends on the endpapers with a glue stick. We remove the masking tape, cut off the excess glue and begin weaving the captal. It will hold the sides of the block together and hide the gap between the binding cover and the spine.
We take two needles with a large eye and insert a thread into each of them in one fold, 60 mm long. We connect the threads using a common knot.
We install the block with the spine facing us and fix the cord on top. Holding it with your left hand, we pierce a hole in the last notebook on the right side exactly in the middle with one of the needles. Pull the thread until the knot touches the spine, braid the cord with a needle and tighten the loop. After this we wrap the cord on the other side. When the last ring is near the center of the second notebook, we proceed to braiding with the second needle. We perform the required number of turns to reach the middle of the third notebook. We alternate needles until we finish the work, after which we tie both into a knot and hide them in sealant. We weave the captal from the other edge of the spine in a similar way.
Making a binding cover
Before you start creating the binding cover, you need to understand the size of each of its sections.
- The height of the cardboard for binding is 19.6 cm - it is equal to the height of the block with 3 mm increases at the top and bottom.
- The width of the cardboard consists of the width of the block - 18 cm, + 4 mm on one side. You need to glue fleece to both parts.
- The width of the spine is measured and marked on thick paper with a height of 19.6 cm. We draw scoring lines to smoothly round the spine. Cut the spine according to the markings.
- Leave a small distance equal to the thickness of the cardboard together with the fleece, multiplied by 2, between the spine and the internal ribs of the binding material.
- We make guides using thin paper, according to which the lid parts will be glued.
- We assemble all the parts using universal glue, pressing them with a scoring bone, and leave them to dry.
We try on the manufactured frame, and if it fits well, we move on to gluing the cover.
Making a felt cover
Mark the felt using a non-waterproof marker. Set aside 2 cm on the right side for the hem. Also set aside 2 cm from the bottom. Place the lid exactly along the marked lines. Apply a 2 cm wide strip of glue to the long side of the structure. Wrap the edge with felt and do the same with the bottom. We cut the felt at an angle of 45 degrees to form a corner from the vertical and horizontal lapel. We wrap the cover with fleece and form the remaining corners.
Connecting the cover to the block
The first step is gluing the back endpaper. Apply glue and apply paper so that 3 mm protrudes on three sides. We straighten the paper carefully, expelling the air from under it. We fix the front endpaper in the same way. All that remains is to add decorative details, and the process can be considered complete.
Pages and binding
You can not connect the photo album with ribbon or rings, but arrange it in the form of a voluminous book with binding. Accordingly, then there will be no need for holes in parts of the cover. For album pages, it is better to take thick white paper.
The sheets are connected to each other as follows:
The number of pages can be arbitrary and is determined only by the desire of the master and the availability of the necessary materials. After this, you can begin making the binding.
To do this you will need:
Do not attach the spine to the pages of the product, otherwise they may not open properly.
That's the whole secret of how to make a photo album with your own hands. Step by step, it won’t be difficult for beginners to create such a masterpiece. Now all that remains is to fill the album with photographs.
DIY photo album: step by step
Stage I
Essentially this is preparation for work. At this stage, we focus on selecting tools and purchasing materials. What will you need?
Materials:
- thick (500 gsm; m) cardboard;
- scrap paper;
- notebook;
- padding polyester;
- adhesive fabric;
- tapes.
Tools:
- awl;
- ruler;
- needle;
- breadboard knife;
- pencil.
Stage II
We sit down to plan the implementation of our own photo album design ideas. The result will not disappoint if you clearly formulate what you want to see in the end. This is where a notebook comes into play. It is desirable that it be similar in size to the future original. It will become a kind of template for work. On its pages you can experiment with the arrangement of photographs and decorative elements. The most successful options are recorded.
Sketch of the location of pictures and decorative elements
Stage III
Let's start creating a photo album with our own hands by assembling the spines for the pages. To do this, you can use less thick photo cardboard. Strips are cut from it corresponding to the height of the sheets. The width of the stripes may vary. On average, the figure rarely exceeds 3 cm.
Stripes corresponding to sheet heights
Using a ruler, find the center of the narrow part. We set aside 2 mm on both sides of it if the landscape pages have convex decorations and 1 mm in other cases. We proceed in the same way from the opposite side. We connect the outlines with a ruler and draw a strip not with a pencil, but not with a writing pen. This photo album design idea will help you bend the sheet strictly along the given lines. We cut off the corners of the workpiece. Now you can put sheets in them and fix them with glue. The outer sheets should not have “partners”. The free part of the spine will be needed for another.
Fix the leaves with glue
Stage IV
Page finishing. Their decor begins with covering them with scrap paper. Select the right colors and create a general background against which the rest of the composition elements will later be located. The decor for a photo album assembled with your own hands can be:
- applications;
- vinyl stickers;
- newspaper clippings;
- beautiful cords;
- ribbons;
- lace;
- beads.
Decorative materials for photo album design
In general, everything that your fantasy draws. If there is an abundance of volumetric parts, they should be evenly placed on the pages, then the sheets will not be deformed, and the product as a whole will not lose its shape. This is another reason to work on a photo album with your own hands step by step.
Place the decor evenly on the pages
Stage V
We make the binding and attach the cover. We collect the sheets glued into the spines into a book and glue the first ones with a piece of bandage, gauze or adhesive fabric, so that there is one and a half centimeters of free material left at the edges of the binding.
Cover the spine with gauze
From cotton braid with processed edges, we cut out two strips, the same length as the width of the binding. We bend the remaining gauze and glue it exactly along the edge. This idea for decorating a photo album will help hide flaws in the assembly of the end part of the binding and will serve as an additional fixation for the sheets, preventing them from coming off.
Glue two strips along the edge
While the cheesecloth is drying, work directly on the spine for the binding. If the paper for work is not too thick, then the part can be assembled. You will have to cut out two components: one strictly according to the dimensions of the binding, the second with a width allowance of 3 cm. We lay the smaller strip on top of the larger one so that there are even allowances on both sides. Mark the boundaries and glue the parts.
Spine for binding
It would seem that's it? But at this stage there are some secrets. Design ideas from scrapbooking professionals will help you make a high-quality photo album with your own hands. What do they advise? A thick spine will prevent the album from opening. Is it possible to avoid problems? Yes, if you draw longitudinal lines along the inside of the spine with a sharp object (the same non-writing pen) with a step distance of 1 cm. This technique will allow the part to bend smoothly.
But the nuances of the topic “how to make a photo album with your own hands” do not end there.
The spine is fixed under the cover
The spine must not be glued to the binding. It is fixed on the cover. The structure is allowed to dry, after which the sheets collected on gauze are placed in it. We fix the free ends of the fabric and the part of the sheet spine that was prudently left when assembling the photo album with our own hands to the inside of the cover. It’s better to make it a transparent “Moment”. It holds more firmly and marks are removed more easily. The drips are simply erased with an eraser.
Inside cover
The creation of the photo album is complete. All that remains is to decorate the cover and fill it with content.
Scrapbooking technique in creating a photo album
Scrapbooking is an art form with which original photo albums are created and designed. Transforming an ordinary boring photo album into a unique story of our life.
The origin of this technique goes back to the distant 16th century. At that time, notepads for recording important dates, valuable advice, recipes, etc. were at the peak of popularity. By the end of the 17th century, books began to appear with additional blank pages for making notes and pasting in illustrations. This was the birth of the scrapbooking technique.
In the 19th century, with the beginning of the mass distribution of photographs, a real revolution took place - special pockets were made for photographs, and the pages were painted with different colors and designs. Albums for girls with pictures, photos and various inscriptions were especially popular.
Today, there are many ways to design photo albums, and scrapbooking is popular all over the planet.
Ready-made sketches for pages
A sketch is a small page template for a future album. In scrapbooking, a sketch is a prepared sketch to speed up and convenient the work process. Ready-made sketches are a godsend for beginners who are wondering how to make an original photo album with their own hands. By step-by-step selecting shades and photographs, you can easily create inimitable pages of your future album.
These ready-made sketches are simply an inexhaustible source of ideas and inspiration! Gradually, as the work progresses, templates will be used less and less, and soon they will completely fade into the background, clearing the way for the uncontrollable imagination of the master. Everything depends only on the desire to act and create. Such ready-made sketches are also useful for visualizing a future photo album.
Themes of homemade albums
Making an original photo album with your own hands if you have the necessary tools and materials, as well as ideas for its design, is not at all difficult.
All that remains is to choose a plot and some significant life event, for example:
In general, the theme of a homemade photo album can be any bright event in life, the memories of which you want to keep in your memory for a long time.
Another reason to do this kind of handicraft could be creating a gift for relatives, colleagues or friends. It’s enough just to make an original photo album and present it for any holiday of a loved one. Such a surprise will not leave anyone indifferent!
Design ideas and themes
Albums can be filled with diverse photographs - without hesitation. But it’s much more interesting to leaf through a product that has a specific theme. Such a product will refer us to a particular event, evoking pleasant memories. Finding an idea for album design is not difficult. You just need to choose some bright significant event from your life.
Most popular options
- Birth of a child.
- The first year of your baby's life.
- Graduation celebrations at the end of kindergarten or school.
- Wedding celebration.
- Anniversary or birthday.
- Journey.
- Gift for a colleague or boss
- Favorite city.
- Life of a pet.
As you can see, themes for photo albums are often suggested by life itself.
Album for a newborn
The birth of a child is one of the most popular reasons for creating a themed album. You can come up with a huge variety of options for its design. Albums of unusual shape look very interesting - in the form of a favorite toy - a car, a boat or a bunny - for a boy, a tumbler or a carriage for a girl. On each page you can place cards on which it will be very convenient to note all the changes occurring with the growing baby.
You can print these cards yourself or purchase a ready-made set. On them it will be possible to mark height and weight indicators, the appearance of each tooth, the day when the baby smiled for the first time, took a rattle in his hand, sat down, took his first steps, tearing away from the hands of adults.
On the first pages of the album it is worth placing a photo with images of mom and dad waiting for a happy moment, an ultrasound image, preferably three-dimensional, a meeting of the mother with the baby in her arms at the moment of discharge from the maternity hospital. After this, all that remains is to fill out the following pages as the child grows up. It is better to do this every month, noting all the changes and new achievements of the baby. Don't forget to take a photo of his stroller, his favorite toy, and his first sandals. Decorate the pages with stickers and cute little things to match your chosen theme.
Wedding album
This album is dedicated to the most significant day for every family. Telling a story about it in photographs will make it unforgettable. Any wedding accessories are suitable for decoration - bride's gloves, images of connected wedding rings, flower arches, doves, wedding cake, glasses with the names of the bride and groom and the wedding date, bouquets, voluminous flowers. Lace, tulle, ready-made flowers and butterflies made of organza, white crepe satin, pearls, and satin ribbons are suitable for decoration.
Attach a sign in the center of the cover that says “Our Wedding” or “Wedding Album.” If there are too many good photos and you don’t want to part with any of them, equip the album with folding pockets. This way you can place several photos on one page at once. In the album you can also organize a place to store a disc with a video recording of the celebration. To do this, you need to glue a beautiful CD sleeve to the endpaper of the cover.
Family album
Over many years of family life, a lot of photographs accumulate. They reflect the entire history of an individual family. In the stack of photographs is the very beginning of the journey - wedding photographs, and joyful events throughout life, and photographs of children, and numerous relatives. People keep family archives not only to be nostalgic for bygone times, but also to talk about the life of the family in its various periods.
You need to start keeping an album from the first days of family life. And what could be a better decoration for the cover of such a product than a wedding photograph. If it was made as a gift for a married couple, an image of the spouses celebrating their next wedding anniversary would be suitable. It would be useful to write on the cover a title that corresponds in meaning to its content.
Each period of life that the couple lived together can be assigned a separate spread. Restore the chronology of events from the time they met to the present day. People often keep various souvenirs, love notes, and tickets from joint visits to events in secluded corners. All these little things should not be forgotten when preparing a family photo chronicle.
The most important milestones in the life of every family are a wedding, the expectation and birth of children, birthdays of relatives and friends, joint travel and events, the purchase of common housing, calendar holidays, marriages of children and the birth of grandchildren. Amateur photos telling about everyday life are also very important to preserve. A family tree would look logical on the flyleaf.
Birthday photo album
A photo album can be a great gift for a loved one. In this case, the choice of page design and cover will depend on his personal interests and hobbies. Don't forget to take into account the person's profession and marital status. Since your relative or friend will add pictures themselves, it is better to make pockets or envelopes for photos of different sizes.
When making a gift item, you will have to tinker a lot, but the result will not only please your relatives, friends or colleagues, but will also give you a reason to be proud of yourself. And if everyone around you knows about your skills, guess who they will want to order a gift album from next time.
School or graduation photo album
School photographs allow you to refresh your memory of images of classmates and teachers. The album must certainly contain classic general options - when the whole class is filmed simultaneously in the assembly hall, in the classroom, in the school yard.
Individual photographs of your child are no less relevant. Nowadays, when each of the children has a smartphone with excellent shooting quality at hand, it will not be difficult for anyone to take a self-portrait right in the classroom during a lesson or recess.
Photos from the prom can become the final touch of the school version or live in a separate cardboard “apartment”. On the cover you must indicate the class number, school and year of graduation. A homemade album with original design is an excellent gift for yesterday’s “chicks” who are so eager to fly away into adulthood as quickly as possible. Looking at it a few years later, they will easily remember the joyful events from their school time.
Sometimes it takes time for your gift to be appreciated. But in a couple of years, the children will longingly remember their carefree school life. And the photographs from the album you donated will allow them to return to childhood again and experience unusually warm feelings when they see their classmates and teachers.
Journey
With the proliferation of digital media, it has become unfashionable to print photographs. Thousands of snapshots fill the space of hard and virtual disks. People take countless pictures when traveling, but the trouble is that almost no one sees them except for a small selection posted on a social network.
Guests and relatives who come to the house are simply unable to view such a huge number of similar photographs. It is much more pleasant to offer your loved ones a small album with the best photographs and interesting design.
Flipping through such a product is much more pleasant than looking through gigabytes of images on the monitor. In addition, old pictures on the computer and on social media pages. You have to search for networks for a long time. But in a self-made album they will always be at hand.
For decoration, you can use any items that came into your hands during the trip. These are symbols of the country being visited, postcards depicting attractions, as well as all sorts of little things - tickets, boarding pass stubs, dried exotic plants, small shells, a bar of soap from the hotel, food labels. Very often we keep such things only for the first time, and then throw them away during the next “de-littering” raid.
We throw away most of our memories with them. To prevent this from happening, add the little things you brought to the album design. Every time you take this product in your hands, you will be covered with a warm wave of joy mixed with a slight touch of sadness.
Wedding album. Step-by-step instruction
The process of creating a wedding photo album is extremely interesting and exciting, because a piece of your own soul is put into it. Beautiful happy newlyweds, their sincere smiles, are the main characters of the emerging fairy tale, the beginning of a completely new life together.
It’s an extraordinary feeling to pick up a tattered, dusty photo album after many years, flip through it and understand that love, true love, is beyond the control of the years.
For beginners, before making a wedding photo album with your own hands, you should study the step-by-step instructions for its design:
In the process of creating an album, it is important not to overdo it with additional elements and decor, because the main thing is still the photographs.
DIY album for a newborn
The birth of a baby is a new exciting stage in life together, filled with emotions and experiences. I so want to remember every moment, every smile of a child, his first inept steps. But over time, even the most vivid memories are erased from memory and dissolve in the everyday bustle. Therefore, it is worth thinking in advance about preserving these emotions.
A handmade photo album for a newborn is perfect for this purpose. It will be interesting and exciting not only to look at pictures of the baby in the future, but also to participate directly in the process of making it. Loving parents can show all their creativity and imagination, putting a piece of their love into their work.
Decoration materials
When designing a newborn's album, you want to use the softest materials and the most beautiful, elegant elements. So that tenderness and boundless love for the baby can be conveyed even through them. Velvet or velor in pastel colors is perfect for the cover.
Additionally, it can be decorated with the following details:
In the decorating process, it is important not to overdo it with the number of additional elements and combine them harmoniously with each other.
Designing photo album pages step by step
For beginners, before making a photo album with your own hands, it is recommended to pay attention to the step-by-step instructions:
The homemade album is ready. All that remains is to put pictures of the baby in it, and it is important to fill out the pages of the album regularly and with love.
How to attach photos inside a photo album
There are different ways to fix pictures on the pages of a manufactured folder using:
- Special glue. You can use a background for the photo. It is recommended to use adhesives with a special mark indicating that they are intended for photographs;
- double-sided tape;
- sewing stitch - regular or zigzag;
- special hole punchers - we form slits in the corners of the backing, glue or sew it to the page and insert a photo into it;
- small corners;
- frames of various sizes and shapes;
- corners from ribbons, scrap paper.
Now you know how to make a unique photo album with your own hands. And if you have any questions, watch the video with the step-by-step process of making it.
Photo album in vintage style
An interesting idea for creating an album with your own hands would be a photo album in a vintage style, i.e. "antique"
This genre of creativity has a number of features:
It should be noted that black and white photographs with frayed edges will look more organic in such an album.
How to decorate pages and cover in an original way
Before starting work, it is imperative to think through the idea of the future creation and sketch out sketches. On the draft, depict everything that is planned to be included in the album, down to the smallest detail. This will allow you to clearly examine the result of the work, taking into account all the nuances. The number of pages is calculated based on the number of photographs.
Each album sheet must contain:
It is important to think in advance about what ink, color, font size and inclination of letters will be used to describe the photographs. You can also use letters cut out from a newspaper or magazine and assembled into whole words.
First of all, flat parts are attached to the album, and at the very end - three-dimensional decorations.
For an original cover design, you can use a collage made from small photographs. It can be created in the form of a simple geometric figure or come up with a more complex artistic design. For beginners, before making a photo album with your own hands, you should step by step understand how and how the finished copies are decorated.
Otherwise, the process of creating your first album may cause some difficulties. It will be more convenient to design the pages before they are stapled into the finished product. It is important to remember that on one sheet of paper attention should be focused on one bright element in order to avoid information overload on the page.
Ideas for creativity
You can create baby books on completely different topics. The main thing is that they are interesting to the child. It is easier to introduce children to the world around them, the seasons, and natural phenomena using a clear example from a soft baby book.
It is enough to put in very little effort to create a unique and unusual book that will arouse genuine interest in the baby and the desire to learn something new.
Learning to count is much easier with bright and cheerful pictures.
There is an opportunity to make a book for a boy or a girl. Little mischievous children will certainly be interested in exploring every hidden corner of the fairy-tale castle, imagining themselves as a brave knight.
Little princesses will appreciate a pink baby book named after them.
Well, all children will enjoy exploring the sea on a ship. You can come up with adventures yourself, imagining yourself in the role of a brave captain who enters into an unequal fight with sea robbers and emerges victorious.
Or go on a journey on a funny train with friends - what could be more exciting?
A baby book should help the little ones develop fine motor skills. Therefore, it is preferable to sew it from felt with many interactive details.
For primary school students, the book should help them study school material. Its contents must correspond to the baby's developmental level.