Materials and tools
Before work begins, you should prepare tools and materials:
- Thick cardboard.
- Multi-colored paper.
- Scissors with rounded ends.
- PVA glue or stationery pencil.
- Wallpaper.
- Cotton wool.
- Felt pen.
- Cotton pads.
- Watercolor paints.
The main differences between patchwork techniques
Ordinary pictures require the use of a variety of ready-made templates. The child must first transfer them to paper of the desired color. Armed with scissors, he carefully cuts out all the blanks. If your baby has not yet learned how to hold scissors correctly, it will be difficult for him to work with them. As a result, he will not see the beautiful application and will be upset.
At the age of 4-5, children experience their first transitional period, so psychologists do not advise choosing tasks that can hurt the child. Having experienced failures at this time, he will not be able to tune in to positive growth or be motivated to demonstrate creative abilities. An application made from torn pieces of paper “Autumn Tree” is an excellent chance to avoid failures associated with using scissors in your work.
Application options
Many people believe that such a craft can be made exclusively from colored paper, but there are other methods. You can stick it on cotton wool, cotton pads or any other elements. In this case, the result will be completely different. Therefore, we recommend experimenting, introducing your child to creativity and developing his original approach to creating things.
Flat paper applique
The standard way to create an autumn forest. To do this you need:
- Take a piece of paper of any color that seems most suitable - white, blue, green.
- Glue a strip of paper along the bottom to imitate the ground. More often they choose brown or green. Just choose this color that is contrasting with the background.
- Make several trees of different colors. It can be yellow, orange, dark green, brown, mustard. Here the child must draw the outline of the future tree on the back of the sheet, and then carefully cut it out.
- Don’t forget to cut additional trunks for each tree.
- Carefully, lubricating the back side of each blank, stick them onto the prepared sheet so that the trunks stand on the ground.
- Then suggest using a black or dark brown felt-tip pen to draw branches directly on top of the colored paper.
The technique is easy and accessible, even for small children. It is used in kindergartens.
Volumetric techniques
By working not only on a given theme, but also on texture, you can achieve a certain effect when creating an appliqué. There are several techniques for creating volumetric applications. Let's try to analyze the main and most effective of them.
Working with cotton wool
This method involves molding pieces of cotton wool into the required volumes. Fixing them to the main sheet. And then carefully painting the entire surface to create a specific color scheme for the entire composition.
This is done as follows in class:
- A piece of cotton comes off.
- It is necessary to prepare a small container of water to make it easier to mold the cotton wool.
- By dipping your fingers in water, give the cotton a certain look and shape.
- Lubricating or dipping one part of the cotton wool into glue, then fix it on the paper in the right place, while creating a tree crown.
- Take a brush with a fairly voluminous and thick bristle, dilute the paint of the appropriate color quite thinly, and with precise movements paint the cotton wool in the desired color. It is not necessary to achieve a continuous tone creation. It will be enough to apply it pointwise.
- Cut out trunks from paper and glue them under the cotton wool.
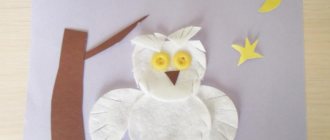
Application with cotton pads
It is necessary to invite the child to take cotton pads and color them in the desired color. Take into account and prompt the child that the final application will look most impressive if the cotton pads are painted with several shades of the same color at once.
Cut out a trunk from colored paper and glue it to the main sheet. Now start gluing cotton pads around the trunk and on top of it, forming the crown of the tree. Keep in mind that if they are placed one on top of the other, with a slight overlap, you can achieve greater volume of the composition and its effectiveness.
Make several of these trees, preferably painting cotton pads in different colors.
Composition of rolled strips of paper
In this case, a colored sheet of paper needs to be cut into thin strips of short length and glued into rings. Cut out the trunk and glue it to the base.
Drop a drop of glue onto the rings, preferably in the place where there is a seam on the paper. And fix it around the trunk in this way so that a crown is formed.
Please note that the rings can be glued both vertically and horizontally. This will result in completely different wood looks. Therefore, you can combine several methods on one application to get more texture.
Using methods for creating an autumn forest appliqué, you can arrange a real master class for your child, both at home and in classes in the garden or at school. Although, there are other ways that the teacher must also take into account when drawing up notes for the relevant classes.
Jobs for kids
A simple applique made from torn pieces of paper can be done even by children of 2-3 years of age. At such a young age, not all children know how to use scissors, glue, or make beautiful and straight lines. To show your child’s creative abilities at this time, the ideal option would be applique and mosaic made from torn pieces of paper. The baby's fingers will develop, and in the future he will not have difficulties with writing skills.
Cheerful lion
In the middle age group, preschoolers learn about the world around them, get acquainted with different types of animals and their characteristics. An applique using maple leaves can help with this.
For the lesson, prepare:
- press-dried maple leaves of yellow and red shades;
- cardboard for the base;
- yellow or light orange colored paper;
- office glue;
- pink and black markers;
- plastic toy eyes.
Step-by-step instructions:
- Glue the leaves onto the cardboard radially so that their sharp ends stick out in different directions. It is advisable to glue them in 2-3 layers to make the applique voluminous. The glued leaves will become the lion's mane. Explain to the children that these African animals have thick manes.
- Draw the kennels of a lion's face on yellow paper. Use a black felt-tip pen to draw on the nose, mustache, and mouth. Color the inside of the mouth with a pink felt-tip pen. Cut out the outline.
- Separately cut out the ears, and paint their central part pink too.
- Glue a lion's face into the center of the foliage ring. Glue the ears a little higher between the leaves.
- To finish the job, glue on the toy eyes. If there are none, you can cut out eyes from white paper and draw on the irises and pupils.
Pumpkin
Autumn is associated with the harvest and Halloween. You can make a bright applique on this topic for the middle group of kindergarten.
For work, prepare:
- template – outline image of a pumpkin with leaves;
- pumpkin seeds;
- gouache paints;
- office glue.
Instructions for creating the “Pumpkin” applique:
- Glue the pumpkin template onto the cardboard base.
- Place the seeds on the table, after covering it with film or newspapers.
- Color most of the seeds orange, the smaller part green. Leave to dry.
- Carefully glue the dried seeds to the template image: orange ones to the pumpkin itself, green ones to its leaves.
Where to get templates
The easiest option is to draw the outlines for the future application on cardboard yourself. In addition, you can use ready-made templates by purchasing a special set. Such kits include not only several thick bases with printed pictures, but also sheets of colored paper and glue.
If desired, you can also print the pictures using a computer and printer. The children themselves can also take part in making the outline of the future applique.
You won’t have any difficulties tearing the paper; you can turn this activity into an exciting game. If you carefully examine the finished work, it looks like a mosaic. School-age children, when gluing small pieces of paper, leave practically no empty spaces between them. Therefore, their work looks like a real piece of patchwork art. Children do not immediately master the basics of this interesting work, but parents or educators can always come to the rescue.

