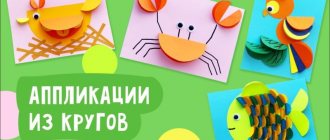
Hedgehog made from autumn leaves
It is difficult for preschoolers of the younger group to sit still for a long time, so they have to use technically simple but exciting activities. One of these crafts is a funny hedgehog. This animal, associated with autumn and mushroom season, is easy to make from fallen leaves. First, you and your children need to collect leaves from the yard; they must be clean and fresh. They must be dried under a press so that the ornamental material turns out smooth and neat.
To create an application, prepare:
- dried leaves;
- landscape or thick colored paper;
- office glue;
- black or dark brown half bead;
- toy eye.
Instructions for creating an application:
- Prepare natural material, select leaves suitable for making the animal. One leaf should have a pointed tip - this will be the face of the hedgehog. A linden or birch leaf will do. For a back with thorns, maple specimens are optimal, but you can choose others at your discretion. Handle dried material carefully, as it is fragile.
- Glue a sharp piece of paper – a muzzle – onto a horizontal piece of paper, slightly moving it to the side from the center of the composition.
- On the back side of the tip of the nose, glue maple leaves to the muzzle. The number of copies can be any, depending on the size of the application. The main thing is that the leaves should be directed with their carved ends up and to the sides; they should not cover the hedgehog’s nose, but can overlap each other.
- Glue a black bead onto the tip of the muzzle to create a nose. Also glue on a toy eye. If you can't find it, cut out an eye from colored paper.
Snow collecting machine
Boys will appreciate the snow blower. To make this craft you will need colored paper, a cardboard sleeve, cotton wool and bubble wrap. To create a background, the air film is painted with white paint. The material is tightly fixed on the blue sheet.
When the paint is dry, the car applique is placed on the background. The transport bucket can be made from a cut bushing. Cotton wool is used to imitate snow.
Application “Autumn” in the younger group
The tool for creating an applique can be the hands of children. For the lesson, prepare a set of colored paper, stationery glue, scissors and decorative cardboard for the base.
Instructions:
- Select brown, red, orange and yellow paper from the paper set.
- Cut out the trunk and branches of an autumn tree from brown paper and glue it to the cardboard.
- Let the children place their hands on the other colors of paper and trace with a pencil.
- Cut out the pencil sketches.
- Invite students to glue paper blanks to tree branches.
Autumn tree
Preschoolers of the younger group are interested in the use of various creative techniques. One of these involves the use of cotton pads.
Making a bright autumn tree is quite simple:
- Prepare your watercolors. Draw the trunk and branches of a tree on watercolor paper with brown paint.
- Provide children with cotton pads and pipettes. If necessary, teach how to use this medical device.
- Dilute the watercolor paint with water so that it becomes convenient for drawing into the pipette. Each color requires a separate glass. It is important that kids choose colors typical for autumn: red, yellow, orange, burgundy, light green.
- Show the students the image technique: they should dip a pipette into glasses with watercolor solutions, then pour it onto a cotton pad. One disc can be pigmented with different colors, resulting in beautiful color transitions.
- When the painted discs are dry, children glue them to the trunk and form the crown of the tree.
Application in the middle group on the theme “Autumn”
Preschoolers of the middle age group begin to get acquainted with geometric shapes, they form the idea that the outlines of natural objects can be similar to figures. For the lesson, prepare a set of colored paper, PVA and scissors. The cardboard base can be of any color.
Application technology "Autumn":
- Cut a strip of green paper and glue it to the bottom edge of a thick base - this will be grass-covered ground.
- Choose from a selection of paper in fall colors: red, purple, yellow, light brown, burgundy, orange.
- Encourage children to cut out different geometric shapes. Emphasize that the shapes must correspond to the actual shapes of the trees. Let the pupils look out the window and say what shape the crowns have: triangular, oval, round. Moreover, it is not the same, but in some trees it is more elongated or wider.
- Once the shapes are cut out, have the children glue them onto the cardboard along the center axis, parallel to the previously glued “ground”. Some figures should be slightly higher - these will be tall trees, others lower. They can be partially overlapped.
- When all the figures are glued, all that remains is to draw on the trunk and branches with a felt-tip pen.
How to make a craft for February 23: the most interesting things
Crafts for February 23rd by the hands of a child always carry special value for the person for whom it is intended. One of the adults can help the child create a helicopter or airplane. Children love to engage in joint creativity with their parents. Every man in the family should receive a gift by February 23, because they protect us from all troubles and adversity even in peacetime.
You can make simple soldiers out of paper and create an entire army out of them. You can also use them to decorate a card or gift wrapping.
Toilet paper rolls can be used for crafts: using a Lego man figurine you can make a racer
Toilet Paper Roll Soldier: A Fun and Easy Craft
Or a funny soldier who can stand and even become a hero in a war game if you make an army of such soldiers.
Materials:
- Sleeve
- Cardboard
- Pencil
- Scissors
- Paints
- Glue
- Brush
- Marker
- Twine
- Half an egg shape
On a sheet of cardboard you need to draw a rifle, a circle with a diameter larger than the shape of an egg and color these details
The bushing needs to be painted green, and when it dries, you can paint it to match the camouflage.
We glue the arms to the body, and connect the rifle with string and attach it to the sleeve. We make a hat and attach it to the soldier’s head. We make eyes and draw a mouth, nose, eyebrows.
DIY helicopter: craft for February 23rd from scrap materials
Such a funny helicopter can be made as a gift for February 23, or you can not be tied to the date and build such a transport, diversifying your leisure time.
Materials:
- Plastic yogurt bottle
- Ping pong ball/kinder egg
- Cocktail straws with a bend
- Stapler
- Gvozdik
- Hot glue
- Scissors
Make a hole in the bottle cap using scissors or an awl. We cut the tubes in the middle.
You need to cut off the round part of the bottle and make a strip from the rest
We make a helicopter landing gear from halves of bent tubes. Attach them to the strip with a stapler. We will also insert the tube into the hole that was made in the lid. Secure the tube with super glue.
Attach the chassis to the vehicle body with a stapler.
The helicopter propeller is made from two parts of tubes without bending, fastened crosswise with a button. Insert the ball into the body.
Ship for February 23: cardboard craft
A handmade boat can be a wonderful gift for February 23rd. As children, we all launched paper boats through puddles or in the bathroom. You can move away from the classic version of a paper boat and make more original copies.
After collecting small sticks from tree branches, fasten them together with threads. Such a raft will become the basis of the boat, and we will make a mast from an ice cream stick. A triangle made of cardboard will become the sail of our boat.
Corrugated cardboard will make a durable boat that can hold Lego figures on board.
Make the parts of the boat: sides, back, bottom and deck. You can connect them using tape.
You can decorate the ship as desired. Make it military or pirate.
You can make an original boat from a kitchen sponge quite quickly.
Cut one edge of it into a cone, and glue circles to the sides, which will act as portholes. Add a toothpick mast and paper sails.
Craft airplane: manufacturing options from various materials
Many boys in childhood dream of becoming pilots of a huge plane, flying in the sky among the clouds. A bright airplane can be made from simple materials.
Using colored paper and a matchbox, make a small corn box.
Easy crafts for February 23rd include an airplane made from ice cream sticks.
Materials:
- Ice cream sticks
- Water straws
- PVA glue
- Gouache
- Brushes
- Scissors
Making the frame of the airplane: use glue to connect 5 sticks together. Attach the sixth stick perpendicular to these five, slightly moving away from the edge.
We cut the water tube, a small piece should be identical in width to the frame. Make two of these pieces and attach them to the edges of the wings. Glue a stick on top - the second wing of the plane. Take another stick and divide it in half, rounding the second edge. Glue it to the bottom of the plane.
We make a propeller by dividing the stick in half and rounding the edges. We fold the two parts crosswise and lubricate the knocking points with glue. Can be decorated with a wooden bead.
We will paint the plane with gouache as you wish, or take the plane in the picture as a model.
You can make a simple airplane using clothespins and popsicle sticks.
Pumpkin
Autumn is associated with the harvest and Halloween. You can make a bright applique on this topic for the middle group of kindergarten.
For work, prepare:
- template – outline image of a pumpkin with leaves;
- pumpkin seeds;
- gouache paints;
- office glue.
Instructions for creating the “Pumpkin” applique:
- Glue the pumpkin template onto the cardboard base.
- Place the seeds on the table, after covering it with film or newspapers.
- Color most of the seeds orange, the smaller part green. Leave to dry.
- Carefully glue the dried seeds to the template image: orange ones to the pumpkin itself, green ones to its leaves.
Cheerful lion
In the middle age group, preschoolers learn about the world around them, get acquainted with different types of animals and their characteristics. An applique using maple leaves can help with this.
For the lesson, prepare:
- press-dried maple leaves of yellow and red shades;
- cardboard for the base;
- yellow or light orange colored paper;
- office glue;
- pink and black markers;
- plastic toy eyes.
Step-by-step instructions:
- Glue the leaves onto the cardboard radially so that their sharp ends stick out in different directions. It is advisable to glue them in 2-3 layers to make the applique voluminous. The glued leaves will become the lion's mane. Explain to the children that these African animals have thick manes.
- Draw the kennels of a lion's face on yellow paper. Use a black felt-tip pen to draw on the nose, mustache, and mouth. Color the inside of the mouth with a pink felt-tip pen. Cut out the outline.
- Separately cut out the ears, and paint their central part pink too.
- Glue a lion's face into the center of the foliage ring. Glue the ears a little higher between the leaves.
- To finish the job, glue on the toy eyes. If there are none, you can cut out eyes from white paper and draw on the irises and pupils.
Crafts for February 23rd from plasticine: we sculpt with pleasure
Toddlers and children in kindergarten love to play with plasticine, so coming up with a craft for the holiday will not be difficult. Plasticine can be replaced with puff pastry, but the classic material can also help create an interesting craft.
Plasticine airplane: step-by-step master class
Cars, tanks, planes - these are the first things that come to mind. A child can feel like a real sculptor. Spend time with your child by making a plasticine airplane in one of the easiest ways.
If you want to create a military aircraft, then use green plasticine for the body.
Materials:
- Yellow plasticine (orange or green)
- Blue or white (for glass)
- Stack
- Board
We make a body blank from plasticine of the main color by rolling the plasticine into a ball.
Press the plasticine onto the board and roll it out until you get a large droplet. Stick an orange cake to one side (the bottom of the plane)
From orange plasticine we sculpt the central part of the tail, which will be shaped like a flat square. On the sides we will attach wing parts made of yellow plasticine.
From a small white cake we will make the nose of the airplane. And from blue or white plasticine, mold the windows of the porthole.
We make the side wings of the airplane from yellow plasticine. To do this, you need to measure out two identical pieces of plasticine and make cakes. Make oblong wings by cutting out the shape using a stack.
Tip: if you want the figurine to become solid, keep it in the refrigerator for a while.
DIY plasticine tank: detailed description
You can make a military tank, which may differ in details, size and color. Take a tank from real life as a prototype, or take a closer look at one of the descriptions of a plasticine craft.
We will need quite a bit of plasticine, so you can take several green shades and mix them. Roll a piece of plasticine into a ball.
Stretch out the ball, rounding the edges. It should be shaped like an oblong turret.
From the rest of the plasticine we make the body of the tank.
Connect both parts together
To make the wheels, roll into balls: 10 large and 4 smaller.
Press each ball a little onto the board and create a pattern of wheel axles with a stack.
Make thin strips of gray plasticine to create caterpillars.
We take 4 wheels, put them in a row and attach small ones to the sides. Wrap the wheels with a gray stripe. We will need two of these parts.
We make a protective casing from dark plasticine
To make the barrel of the tank, we need a stick, which must be covered with plasticine.
We make the front part of the tank with a white lantern from a flat cake.
Make parts to imitate hatch covers, side bolsters and attach all the parts to the tank body.
Attach two gray plasticine hooks to the front
You can also create an antenna from wire
Such a tank can be made not only as a gift on February 23, but also on May 9, for a plasticine crafts competition.
Having learned how to make different figures from plasticine, you can create military compositions.
A plasticine helicopter can look so cartoonish if you choose bright colors
Add creativity to your craft.
Autumn landscape
This leaf applique on the theme “Autumn” is intended for older preschoolers. The task greatly develops imagination; autumn leaves in the composition turn into bushes and trees: the leaf plate is the crown, the petiole is the trunk.
For work take:
- press-dried leaves of different types of trees;
- white cardboard for the base;
- PVA;
- watercolor.
Step-by-step work:
- Using watercolor paints, depict the main composition on cardboard, for example, the sky, a lake, and a strip of shore between them. Wait for the painting to dry.
- Select leaves in pairs. That is, the leaves in a pair should be as similar as possible.
- Create a forest on the shore. Glue the leaves one at a time from a pair. Glue at random, with one leaf partially overlapping another. The effect will be as if the trees are standing close to each other, the forest approaches the water itself.
- Don't forget about the reflection in the water. Glue the second pair of leaves upside down onto the image of the lake. Straight and inverted paired leaves should be joined by petioles.
Hat with mittens
An applique is created from winter accessories. To make the details more realistic, they are decorated with pom-poms made from cotton wool. You can decorate the mittens with felt, bugles or beads.
Application “Autumn” in the senior group made of colored paper
One of the associations with autumn is drizzling rains and bright umbrellas. Older preschoolers will certainly enjoy the beautiful “Autumn” applique made from colored paper. Take a set of paper, stationery glue and scissors for the lesson.
Make the application like this:
- Draw a circle of any size on colored paper, which determines the size of the composition. Divide the circle into 4 equal parts and cut them out.
- Twist the blanks into cones and secure with glue. Their color can be any, the same or different. In the second case, you will either have to cut out parts of the circles from different papers, or use white paper, then color it.
- Glue the finished cones onto a cardboard base so that they meet at their sharp ends. You will get a half-opened umbrella.
- Cut out a handle with a curved knob. Glue to the base of the umbrella.
- Cut out colorful autumn leaves using templates. Insert them into the cones and secure.
Forest and trees
Branches are glued onto a colored sheet. You can create an imitation of snow using cotton wool or fur. And with the help of cut rain or silver beads it is easy to depict snowflakes. On the finished sheet you can draw trees, placing a tubercle with cotton wool between them, and you will get a den.
Note!
How to make a snowman with your own hands: reviews of the best ways to create a snowman. Simple work schemes and step-by-step master class for children (130 photos)
Crafts for the New Year 2022: TOP 110 photos and step-by-step instructions for creating New Year's crafts from scrap materials
Snowman made of cotton wool - TOP-170 photos of original ideas. Simple schemes for creating a snowman with your own hands + step-by-step instructions for children
Mushroom time
A wonderful three-dimensional applique on the theme “Autumn” in kindergarten makes you want to go to the autumn forest to pick mushrooms.
For work, prepare:
- set of colored paper;
- templates - contour images of mushrooms and leaves;
- decorative cardboard for the base;
- office glue;
- scissors.
Instructions:
- Take light brown and dark brown paper. Cut out strips 7x1.5 cm. Ask the students to glue each one into a ring. This is a fun activity that develops perseverance.
- Make a basket from the finished paper rings. Glue the rings to the cardboard, alternating dark and light copies: it will turn out more interesting. First, make a semicircle - this is the bottom and sides of the basket. Then fill the middle tightly with rings. Finally, make a semi-circular handle for the basket.
Cut out mushrooms and leaves of the corresponding colors according to the templates. Butt glue to the top edge of the basket.
Deer
Disposable plates are very good as an applique on the winter theme. You can easily make a Christmas reindeer out of them. The plate is painted brown. Horns are created using handprints.
Cardboard rectangles are suitable for paws. All parts are cut out and attached to each other. Eyes made of beads or paper are glued onto the muzzle.
Application “Autumn” in the preparatory group of kindergarten
Preschoolers 6-7 years old can be taught to work with salt dough. It is more interesting for children to sculpt figures from it than from plasticine. The work is painstaking, teaches patience and perseverance, and develops imagination.
Step by step execution:
- Prepare a dough from white flour, fine salt and water. It should be dense enough for modeling.
- Place the finished dough in a cool place for 1.5-2 hours.
- Make out of it any two-dimensional, that is, flattened figures associated with autumn: fallen leaves, mushrooms, ripe fruits. Make a beautiful composition out of them. You can, for example, make a vase with leaves, you will get a wonderful still life.
- Place the composition in the oven. Heat for 30 minutes at 130°.
- Paint the frozen dough with gouache paint.
- Glue the finished autumn composition to decorative cardboard using a hot glue gun.
Origami “Maple Leaf”
Preschoolers in the preparatory group will be interested in learning about the Japanese art of origami. Making an applique is not difficult, the main thing is accuracy. The work requires 3 paper squares of autumn colors and stationery glue. The preferred size of the squares is 8x8 cm.
Instructions:
- Take a square. Fold diagonally. Expand.
- Place the square so that the fold is directed vertically. From its top point, fold the “wings” towards the fold. The result will be a rhombus with a more elongated upper part.
- Turn the workpiece over with the extended end down.
- Fold the protruding upper triangle under the “wings”.
- Fold the top corners towards the center line. You will get a rhombus with two small triangles.
- Return the triangles to their original state. Then remove them along the folds inside the diamond.
- Fold the top corners of the diamond down. The result was a third of a maple leaf.
- Perform similar actions with 2 other squares. Then connect them with the side edges.
The carved maple leaf is ready. All that remains is to glue it to the decorative cardboard and paint on the petiole. You can decorate walls and windows in a kindergarten with ready-made origami maple leaves.