07.08.2019
Modeling from plasticine step by step is the best educational technique for preschool children (from 2-3 to 7 years old)! Children love modeling with clay because they can create anything!
Most of all, children love to sculpt: animals, people, cars, cities. Nowadays it is very popular to sculpt Smeshariki, unicorns, cats, hedgehogs and dragons. Sculpting is very useful. Step-by-step modeling develops creative thinking, imagination, fine motor skills, speech, and logical thinking several times faster.
Children from 3 to 7 years old are especially passionate about modeling. Therefore, we have selected interesting craft ideas that are very popular among children. Stock up on plasticine of different colors to make it even more interesting for your child!
Simple crafts from plasticine
Children aged 1–2 years can easily roll balls, flatten them with their fingertips and glue them to pictures. Little hands cope with wax plasticine, heated in mother’s hands.
Adults and children perform simple crafts in a circular motion:
- Multi-colored balls for the Christmas tree.
- Grains for chickens.
- Sunflower seeds.
- Leaves for flowers.
- Black dots for the back of the ladybug.
- Wheels for a car.
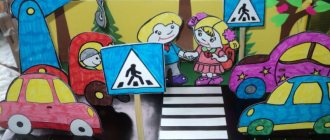
The second technique that young children learn is how to make thin sausages. The plastic pieces are rolled out between the palms with straight movements. The results of the work are used as zebra stripes or rungs on stairs.
Plasticine worm
A poem or a fairy tale about a worm will help get kids interested in modeling. Adults come up with their own stories or find material in books. They also prepare a background of flowers, trees, and grass for applique. In the picture they draw a bend line for a plasticine craft. Then the kids are taught to make a worm with their own hands:
- Identical balls for the body are rolled from the pink pieces.
- Flatten with fingertips.
- Glue to the line, overlapping the circles.
Now they roll one ball for the head, two smaller ones for the eyes. The mouth is made using a stack. All parts are attached in place. After class, the children are praised for their diligence and told that they have created a beautiful applique.
Plasticine caterpillar
The principle of making the second craft is similar, but only the balls are made from green pieces. They also additionally make an elementary pattern - holes in circles. The background for the applique can be borrowed from the fairy tale “Apple House”.
It tells that a caterpillar lived in a red apple, and a bee flew to visit it. In the evenings they sat together on a branch and watched the sun go to bed. The picture will be clear, because 2-year-old children are already very familiar with these characters.
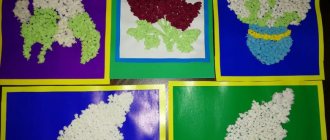
Plasticine mosaic
Children know what a mosaic is and how to play it from the age of three.
Therefore, it is not difficult for them to understand how to fill silhouettes from the inside with plasticine balls.
- Adults can only prepare templates for drawing and visual material in the form of pictures.
- The difficulty of appliqués made from small pieces is that the manufacturing process takes a week.
- But such a drawback does not affect the mood of preschoolers; their interest in the craft does not disappear.
What is plasticineography
Plasticineography is a type of modeling that involves creating three-dimensional figures and compositions on a dense horizontal base. But at the same time, this area of creative activity can be attributed to drawing, since the result is a picture made of plasticine.
This technique appeared relatively recently. Today plasticineography is actively used in kindergarten. For classes you will need:
- plasticine;
- medical or confectionery syringe;
- special boards for modeling;
- base for the picture made of thick cardboard, fiberboard or plywood;
- special stencils and templates for plasticine printing;
- rolling pins, stacks and scissors;
- buttons, beads, sequins;
- shells, nut shells, cones, twigs, pebbles;
- cereals, grains, eggshells;
- wet wipes.
Plasticine butterfly
Making an applique for children will not seem tedious or boring if the sketch is not completed immediately, but several days in advance. During the first lesson, roll out a lot of multi-colored balls, which are glued on gradually.
- First on the upper wings of the butterfly, and then on the lower ones.
- As a basis, you can use drawings with contours from coloring books.
- Additionally, a part for the body is made in the form of a thick sausage.
- Draw the antennae with a pencil or felt-tip pen.
The mosaic craft looks so colorful and beautiful that you want to keep it. For this purpose, cover the surface with decorative varnish and hang it in a frame on the wall.
Progress of the lesson
Read the poem “Turtle” by R. Desnos to the children:
I am a turtle, Therefore it is clear that I am both smart and beautiful.
And the fact that like a swallow, I am not winged, So it’s not me, But fate is to blame.
But being dissatisfied with your destiny does not mean being dissatisfied with yourself.
Ask the guys: “Who is this poem about? (About the turtle.) What does the turtle think about itself?” (That she is smart and beautiful.)
Invite the children to make a chestnut turtle. Explain the sequence of work: the nut is coated with plasticine on all sides. Then a pistachio shell is fixed on top of it, forming a turtle shell. The head with neck, legs and tail are created from separate parts of plasticine and attached to the lower part of the turtle's body. All that remains is to design the face.
Plasticine flowers
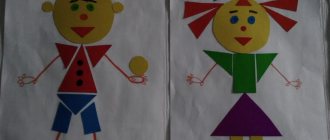
A master class on making this craft will teach you how to create flowers from two types of plasticine mosaics: flat buttons and round balls. Prepare for the lesson:
- Plasticine in three colors.
- Ballpoint pen body.
- Sketch of a flower on light cardboard: using a simple pencil, draw a stem in the form of two lines, a leaf, a round center, 4-5 petals.
Then they begin to create miniature flat parts, shaped like buttons. They fill the stem, leaf and petals of the flower, trying not to go beyond the contours and not leave gaps.
- Knead green and red plasticine until thin cakes are obtained.
- Using the body of the pen, circles are squeezed onto them, which are then glued into place.
For the center of the flower, roll out balls of yellow pieces. And the outline of the petals, if desired, is highlighted with plasticine thread: the syringe is filled with soft plastic material, which is squeezed out of the hole with a piston.
Plasticine painting from flagella
A subject or subject picture with plasticine flagella looks much more realistic than a simple applique. Thin sausages are rolled out from pieces between the palms or squeezed out using a syringe.
The second method is beyond the capabilities of younger preschoolers, so adults make such preparations themselves. And the children twist them into a spiral or snake and glue them onto cardboard.
Craft materials:
- Outline illustration from a coloring book. You can also draw your own design on cardboard by hand or using templates.
- Soft plasticine in the desired colors.
- Medical syringe with a volume of 5–10 ml.
- Container with hot water.
Christmas balls
If you want to make New Year's balls to decorate the Christmas tree, take special foam blanks. They are sold in craft stores. Such a ball can be easily coated with a thin layer of plastic mass and decorated to suit every taste.
Decorations on balls can be made of thin flagella, cut out elements - snowflakes, spruce branches, petals, circles.
Any small decorations - beads, buttons, seed beads, sequins, sparkles - will stick perfectly to the plasticine layer.
By the way! An even flagellum from the modeling mass can be obtained by squeezing it out of a large syringe without a needle. The mass should be heated in your hands or on a radiator to give it greater plasticity.
Master Class
- The first thing they do is prepare the flagella. The syringe is filled with pieces of plasticine and pressed with a piston.
- Place horizontally in hot water for five minutes or heat in the microwave.
- The syringe is taken out and plasticine threads of the required length are squeezed out.
- Children are given cardboard with an outline and flagella for laying out the picture.
Round figures (apple, cherry, flower centers) are filled according to the same pattern. First, the end of the flagellum is glued in the center. Then they twist it in a spiral, filling the entire space. On all non-round silhouettes (pear, leaves), thin sausages are glued in the reverse order: from the contour line to the middle or in a zigzag, trying not to leave gaps.
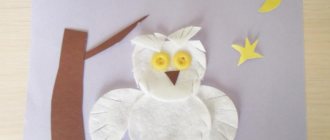
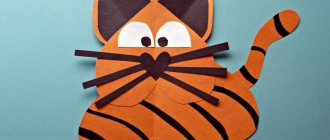
Flat and volumetric applique
Three-dimensional pictures on cardboard are created from molded parts, flagella and mosaics. The background is drawn with pencils, watercolors or made from plasticine using the smearing technique.
The most interesting topics for children are: “Birds and Animals”, “Nature”, “Based on Fairy Tales” and “Underwater World”.
Snowman
What's New Year without a snowman? Moreover, it is quite simple to do it.
To do this you need:
- roll 2 white balls of plasticine, one of which should be larger than the other;
- Flatten the large ball slightly at the bottom and form it into a wide sausage. This will be the body of the snowman;
- attach the head (second ball) and arms - 2 small sausages made of white plasticine;
- attach small black balls (eyes) and an orange cone (carrot nose);
- the snowman’s mouth can be drawn or also made from small black balls;
- Make headphones and a scarf from plasticine of a different color.
The snowman is ready.
Undersea world
In one craft, children are introduced to all the modeling techniques and discover the secrets that the seabed of the seas and oceans keeps.
- Waves and sand are drawn on a thick sheet or cardboard with wax crayons.
- The background is painted over with watercolors and dried.
- A yellow piece of plasticine is flattened into a cake, and dents are made with the blunt end of a pencil. The first sea plant is ready.
- Mix two colors, for example, blue and green, and roll a long flagellum. Glue to the base from bottom to top in a zigzag pattern.
- Or the sausage is squeezed with fingers on both sides, as is done when making dumplings.
- Another option is to glue green leaves on both sides to a thin sausage. Lines are drawn in a stack - veins. This is how three types of algae are obtained.
- Multi-colored corals look like a flat circle with uneven edges and through holes. A stack and a cocktail straw will help in this matter.
- The starfish consists of simple parts: a round center and 4 rays in the form of thick sausages with sharp ends. Connect them together, level the surface and make indentations with the sharp end of a skewer.
- Two types of shells are made from flagella, twisting them in a spiral and zigzag.
- For the jellyfish, roll 5-6 long sausages, a flat oval and a short flagellum for the body.
- All figures are glued to the background, starting to decorate the background with tall plants and algae.
The underwater world is populated with fish, which are sculpted from individual parts: the body is a circle or oval, the fins and tail are flat figures of arbitrary shape, the eyes are a round mosaic.
Required Tools
For work you will need the following devices and materials:
- cardboard, plastic sheet or plexiglass base;
- modeling board;
- stacks, toothpicks and other sticks to create a textured surface and cut off excess;
- scissors;
- a set of plasticine (better than wax).
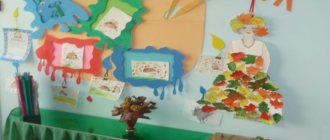
Crafts from plasticine on glass
Plasticine applique under glass in a photo frame will last for a long time. Children like this approach to the results of their work.
Miniature crafts are also made in plastic yogurt or sour cream lids:
- Using a black marker, draw the outline of the picture, either by hand or using templates.
- Spread plasticine over the inner surface, starting with small parts.
- The background is also filled with plastic material or appliqué is done on colored cardboard.
The glass with the craft is inserted into a frame. In this case, the plasticine should be inside. A catalog with photos of plasticine applications will tell adults what to do with their little fidgets.
Modeling classes, like other types of creativity, are carried out according to the principle “from simple to complex.”
This way, the child can easily master all the techniques for creating interesting crafts and prepare their hands for mastering writing. Kneading plasticine in your hands is also useful for adults: for therapeutic purposes to prevent strokes.
Father Frost
To make a figurine of the main New Year's wizard - Santa Claus, you can use step-by-step photo instructions. There are simpler options - for small children. There is no shame in sending a complex craft made from many small parts to a competition at school or kindergarten.
The simplest idea is to make a red cone shape. The face is attached to it, then a white beard and fur trim.
Advice! If your modeling kit doesn't have flesh color, you can make your own. Mix the white and orange mass thoroughly in your hands in a 5:1 ratio.
Here are other ideas on how to make Santa Claus out of paper.