Drawing in the senior group, depending on the kindergarten curriculum, can follow a standard or non-standard path. That is, traditionally a child learns to draw with pencils (simple, wax), paints (watercolors, gouache).
And in creative circles, children use different techniques (spraying, blotography with threads and tubes, drawing with soap bubbles, pokes, fingers, palms, candles, leaves, “wet” drawing, airbrushing, scratching, monotype, imprint) and mix materials (for example, crayons with watercolor). Nowadays, many modern teachers of state kindergartens are trying to diversify drawing classes with unusual techniques.
Preliminary work on visual activities
Drawing in the senior group is aimed at consolidating and detailing previously acquired knowledge. Children can draw the shapes of geometric figures (circle, cylinder, triangle, square, rectangle) and convey them through images of vegetables, animals, people, birds. In older preschool age, it is necessary to more detail the conveyed image, focusing on its features.
For example, a child freely depicts his family. Then you need to suggest that dad is taller than mom, who is taller than the children, and their youngest is a preschooler. In addition, you need to help with the proportions of the body: the torso is divided into two parts, the elbows should end where the “belt” is. The face should also be harmonious and correct.
In order for children to better understand the signs, proportions, and properties of the objects depicted, the teacher works every day to develop their perception of the world around them. Without this, not a single drawing can be done (senior group). The kindergarten provides the necessary material for classes, and teachers and parents should broaden the children’s horizons.
Methods of drawing trees and people in senior and preparatory schools
Technique for drawing trees
in senior and preparatory groups.
Senior group
The senior group teacher faces the following tasks: to develop
children have observation, imagination, initiative, independence;
to cultivate an aesthetic attitude towards the environment, to teach children to describe an object, its
shape, highlighting the most essential features, to compare objects by shape and color; convey the relative sizes of objects, form spatial imagination; learn to draw from winter chalk and from memory, achieve an expressive solution to the composition.
The teacher should introduce children to works of decorative and applied art, folk crafts; teach them to distinguish, name and select colors (red, yellow, green, blue, orange, purple, black, white), to distinguish shades (blue, pink, light green, etc.) and neutral colors (gray, gray-blue) .
oe in a drawing.
the ratio of two or three objects, arranging them according to the scheme: below - those that are on the ground, above - those that are in the air, in the sky; create a plot of five or six items.
Education for older children is aimed at improving visual skills and developing the ability to create expressive images using various means of representation.
The learning objectives are the following:
- teach how to correctly convey the shape of an object, its characteristics, relative size and position of parts; - teach how to convey simple movements in drawing; - develop and improve the sense of color; technical skills in working with pencil (shading methods) and paints (brush techniques); teach drawing techniques with crayons, charcoal, and watercolors.
Children must use watercolor paints and a brush correctly, holding it at an angle and turning it on a plane; must be able to depict a person in a frontal static position and in motion, depict birds and animals both statically and in motion.
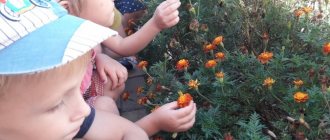
Children love to draw autumn.
In autumn, children should pay attention to the golden leaves of trees. At this age they already know about different types of trees and
can draw them.
Explain that the thickness of the trunk can be conveyed by gradually increasing the pressure on the bristles
of the brush, and a very thick trunk can be painted by increasing strokes.
Each tree has a vertically directed trunk, thick and thin branches, and leaves on them that form a crown. These signs are also transmitted to children of the older group. Invite the children
to depict trees of certain species, placing them at some distance from each other. Suitable themes for children of the senior group are “Forest in autumn”, “Autumn park”, “Apple orchard in autumn*.
When working on the topic “Apple orchard in autumn*, children should know that apple trees are different - low and tall, young and old, spreading with a thick trunk and slender with
thin branches pointing upward. Fruits can be green, yellow, red. Particular attention should be paid to placing images of trees on the sheet.
Program material in the second quarter becomes more complex. Children should reproduce in their drawings pictures of winter nature, snow-covered houses and trees, winter games and entertainment, and draw objects that are more complex in shape and structure. The best paper for drawing on the theme “Trees Covered with Snow” is blue. The teacher shows how to apply white paint (snow) to tree branches with the tip of a brush.
The expressiveness of the drawing largely depends on the chosen vertical or horizontal position of the sheet of paper. To successfully cope with this choice, the child must very carefully analyze the object in various turns and note the features of its structure.
Spruce drawing.
We draw on two-stripe tinted paper with brown and green paint. We give 3 brushes: wide for the trunk, medium thickness for the branches and thin for the needles.
Explanation:
We don’t indicate where the spruce grows, we immediately draw the trunk. I take a wide brush and use brown paint to draw an even straight line at the end with pressure, from the top point I draw another similar line next to it and so on several times to get a beautiful, straight trunk. Now I paint the branches with a medium brush. The technique is the same as in the middle group. At the top 2 are small up, the rest are long to the sides. The spruce branches have “legs” - small branches, I’ll draw them under the big ones (show). Now we paint the pine needles with green paint and a thin brush.
We decorate the New Year tree with a garland and draw a stand under it. In this group we give images of fir trees near and far. Please note that here the branches are not painted separately with brown paint, but the spreading paws are painted immediately with green paint.
Drawing trees of different species
We will draw varieties of trees. Pay special attention to the fact that if children in the older group, even after repeated observations, draw poorly, then this work should be transferred to the preparatory group, since this material is very difficult for children.
Pine
If children have mastered the technique of drawing fir trees well, they can be taught to draw pine trees.
We draw on two-stripe tinted paper, gouache, palette. We give 3 brushes: wide for the trunk, medium thickness for the branches, thin for the needles.
Explanation:
The pine has a beautiful, even trunk of light brown, golden color, because pine really loves light and sun. Create this color on the palette. The technique for drawing a trunk is the same as for spruce. Pay attention to the branches, they grow to the sides of the trunk, alternately on one side and the other, the branches are short at the top, longer at the bottom. There were also branches below, but they all lacked light and sun, and they broke off, leaving only small twigs. Pine needles are emerald, long and fluffy. Using a thin brush, make long strokes from the branch in different directions.
Birch
We draw on two-stripe tinted paper with white and black paint. We give 2 brushes: wide and medium thickness.
Explanation:
The birch has a beautiful trunk - I paint the trunk with a wide brush of white paint, just as we painted the trunk of other trees. The birch tree has black specks on its trunk, we will paint them later when the white paint has dried. Birch is called curly birch. Its branches are beautiful, elastic, and bent down. I take a medium brush and use black paint to paint thick branches from the trunk on one side and the other, starting from the top. And from the thick branches come thin ones, like garlands, descending down. The birch trunk has dried up, now let’s decorate it with black dots. Remember, when we looked at it, we noted that the trunk was very black at the bottom and there were fewer dots at the top.
We draw a birch tree at different times of the year: snow-covered in winter and green in spring (we draw the outline of the crown and the leaves with dots in a raw way).
Apple tree
We draw on two-stripe tinted paper, gouache, palette. We give 2 brushes: wide and medium thickness.
Explanation:
I paint the trunk with a wide brush and dark brown paint. The drawing technique is the same. Now I will paint the crown with a medium-thick brush. The crown of the apple tree is like a bowl. Large branches grow from the bowl towards the sun, and small ones on them. Because the apple tree has such a crown it is called spreading. I paint the leaves of the apple tree by dabbing, with the end of the brush pointing upward.
You can also give the theme “Apple tree in bloom” - with pink paint we paint the flowers with curls, but we don’t paint the leaves.
Drawing varieties of trees in the older group can only be taught if the children have high technical skills. In case of difficulties in the senior group, it is better to leave drawing a tree according to the method of the middle group and teach drawing a birch; the rest should be taught in the preparatory group.
It’s good to draw branches of trees and shrubs with leaves or flowers (willows, mimosa, spruce, poplar) from life.
It is more difficult to draw such objects than objects that have regular geometric shapes with a symmetrical structure. The complex structure of a plant, in which the leaves are attached in bunches, the branches have many branches, children of the older group will not be able to convey, but they can see and draw some leaves raised up, and others lowered.
Six-year-old children have fairly well developed analytical thinking. They can highlight both common features inherent in objects of the same type, and individual characteristics that distinguish one object from another.
This task is carried out starting from the first quarter, for example, in the depiction of various trees. Each tree has a vertically directed trunk, thick and thin branches, and leaves on them that form a crown. These signs are also transmitted to children of the older group. In the preparatory group they are taught to see and draw trees of different species, where all these common features are somewhat unique: in a fir tree the trunk gradually narrows upward and ends with a thin sharp tip, while in deciduous trees it also narrows, but at the top it branches and ends with many small branches; the birch has thick branches going up, and long thin branches hang down, and the linden has thin branches located parallel to the ground.
There are bent trees, with forked trunks, young and old. The ability to see this diversity and convey it in a drawing develops in children the ability to create expressive images of nature.
Preparatory group.
The objectives of training in the preparatory group are the following: - to teach the image of the structure, size, proportions, characteristic features of objects from nature and from representation; - teach how to convey a wealth of shapes and colors, create expressive images; -develop compositional skills (location of an object on a sheet depending on the nature of the shape and size of the object); -develop a sense of color (the ability to convey different shades of the same color); -develop technical skills (the ability to mix paints to obtain different colors and their shades; -apply pencil strokes or brush strokes to the shape of an object). Six-year-old children have fairly well developed analytical thinking. They can highlight both common features inherent in objects of the same type, and individual characteristics that distinguish one object from another. This task is carried out starting from the first quarter, for example, in the depiction of various trees. Children in the pre-school group should know: to draw a tree, you first need to draw thin lines indicating the basic shape and size, draw the direction and shape of the branches, and then the exact outline of the tree. Then foliage and small details are added, after which the design is painted. Each tree has a vertically directed trunk, thick and thin branches, and leaves on them that form a crown. These signs are also transmitted to children of the older group. In the preparatory group they are taught to see and draw trees of different species, where all these common features are somewhat unique: in a fir tree the trunk gradually narrows upward and ends with a thin sharp tip, while in deciduous trees it also narrows, but at the top it branches and ends with many small branches; the birch has thick branches going up, and long thin branches hang down, and the linden has thin branches located parallel to the ground. There are bent trees, with forked trunks, young and old. The ability to see this diversity and convey it in a drawing develops in children the ability to create expressive images of nature. The same diversity in conveying the features of an object is reinforced in topics on the depiction of vegetables, fruits, etc. For this, children in the first quarter become familiar with obtaining shades of color and composing new colors. Preschoolers master the ability to convey the characteristic features of the structure and shape of objects by drawing from life a variety of objects, initially simple in shape and structure: Christmas tree and pine branches, fish, birds, dolls. Twigs with leaves, flowers, berries, toys and other various small objects can be used as nature in the preparatory group. The proximity of nature more often attracts the child’s attention to it: he compares it with a drawing. In addition, the value of such an “individual” nature is that it allows you to focus on its characteristic features. The teacher selects a homogeneous nature with slight variations: on one branch there are 3 branches, on the other - 2, on one - all the leaves look up, and on the other - in different directions. Children’s attention is drawn to this difference when explaining the task and analyzing nature; They are invited to draw their twig so that they can recognize it later. At the end of the lesson, an interesting analysis of finding from a drawing of life or from the nature of a drawing can be carried out. Here children's attention to all details increases. Drawing from nature helps develop a sense of composition when conveying space. Children very quickly master the ability to arrange objects in a large space near and far when drawing from life the surrounding nature. For example, from the window they look with the teacher at the space between two trees: close to the children there is a lawn, behind it is a river, then a field, and where the sky seems to meet the ground, a narrow strip of forest is visible, where you can’t even make out individual trees . Children begin to draw, moving from nearby to distant objects, starting from the bottom edge of the sheet. It becomes clear to them what drawing in a wide space means. The void between earth and sky disappears. The expressiveness of the drawing largely depends on the chosen vertical or horizontal position of the sheet of paper. To successfully cope with this choice, the child must very carefully analyze the object in various turns and note the features of its structure. In the preparatory group, children begin drawing with a preliminary sketch, in which the main parts are outlined first, and then the details are specified. Using a sketch forces the child to carefully analyze the nature, highlight the main thing in it, coordinate the details, and plan his work.
Drawing fir trees
We draw on tinted paper, gouache, palette - on it we will create different shades of green. We give 3 brushes: wide for the trunk, medium thickness for the branches, thin for the needles.
Explanation:
The drawing technique does not change. Drawing like in the older group. Only when depicting the needles do we pay attention to the fact that the upper branches are young, elastic and the greenery on them is bright, while the needles on the branches below are old and dark in color.
Drawing trees of different species.
Drawing trees in a landscape is different from just drawing trees. Since the structure of any tree is quite complex (many branches and twigs, and even more leaves.). then it is impossible to draw this mass separately, especially if the tree is located in the background. Here, when drawing, we proceed from the following rule: being away from the tree, we see only its general shape, without details. Each tree has a shape that is different from other trees, and you need to depict
Oak
We draw on tinted paper in two stripes, gouache, palette. We give 3 brushes: wide for the trunk, medium thickness and hard.
Explanation:
The oak is called a giant, its trunk is very thick, I will paint it with a wide brush with brown paint like this - I will draw a central line and “build up” the trunk on one side and the other. The trunk is thick, the oak is mighty, it stands firmly on the ground - the roots are visible. Using a medium brush, I paint the branches with brown paint. The branches have bent from time to time, they are old and thick. The oak tree does not have a crown like other trees. At the top the branches are curved and thick curved branches extend from the trunk. Small curved branches come off from the thick branches; I paint them with the tip of a brush. The greenery of the oak is transparent, carved, I will paint it with a hard glue brush “poke”.
Pine
In this group you can teach drawing pine trees with colored pencils, but for children it is very difficult. Children also learn to draw a young pine tree.
We draw on two-stripe tinted paper, palette. We give 2 brushes: wide for the trunk and medium thickness for the needles.
Explanation:
Using a wide brush with light brown paint, I paint a short trunk. The technique is the same as when drawing fir trees. We pay special attention to the branches. I draw 2 small ones at the top, and then from the trunk I draw 2 branches up to the sun and from here 2 down. Now, with the middle brush, I paint the needles, the upper branches are young - the needles on them are light, bright, the lower branches are older - the needles are dark.
In this group you can show how to draw a crown without branches - with an outline.
Also at this age, children enjoy drawing various fairy-tale trees.
The image of a person is the most difficult thing in the development of visual creativity of preschool children, which, gradually becoming more complex, occupies a place in children's drawings throughout preschool childhood.
Children whose attention and visual memory are poorly developed are lost. Basically, in the drawings of children, people stand with their arms outstretched helplessly and their legs spread apart. And only talented, gifted children can convey movement.
Everything is natural and very nice for a certain period, but there must be development! I have learned from experience and believe that drawing a person should be introduced into work with children as early as possible. Young children are not yet afraid of making mistakes, they like everything, and drawing a person in children’s drawings occupies one of the most preferred places in their visual activity. But the quantity and quality of images of people directly depends on how a child (especially of older preschool age) can do it.
In order for a child to be able to convey his plans in a drawing, he must have visual and technical skills. Often, a child, dissatisfied that his image is not done at the proper level, may simply refuse to draw human figures. Experience shows that due to difficulties in depicting a person, children try to avoid depicting the image of a person in independent creative activities. Based on this, it is necessary to teach children how to draw a person, showing a variety of ways to depict them. And for the teacher, the primary task should be to teach children to depict a person in accordance with his age and individual abilities
Children begin to try their hand at drawing the human figure shortly after three years of age. At this time, they use several basic strokes with which they can portray a person: mom, dad or another family member. The child draws the figure according to the same pattern: “Stick, stick, cucumber, here comes the little man!” The conclusion suggests itself: for there to be development, systematic, planned training is necessary.
Teaching preschool children to depict a person is a complex and painstaking process, requiring the teacher to be able to take into account a number of requirements in his work and create the necessary conditions for children's creativity. Pedagogical guidance should be aimed not only at teaching the art of depicting a portrait, but also at developing perception and imagination. In other words, it is necessary to teach children to see and perceive, to gradually bring them to the understanding that their image can express different contents and the management of the process should be aimed, first of all, at the development of aesthetic perception, at the figurative reflection of their impressions in the drawing using certain visual means. It is necessary to find pedagogical techniques that can arouse interest in drawing a person, emotions, and the imagination of children, intensify the drawing process, evoke a desire to evaluate the drawing, and find elements of expressiveness in it.
A child in the world around him does not catch everything that his eyes see, therefore, in classes on developing the ability to portray a person, it is necessary to teach children observation skills in order to more fully and truthfully convey the characteristic features and traits of the person being depicted.
In the process of educational work in this direction, children develop an understanding of the created image, the beauty and expressiveness of a portrait drawing.
In addition to all that has been said, a free and creatively created image by a child of the world of people will not only allow him to experience the joy of creativity, the joy of creating expressive images, but also, finally, will help him more easily enter into real relationships with the surrounding world of people, that is, it will provide one of the ways to carry out the process socialization of a preschool child. Drawings by older preschoolers show their interest in both social problems and the life history of their people.
It is also important that children of senior preschool age will soon go to school, and practice shows that a first-grader who does not know how to portray a person will find it quite difficult to create “lively”, bright works for which the teacher will give a positive mark, which in turn is the main motive for a child - a first grader.
Middle group.
In the middle group, children learn to draw a “matryoshka doll”. The head is depicted, with an extended sundress towards the bottom. “Snow Maiden” - head, widened fur coat towards the bottom, arms from the shoulder. By the end of the year, the image becomes more complex, you can add the “raised hand” movement.
In the older group, children are encouraged to draw in more detail. You can suggest a drawing scheme from geometric shapes, a head drawing scheme.
Invite children to look at a doll or child in beautiful clothes. Clarify by asking children the shape of the dress, head, arms, legs, their location and size. Facial proportions: the head is oval in shape. To depict the face, the head is divided by transverse lines into three parts: from the top to the brow ridges, from the brow ridges to the tip of the nose, and from the end of the nose to the end of the chin. The teacher draws an oval of the face on the board, notes auxiliary lines, explaining that they are noticeable, shows how eyes are drawn, the distance between the eyes is small, no more than one eye, inside the eye there is a colored circle and a small pupil. Asks what is above the eyes (eyebrows). He further explains that a person’s nose is the same color as their face, so you only need to draw the tip of the nose. You can draw the tip of the nose with a short line or depict nostrils. From the tip of the nose to the end of the face, the lips are in the middle.
- Children, look at each other. Do you see that the upper lip is different in shape from the lower? There are, as it were, two waves on the upper lip, and one on the lower lip (draw lips). We draw ears and hair.
In the preparatory group we introduce children to the human structure. Consider the structure of the human figure and the proportional relationship of parts. The figure shows that when determining proportions, any part of the body, usually the head (its height), is taken as a scale unit. The height of the entire human figure is 7-8 scale units (including the head). The dimensions of the length of the body and head together are approximately equal to the length of the legs. The arms are one unit longer than the body (reach mid-thigh). The arm to the elbow is longer than the forearm; The elbow is at waist level (about halfway across the body). The width of the figure at the shoulders is approximately two units. The legs at the knees are divided into two equal parts.
Let's consider one of the ways to draw a person in motion. Theme: “Ski trip”. One of the drawing methods is drawing with ovals. We draw an oval - the torso to the waist, an oval - the pelvic part. Then we will draw ovals - legs up to the knee, from the knee - ovals, ovals - feet. Then we will draw the arms, first finding the place of the shoulder. We draw the hands in the same way: an oval up to the elbow, an oval after the elbow. The elbow is at waist level, the palm is an oval. And finally - the head. Find a place for the neck and draw the head. Then, using a smooth line, we assemble the pattern and dress it. After you have drawn a pencil sketch, use an eraser to erase the auxiliary lines. Let's start working in color.
In the middle group, children learn to draw a “matryoshka doll”. The head is depicted, with an extended sundress towards the bottom. “Snow Maiden” - head, widened fur coat towards the bottom, arms from the shoulder. By the end of the year, the image becomes more complex, you can add the “raised hand” movement.
In the older group, children are encouraged to draw in more detail. You can suggest a drawing scheme from geometric shapes, a head drawing scheme.
Invite children to look at a doll or child in beautiful clothes. Clarify by asking children the shape of the dress, head, arms, legs, their location and size. Facial proportions: the head is oval in shape. To depict the face, the head is divided by transverse lines into three parts: from the top to the brow ridges, from the brow ridges to the tip of the nose, and from the end of the nose to the end of the chin. The teacher draws an oval of the face on the board, notes auxiliary lines, explaining that they are noticeable, shows how eyes are drawn, the distance between the eyes is small, no more than one eye, inside the eye there is a colored circle and a small pupil. Asks what is above the eyes (eyebrows). He further explains that a person’s nose is the same color as their face, so you only need to draw the tip of the nose. You can draw the tip of the nose with a short line or depict nostrils. From the tip of the nose to the end of the face, the lips are in the middle.
Children begin drawing from the cone-shaped body.
First topic: “Girl in a long fur coat.”
This topic is divided into two lessons.
1 lesson
Gouache – blue and flesh-colored (pink), wide brush.
Explanation:
I take a brush and paint the girl’s head with pink paint – it’s round. Now I will paint the girl’s long fur coat with blue paint. I step back a little from the head and draw a triangle. The fur coat has sleeves, like spruce branches, I paint with one downward movement of the brush. The girl has a hat on her head. To draw eyes, lips, nose, you can give a pencil or felt-tip pen. The teacher himself can draw: “Let’s bring your girl to life.”
Lesson 2
If the children did a good job, then we give them white paint and offer to draw the edge of the fur coat and hat. If it didn’t turn out well enough, you can invite all or some of the children to draw a friend for the girl. “You and I have already drawn a girl in a long fur coat, let’s draw a friend for her so that she won’t be bored.”
Lesson 3 – “Bear”
To make it easier for children to draw a naked doll in the next lesson, we first teach them how to draw a bear.
Gouache – brown, black, 2 brushes: wide and medium thickness.
Explanation:
I take a brush and use brown paint to paint a bear with a round head. To make the bear have an oval body, I will draw 2 circles - one under the other and then connect them, I will get an oval - the body of the bear. I will draw small ears on the head. Now I’ll draw oval paws - 2 at the top and 2 at the bottom (show). When the paint dries, paint the eyes and nose with black paint.
Lesson 4 – “Nude Doll”
Gouache - yellow, red, black. 2 brushes: wide and medium thickness.
Explanation:
We draw it in the same way as a bear, but we immediately draw the body oval. Oval arms and legs. Instead of ears we draw hair. Let's draw panties. When the paint dries, we bring the doll to life - draw eyes, a nose, and a mouth.
Lesson 5 – “Doll in a red dress”
Gouache – yellow, red, black. 2 brushes: wide and medium thickness.
Explanation:
We draw it the same way as a naked doll, but we dress it in a dress (triangle).
Senior and preparatory groups
A simple pencil.
We draw a person according to the diagram.
Explanation:
To make it easier for you to learn how to draw a person, I will teach you first to draw a diagram, and then from it - a little man. A person has a round head - draw a circle. Short neck - draw a vertical line. Now I draw a horizontal line - this is the line of the shoulders, it is wider than the head. Now I’ll draw a longer vertical line - this is the line of the body, it is equal to the size of two heads. Below I will draw the line of the hips, it is equal to the line of the shoulders. On the body I will mark the waist line, it is equal to half the shoulder line. Now I will draw a line of arms obliquely from the shoulders to the line of the hips. From the line of the hips we draw the lines of the legs; they are longer than the torso.
Several lessons are devoted to drawing diagrams until all children have mastered it, since this is the basis of the basics.
"Man on the Move"
A simple pencil.
Explanation:
In the first lesson, we draw the same diagram as usual, but mark the bend points on the arms and legs. Then we show how to draw a diagram to convey movement. To convey movement, you can use a child to show the direction of the lines of the arms and legs.
"Man on the move." Of course, it would not be easy to draw a person in motion if there was only one way of drawing, because we are all so different and our perception of the surrounding reality is also different. Fortunately, there are several ways of drawing and everyone can choose the most suitable one for themselves. Today we will talk about three ways to depict the figure of a moving person.
The first schematic drawing is traditional drawing, where we draw the human body with straight lines and then “dress” it with clothes.
1)2)
The second way is to draw with ovals. With this method, we convey the proportions of the human body using ovals of different sizes.
The third method is drawing with arcs, where we can depict a human figure using arcs, long and short, turned in different directions.
For all methods, without exception, you need a basic understanding of the proportions of the human body, which we will later study on the multimedia slide.
Explanation:
And so, we take the first sheet of paper and outline with a pencil, a barely noticeable line, the size of our person. Then, using lines, we depict the human skeleton, taking into account its proportions and the inclination of the torso, head, as well as the position of the arms and legs. Having drawn a diagram, we “dress” a person in clothes. The schematic representation is traditionally well known to everyone, so it does not cause any difficulties.
To master the method of drawing with ovals, take a blank sheet.
The entire drawing of a person consists of seven ovals the size of his head. That is, the full height of a person will be equal to seven circles, in one of which you will draw the head and neck. With the help of such a scheme, the proportions of the drawing will be strictly observed. The main thing is to draw the ovals the same. Let's try to make a drawing of a standing person and make the markings as on the slide, namely for the head and neck, shoulders and collarbone, chest, abdomen, legs and arms. Apply all these parts of the body to the previously prepared diagram, separately. First, on a drawing of a person, you need to draw an oval for the head, then an oval for the shoulders and circles for the joints. Next, draw two ovals placed on top of each other, the higher oval should be larger than the lower oval, this will be the chest and stomach of the person. Then you need to draw an oval for the hips, and then two ovals attached to the hips, these are the person's knees. The next step is to draw the legs and outlines for the arms as shown in my drawing. Now all that remains is to draw the general shape of the person’s torso and get the outline of a standing person. This is a very simple method, but it is very effective for those who have never drawn a person and helps to maintain exactly his proportions in the drawing. It will not be at all difficult for you to draw the general shape of the human body. Just trace all these ovals and circles with a pencil. The line can be very approximate, because the person in the picture is standing in clothes. remove all the extra contour lines and draw the clothes of the person
paper and draw the coordinate axis with very thin lines. Having stepped back equal segments from the horizontal axis up and down, we mark the person’s height with dots (both halves are the same size). Now we divide the lower part into two halves, these are the human knees. We also divide the upper part into two halves; this line separates the chest from the torso.
Method three,
drawing with arcs. Let's take a blank sheet of paper and try to draw, for example, a figure skater. We put a point just above the middle of the sheet (neck), draw two lines down from it, the arcs are wide at first, but gradually narrowing down, the lines are parallel. Then we draw two arcs upward, according to the same principle (hand), see the direction of the lines on the slide. We draw two arcs in the same way parallel to the lower lines, but a little more curved and a little shorter (the second leg in perspective). From the point where we started the drawing, we outline an oval (head), all that remains is to work out the small details, hands, skates, hair, dress. Middle-aged children can easily cope with this drawing, it is so simple.
So, in practice, we have mastered three types of images of a person in motion; if you wish, you can use all the skills and drawing techniques in one image to improve your drawing skills.
Visual skills of a senior preschooler
Teachers, together with the children, study weather phenomena on the street, examine objects, and in a group consolidate the acquired knowledge through modeling, appliqué, cutting out shapes and figures, and tracing patterns. As soon as the children remember all the signs, they try to draw themselves.
Then an analysis of the errors in the resulting drawings is carried out. Based on this, one or another drawing technique is selected. For example, you need to circle the dots, numbers, or complete a symmetrically depicted picture in the cells. Children must learn to arrange all objects harmoniously in space and convey realistic images on a sheet of paper.
In addition, drawing in the older group should develop a sense of color and aesthetic taste. Various techniques help with this. For example, children make an abstract drawing from splashes, conveying the image of autumn through leaf prints and brush marks. They can draw with soap bubbles (mix shampoo with paints), a candle, and then paint over the background with watercolors. All this contributes to the development of creative abilities, imagination, and broadening the horizons of older preschoolers.
The importance of classes using non-traditional drawing techniques
The meaning of alternative drawing techniques:
- help overcome fears and insecurities;
- develop spatial thinking and a sense of color, shape, texture;
- create conditions for the free expression of children's individuality;
- introduce children to the properties of various materials;
- instill a taste for unconventional thinking and creative exploration;
- improve fine motor skills;
- allow you to experience a feeling of joy and emotional satisfaction.
Alternative drawing techniques allow you to discover the creative potential in every child
Unconventional techniques create a special atmosphere; they inspire and inspire. In addition, in combination with traditional techniques, which are extremely important, they give a sense of novelty and are an impetus for the development of initiative, independence, stimulate ingenuity and interest in visual activity.
Drawing vegetables
It is easier for a child to master drawing vegetables. In the older group, the lesson is arranged in increasing complexity:
- children study the shape and appearance of vegetables in pictures, visual aids, real objects (feel, pronounce);
- preschoolers draw a geometric shape;
- correct the appearance of the vegetable;
- outline the main lines, bulges and other small elements with a pencil;
- color with paints, pencils, felt-tip pens, markers.
For example, a cucumber resembles an oval shape. Next, one end of the oval is lengthened and narrowed. Then, at the other end, draw the tail of the vegetable, mark “pimples” and groove lines on the body. The cucumber is then colored, showing the dark and light shades of the peel.
Or take, for example, carrots. A triangle is drawn. Then one side of it is rounded, the boundaries of the vegetable are made smoother. Next are the leaves and roots. Then the carrots are painted.
As soon as the senior group has mastered drawing vegetables, children move on to drawing still lifes. First, this is drawing linear visual objects, then vegetables on a plate or other utensils. The most difficult level is depicting objects from memory. To do this, before the lesson, the features of the appearance of the vegetable/vegetables are discussed, after which the children begin to complete the task (immediately using paints).
Notes on drawing for children of the senior group “Owl-owl, big head”
Summary of GCD on drawing for children of the senior group
"Owl-owl, big head"
Goal: create an image of a bird.
Tasks:
1. Educational:
1.1. cognitive: to form ideas about the diversity of birds, their way of life.
1.2. pictorial: learn to draw a bird, conveying the shape of the body (oval), parts (head, wings, paws, beak), plumage;
1.3. technical: strengthen the skills of drawing with colored pencils and painting images using a variety of strokes, different pressure on the pencil to convey shades of color.
2. Developmental: develop attention, eye, fine motor skills, graphic skills; develop figurative perception and imagination.
3. Educational: to cultivate interest in nature, caring attitude towards our smaller brothers.
Priority educational area: artistic and aesthetic development.
Educational field in integration: cognitive development, speech development.
Organization of a developing subject-spatial environment:
For the teacher: a toy (illustration) of an owl, an audio recording of the owl’s voice.
For children: sheets of white A4 paper, colored pencils and colored wax crayons.
Preliminary work: reading and telling fairy tales: V. Bianchi “The Owl”, D. Kharms “The Tale of the Forgetful Owl”, conversations on them. Examination of illustrations in books with fairy tales and children's encyclopedia. Outdoor games: “Owl-owl, big head”, “Owl”.
GCD move:
Educator: Hello, kids! Now I’ll tell you a riddle, and you try to guess it.
Her eyes are big
The beak of a predator is always hooked.
At night she flies
He sleeps on a tree only during the day.
Children's answers. (Owl).
Educator: That's right, well done!
Shows the children a figurine of an owl and turns on an audio recording with the sounds of the voices of these birds. Draws children's attention to the shape of the owl's body, its large "saucer" eyes, ears with tassels, a small hooked beak and small tenacious legs.
An owl is a bird of prey. It feeds on rodents, which it catches with its claws while flying low above the ground. The huge eyes of an owl do not like daylight, therefore, the owl sleeps during the day and hunts at night. Thanks to its coloring, the owl is a champion in camouflage. In addition, she knows how to retract, pressing her feathers to her body and freezing, thus becoming like a broken branch. Many species of owls are listed in the Red Book.
Guys, now let's play a little!
The outdoor game “Owl-owl, big head” is played.
Educator: Now, guys, let's draw this amazing bird.
Using form-building movements of the hand, he shows how to place the silhouette of a bird on a sheet of paper - large, on the entire sheet. Reminiscent of the shape of the beak, wings, legs.
The children get to work. During the drawing process, the teacher helps the children by asking leading questions about how else to depict its plumage. Reminds you of using different pressure on a pencil to get shades of colors.
At the end of the work, the children look at all the drawings.
Educator: Look what different owls we have: some are mischievous, some are sad, but this one is very menacing! Did you guys like our drawings? Whose drawing did you find more expressive? Why? (Children's answers). Children note the expressiveness of the drawing, careful coloring, the use of different pressure on the pencil, underlining
character of the owl with additional details.
Educator: Well done, guys! Everyone tried very hard. Let's place our drawings at the exhibition so that moms and dads can also admire our owls!
Sample
Drawing animals
Older preschoolers already know how to portray animals, but more often they are fabulous, animated (in dresses and suits, walk on two legs, eat with their paws). The teacher’s task is to achieve a realistic transfer of the image. For this purpose, visual activity takes place in parallel with applications, modeling, reading, and getting to know the outside world.
To begin with, children study the structural features of the body, then try to find common properties with already familiar shapes (for example, a round head, an oval body, triangular ears). In addition to the similarities, attention is focused on existing discrepancies, the tilt of objects, and their spatial position.
Let's look at drawing animals in the older group using the example of a hedgehog, a sheep and a puppy. To draw a hedgehog in a clearing, you need to do the following:
- find the center of the sheet where the animal will be located;
- draw an oval (body);
- on one edge outline a nose in the shape of a carrot;
- draw a round eye, nose, oval legs, mouth, needles with sticks;
- outline the grass, the sun, the clouds;
- Then you paint with paints, taking into account color transitions.
Image of a sheep, puppy
How to draw a sheep:
- draw a circle (torso);
- determine the tilt of the head;
- outline an oval (head);
- outline the body in a zigzag, creating curls;
- draw eyes on the head;
- outline four legs with sticks;
- draw the “feet” of the paws, the nose with dots, the pupils of the eyes, the ears;
- decorate.
The most difficult stage is considered to be detailed drawing in the senior group. Here's how to draw a puppy:
- draw an oval body, a round head, taking into account the tilt;
- draw a circle (muzzle) in the middle, mark the neck, paws with rectangular strokes and ovals (feet) with lines;
- Schematically determine the symmetry of the muzzle, outlining the position of the eyes, nose, and draw the ears;
- draw eyes, mouth;
- instead of circles on the paws, draw fingers, add a tail;
- erase the extra lines, mark the direction of the fur.
Such complex classes are carried out with children individually, in drawing classes.
Drawing "Mushrooms" in the senior group
Children often depict mushrooms with a vertical and horizontal oval. They especially like to decorate the fly agaric. It can be depicted with a convex oval or triangular cap. To draw a fly agaric with an oval hat, you need to determine its location on the sheet of paper and mark an ellipsoidal oval with a vertical stick. Next, draw the leg of the fly agaric.
Divide the ellipse diagonally: draw circles on top of the hat, and below, on the leg, a white collar. This way you can draw large and small mushrooms in the clearing. To get a triangular hat, make the top of the fly agaric into a mound. Under the hat, draw an oval outline of the inner layers. For such a “curly” mushroom, draw a thickened leg at the bottom. This is a simple drawing.
Mushrooms in the older group can be depicted more naturally. To do this, do the following:
- mentally determine their location;
- outline the foreground with a pencil, drawing a leaf and a rectangular leg of a small boletus;
- now you draw a hat that looks like half an oval;
- then draw another leaf and the stem of a neighboring large mushroom, which “looks” in the opposite direction;
- this boletus has a flat oval hat;
- move on to the largest mushroom behind the two;
- also draw a leg in the form of a trapezoid, and on top a hat resembling a horizontal egg;
- on the hat of the largest mushroom, highlight the upper dark side and the lower white layer;
- draw the grass.
More often than not, mushrooms grow in the rain. How to draw it realistically, without “sticks”, we will consider further.
Drawing "It's Raining"
The older group is already identifying the characteristics of rain (mushroom, blind, torrential, autumn, summer). The teacher just needs to focus on the fact that the drops are depicted in one direction. First, children draw clouds with raindrops, then they depict people with an umbrella; at the last stage, preschoolers depict rain “on the other side of the window.”
What to pay attention to when depicting rain clouds.
- If the clouds are nearby, then depict the rain as elongated drops of different sizes, but in the same direction. The drops start from the middle of the cloud, and not from the edge. The bottom and top of the clouds are darker in color than the foreground.
- If the clouds are far away, then shade the background under them with a pencil, forming a continuous shower stream. Then use strokes to identify individual raindrops.
This is a simple drawing (“It’s Raining”). The older group is quite capable of depicting “natural” weather phenomena. The following rules will help with this.
- You always depict rain on a dark background, regardless of whether you draw with paints, pencils, pastels, or oils.
- Draw the rain lines parallel to each other.
- You convey bright drops through the pressure of an eraser, a candle, different colors or a special bristled fan brush.
If you need to depict rain as a natural phenomenon, then draw a landscape, and after some time apply drops of light paint on top of it with continuous inclined strokes. If you make drops with an eraser, first draw directions with the wide side, and then with a sharp corner, using strong pressure, create a highlight of the drops.
You depict people in the pouring rain in a similar way. But attention is paid not only to the direction of the rain, the shape of the drops, but also to puddles and the force of the splashes. This is taught to preschoolers in individual drawing lessons.
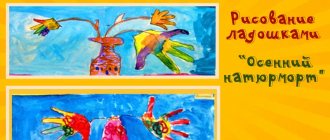
Drawing autumn
October is the month of autumn competitions. The teacher needs to consolidate the weather properties with the children through drawing (“Autumn”). The older group compares all the autumn months, finds similarities and differences, and remembers color transitions. The simplest task is when children depict a lonely tree. To do this, first determine its location and mark the trunk and branches with a “slingshot”.
Then small ticks are also schematically applied on the branches. Using paint, the thickness of the trunk and branches is “increased”. On top of the branches, foliage is depicted in different colors (red, orange, yellow). Now all that remains is to draw the lawn, sky, clouds, sun and shadow from the tree.
Autumn can be depicted by drawing leaf fall. Here children consolidate their knowledge about trees. The easiest option is to depict autumn with prints (this method is most preferred by the older group).
Drawing: theme "Autumn"
- Collect different leaves from trees.
- Distribute them on a sheet of paper.
- Next, take a piece of paper and generously coat it on the reverse side with red, yellow, or orange paint (especially carefully coat the veins).
- Place the leaf with the painted reverse side on the album sheet and press with your palm.
- Do this work with other sheets, choosing a different color.
- Now the leaves are no longer needed. You draw the prints with a brush and paints. Please note that the veins of the leaf act as the trunk and branches of the tree.
You can draw tree trunks with branches, and put leaf dots with your fingers. Preschoolers of any age also enjoy this. For the competition, many children, showing their imagination, draw an image of autumn with a woman’s face and leaves instead of hair. This consolidates knowledge about the proportions of the human face, leaves, trees and the color scheme of autumn.
Long-term planning for non-traditional drawing for the preparatory group
The program on alternative drawing techniques contains:
- Explanatory note: place of the course in the educational program of the preschool educational institution,
- goals and objectives.
- consultations,
- exhibition of works,
Table: long-term plan for unconventional drawing (fragment)
| Month | Subject | Goals | Execution technique |
| October | "My hometown" |
| Students' choice |
| “Red, yellow, gold - all over the colored sheet” |
| Leaf prints | |
| November | "Birch" |
| Charcoal drawing |
| "Painted Forest" |
| Poking drawing | |
| Author | Naumova E. N., teacher of the Municipal Preschool Educational Institution “Kindergarten No. 164” | ||
| Quote from: https://www.maam.ru/detskijsad/perspektivnyi-plan-po-netradicionomu-risovaniyu-podgotovitelnaja-grupa.html | |||
Creativity is meant to bring joy to children. Let drawing in each non-traditional technique become a small but memorable game. Experiments with materials and tools, unexpected results and unbridled flights of imagination! Unusual drawing techniques expand possibilities and strengthen children's courage to express artistic talents.
Drawing birds
Drawing a bird in the older group follows the same plan as the lesson on depicting animals. First, all details are compared with geometric shapes, attention is focused on movement, head tilt, and location on the landscape sheet. Here is an example (drawing a peacock):
- draw an oval body;
- a round head on top;
- the neck goes from the head along an oval;
- draw triangular wings on the body;
- add paws with three fingers to the oval;
- on the head you draw round eyes and a triangular beak;
- from one wing to the other, outline a loose tail, similar to daisy petals;
- color the bird with paints.
Drawing in the older group allows you to depict birds from different sides, in action. This is what the profile of a rooster looks like. You start working from the head. Draw a circle, mark the eye, a triangular beak with a transverse line, an oval beard and a comb of three petals.
From the head, draw a neck with a collar similar to the shape of a flared skirt. From it you continue the concave body, which together with the neck resembles a crescent. Next, draw a tail of eight feathers: the first long, raised up, four feathers starting from the end of the body, the last short, extending to a third of the body and hanging down.
On the body, a wing is drawn with a line, legs with four fingers and spurs. On the wing, sharp horizontal arcs indicate feathers, and vertical lines indicate long feathers. The claws are drawn on the fingers in small arcs.
How to write a summary of visual arts
The drawing notes in the senior group are written according to the following plan.
- Topic of the lesson. Usually taken from the program.
- Target. Three to five tasks for this lesson are prescribed, which involve acquiring new knowledge and consolidating existing skills.
- Material. The instrumentation is indicated, right down to the last brush. What techniques will be used, what equipment will be needed.
- Progress of the lesson. The theoretical part begins with preliminary work on the topic. So, a fairy-tale character may come to visit, who needs to be drawn or who needs help to portray something. With the help of poems, stories, looking at paintings, and visual material, the necessary properties of the object that needs to be drawn are revealed. Then, in practice, children complete the task, and at the end of the lesson, conclusions are drawn about the knowledge gained.
Nowadays, in kindergartens, classes are called “direct educational activities” (DEA). Drawing in the older group did not change its essence. Didactic games, game techniques, and various techniques are also used to make children want to draw the desired object or phenomenon.
How to make notes for a lesson on drawing in non-traditional techniques
The lesson notes indicate:
- goals and objectives,
- preliminary work (if carried out),
- materials and equipment,
- progress of the lesson.
Working on organizing the lesson is the responsibility of the teacher
According to SanPiN standards, a drawing lesson in the preparatory group lasts 25–30 minutes.
- Organizational moment - 1 minute.
- Introductory stage – 4–6 minutes.
- Practical part - 16–20 minutes.
- Display and discussion of works - 2–3 minutes.
- Reflection and summing up - 1 minute.
Between the structural elements of the lesson, didactic games and dynamic pauses are included.
Outdoor games and warm-ups are a form of health protection in drawing classes
Table: summary of a lesson on drawing in an unconventional technique, scratch paper “Dinosaur Excavation” (preparatory group)
| Author | Semenyako T. |
| Tasks |
|
| Preliminary work |
|
| Materials and equipment |
|
| Contents of the lesson | Children sit in a semicircle on chairs on the carpet. V.: Guys! Today we will meet dinosaurs again! She will be unusual. Want to go in search of dinosaurs? (Children’s answers are usually positive.) Reading the poem “Dinosaurs” by E. Aerova V.: Guys, why can’t we meet dinosaurs anywhere other than the museum? D: Because dinosaurs became extinct. They don't live now. Q: How then did dinosaurs get into the museum? Maybe they live in a museum? (Children's answers) V. gives the correct answer: Of course, dinosaurs do not live in museums. There they are kept in the form of stuffed animals, skeletons or fossils. In the museum you can find out what dinosaurs looked like, their height and weight, and coloring. Let's remember which scientists helped us learn everything about dinosaurs? How did they find them and where? (Children's answers) <…> V.: Let's imagine that on your tables there is an excavation site. Here is a “piece of earth” (shows the prepared cardboard for scratching), and tools (shows a sharp stick and a napkin). Using a sharp stick, you will “find” the dinosaur you want on a black background. But this work is not only interesting, but also difficult, and you need to prepare for it. Let's stand freely in front of the chairs and warm up. Physical education Setting an educational task V.: Guys, how to “find” a dinosaur? It’s very simple - you need to scratch it on a black background with a sharp stick. This image method is called “scratching”, or in other words, scratches. Think about what kind of dinosaur you want to find and scratch the drawing. Think about whether your dinosaur is tall or short, what kind of neck, tail, paws does it have? Are there horns, spikes or claws? You can draw a dinosaur as if it were alive, or you can draw its skeleton. Look what dinosaur I recently dug up. Next, show a sample and explain the scratching technology. Practical work for children At the end of the lesson, an exhibition is organized and the work is analyzed. V.: Well, our excavations have come to an end, and now I invite young paleontologists to tell us what they managed to find, what are the names of your dinosaurs. 2-3 children speak, and the opinions and assessments of those interested are heard. You can suggest making an illustrated magazine: “Dinosaurs”. |
| Quote from: https://www.maam.ru/detskijsad/konspekt-zanjatija-po-risovaniyu-v-netradicionoi-tehnike-gratazh-raskopki-dinozavra-podgotovitelnaja-grupa.html | |
Non-traditional drawing classes are often conducted in a playful way, for example, children go on a dinosaur dig
Dinosaur Dig is an ideal pedagogical development. The lesson is combined with topics on studying the surrounding world (“Professions”, “Animal World”), satisfies children’s desire to experiment and undoubtedly develops their imagination. The list of preliminary work includes a visit to a paleontological museum - unfortunately, they are located in only a few cities of the Russian Federation. Make a presentation and let the children visit the Museum of Antiquities virtually!
This is probably every child's dream - to become a paleontologist and dig up a dinosaur.