Features of paper birds
The origami technique allows you to create a wide variety of figures, including sparrows, which differ in the level of complexity and overall appearance. Children can also create real masterpieces in the form of applications, where the main character will be such a feathered animal. To work, you need to select the simplest tools and materials, but the base will be colored paper or cardboard.
- Where can crafts on this topic come in handy?
- Examples of ready-made crafts made from paper and cardboard
- How to make a sparrow
- Required materials and tools
- Origami with a simple diagram for beginners
- Step-by-step assembly of an origami sparrow with step-by-step photos
- Video master class
- Applications for children
- Cutting templates
- Simple sparrow costume: wings + mask
The second method is mosaic
- Choose different colors, but similar tones. For example, different shades of red or orange.
- Cut into pieces close to square, rectangular, triangular shapes, but of different sizes.
- Glue them onto plain cardboard to create the desired image.
This is what a craft made using this method looks like.
Wild birds
This is a method of embodying the lifestyle of untamed winged creatures, as children see them. Most often, such compositions depict keys flying to the south, as well as caring mothers in a nest with babies or in search of food among the foliage of a tree.
A three-dimensional image will be able to convey all the beauty as much as possible.
- The base must be solid. You can simply take a plain sheet of cardboard or paint it, adding elements that correspond to the character of the product (leaves, flowers, clouds, etc.)
- Fold white A4 in half and along the fold draw the shape of a bird from the side - head, elongated neck, raised wing, tail.
- Cut along the outline and glue on one side only.
- Create several of these birds, preferably of different sizes, so that they are not identical.
- After the glue has dried, “straighten the feathers” of the jamb - slightly twist the part of the wing that is not glued to the outside so that it puffs up. A few cuts symbolizing plumage will also not hurt.
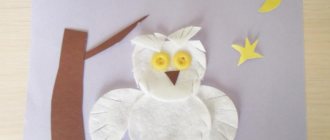
In winter, it will be relevant to implement the idea of winged animals that do not fly to warmer climes. The birds at the feeder will remind you of caring for our little brothers. Bullfinches and tits can be easily recognized by the bright colors of their plumage, and your plans can be realized with the help of decorated cotton pads.
Where can crafts on this topic come in handy?
A paper sparrow can become the central element of a thematic composition. Especially if we are talking about a children's painting or applique. In the future, the product can be used as room decoration.
You can make a beautiful interior decoration from paper birds. It is enough to make several copies and tie them at different levels to the block with threads. You can even secure the block with double-sided tape, since the craft will be easy, and you choose the placement location yourself. It will appear that the birds are soaring in the air, swaying in the wind.
You can use birds created using the origami technique to make horizontal or vertical garlands. Such products should be used to decorate rooms for the holidays. The figurine can be an excellent bookmark for a book.
A sparrow mask will be an excellent basis for a carnival costume. Another area of application for such a detail is theatrical productions or home theaters for family and friends.
Examples of ready-made crafts made from paper and cardboard
To be able to appreciate the variety of options for what a paper bird can look like, it’s worth considering several ready-made crafts:
- Colored three-dimensional bird.
- A bird with wings and a tail gathered into an accordion made of paper.
- An applique made from colored paper and corrugated cardboard.
These are ready-made versions of paper birds, which can be supplemented by creating the desired background or by forming a more complete compositional craft based on them.
How to make a sparrow
There are several ways to make a paper sparrow. In this case, completely diverse assembly techniques can be used. The most popular technique is origami. For young children, the applique technique is an ideal option. In accordance with the chosen technique, the necessary materials, as well as tools, are selected.
Required materials and tools
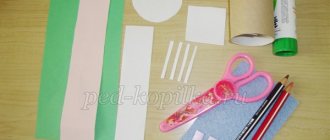
To make a paper bird you need to select the following tools and materials:
- Colored double-sided paper and cardboard.
- Scissors, glue and a simple pencil.
- If necessary, you need to select a sparrow template.
Additionally, you may need paints and decorative eyes with an adhesive base. For decoration, you can use other decorative materials - beads, cereals, rhinestones, sequins, fabric.
Origami with a simple diagram for beginners
You can make a paper bird with your own hands by using a simple origami pattern. This option is suitable for forming simple shapes that can become an excellent element for creating an applique. You can make a craft in 6 stages if you use the following scheme:
Step-by-step assembly of an origami sparrow with step-by-step photos
To make a figurine of a small bird, you can use the universal origami technique. There are several types of assembly schemes, each of which differs in the level of complexity of execution.
Origami sparrow assembly diagram for beginners:
- You need to prepare a square of paper. Bend the resulting element diagonally. Lay out the workpiece and bend 2 corners so that they are located along the diagonal line.
- The remaining corner, which forms a triangle at the bottom, should be completely bent in the opposite direction.
- The resulting side angles must be bent again relative to the diagonal line and disassembled. This will help form the basis for further manipulations with the workpiece.
- Straighten the side corners so that you get full-fledged pockets. In this case, you need to bend the corner that was previously “hidden” behind the base of the craft. Fold the straightened corner along the diagonal line.
- Next you need to bend the side corners so that they form “pockets”. The edges of such elements must also be bent in the direction of the free corner.
- The next step will be assembling the base of the workpiece. You need to fold the side corner so that its base coincides with the line of the central part. And once again bend the part in the primary direction.
- Fold the workpiece in half along the diagonal line. Straighten all parts of the figure. The outline of a bird immediately appears.
- The angle that will form the head needs to be bent inward. This can be done by bending the tip of the corner.
- The tail needs to be raised slightly, straightening the bend of the part from the inside.
As a result of simple assembly, you will get a voluminous sparrow. You can make the figurine more attractive if you attach decorative eyes (doll eyes) to the head area.
Video master class
There is another option for assembling a sparrow using the origami technique. At the same time, the algorithm is not complicated, so even a child can repeat it. To do this, you can watch the video instructions with a detailed description of all stages:
Applications for children
The sparrow applique can be the simplest manipulations with pre-prepared templates made of colored paper. This version of the application is perfect for children in the younger group of kindergarten.
To work, you will need a ready-made body with a bird's head. Separately, wings in the form of drops of black paper and circles (eyes) are prepared. You need to glue the wings and eyes onto the brown base. The composition can be supplemented by gluing the finished sparrow onto a sheet of cardboard and thinking about the background of the application.
Cutting templates
Often, ready-made stencils are used to create three-dimensional and flat bird figures. The selected sketch can be printed on a printer or redrawn. The blank is suitable for cutting and further gluing.
Template options:
- A multi-element template that can be used to create a full-fledged sparrow.
- Ready-made blanks that need to be glued onto the selected blank.
- A template that requires additional finishing. Makes an excellent base for coloring or appliqué.
You can select other types of templates for cutting, which will differ in appearance, shape and number of parts.
Third option
A more complex method for older children.
Create an original background on a landscape sheet that will match the theme of the work. In extreme cases, the sky and grass will suffice.
Mark with a pencil where the rest of the elements will be located. Cut out parts of the house from colored sheets and glue them to the base, which should already be dry.
Download a black and white drawing of a chicken and a rooster from the Internet. If you know how, you can draw it by hand on a white sheet. Cut out the silhouette.
Prepare colored elements that will correspond to the sizes and shapes of body parts: wings, comb, body, tail feathers, etc.
Glue the blanks and decorate the top with colored paper pieces.
All this work can be done collectively, entrusting the child with the responsible work of gluing the parts in the right places.
Firebird
A fairy-tale character who looks as fantasy suggests. An ideal composition for beginners.
Master class on making the “Sparrow” applique in the middle group
Maria Brovkina
Master class on making the “Sparrow” applique in the middle group
Master class on making the “Sparrow” applique in the middle group
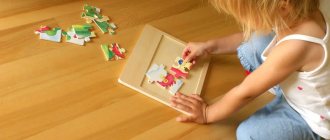
International Bird Day is celebrated annually on April 1. We do not ignore this holiday. This year we had an entertainment activity where the children of our middle group “Fidgets” strengthened and enriched their knowledge about birds, their characteristics, habits, and nutrition. We played outdoor games and put together puzzles.
And we finished the lesson by making a tear-off appliqué “Sparrow”.
—make an applique using the “Sparrow” tear-off technique
- learn how to make a product according to a sample,
-develop compositional skills,
- develop fine motor skills of the hands.
-colored and white paper,
We take sheets of colored cardboard, in different colors, and cut each sheet in half.
Cut out the silhouette of a sparrow from white cardboard.
We apply the sparrow silhouette to sheets of colored cardboard cut in half and outline the silhouette.
Cut white and brown paper into strips 1.5 cm wide.
Now for each child we distribute half of the colored cardboard, glue, strips of white and brown paper.
Children tear off pieces from stripes of two colors and paste them along the contour: white for the breast, brown for the body of the bird.
We then use a long strip of brown paper to make a branch for the bird and a leg.
Our application is ready!
Master class on making a collective application “Easter Basket” Good day, dear colleagues! I present to your attention a master class of collective work on the Easter Basket applique.
Children's master class on making the "Narcissus" applique Dear colleagues, I bring to your attention a children's master class on making the "Narcissus" applique. Goal: Continue to teach children.
Master class on making an applique from cotton pads “Snowdrops” Cotton pads are another material for creating various applications. From them we decided to make snowdrops - the first flowers of spring. For the manufacture of.
Master class on making an applique from rice “Autumn Tree” Master class on making an applique from rice “Autumn Tree” For work you will need: 1. Blue cardboard, 2. PVA glue, brush.
