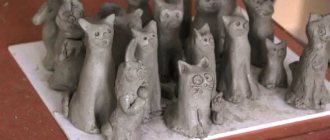
How to make roses from plasticine step by step
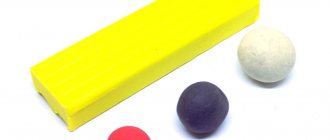
Step 1 . Prepare plasticine for work. The lid is necessary to make a flower pot or vase. You will need a toothpick for the stems.
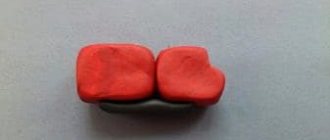
Step 2. To make lush bouquets of roses, you need to prepare a lot of flat petals. Just tear small pieces from the red block, knead them, roll them, then press them with your fingers so that you get small oval cakes with jagged edges.
Step 3. Attach each cake to the central curl, that is, twist one longer part into a spiral, and then stick all the rest around the circumference. You can use 3-4 or more parts. The more magnificent the rose, the more such leaves will be needed.
Step 4. Make beautiful rose buds using a simple method. Using your fingers, pull the tops of the petals to the sides to open them a little.
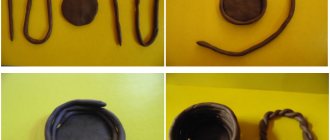
Step 5. Make green sepals. Take small pieces, squeeze them so as to get round cakes, use a toothpick to cut around the circumference 5-6 times and pull out each petal process with your fingers, that is, make a kind of star.
Step 6. Attach the resulting sepals to the back of the flowers, and you will get lush, beautiful roses. If you make these crafts from polymer clay, you can bake them and they will become a wonderful decoration.
Step 7 To make the stems, toothpicks were used. Just apply soft plasticine to each toothpick, press it with your finger to a hard surface and roll it out. It is better not to fill the top and bottom of the toothpicks.
Step 8. Insert 1 part of each toothpick into the buds.
Step 9. Make tender leaves. Secure small droplets of 5-6 pieces onto the branches, cut the tops with toothpicks.
Step 10 . Fill the prepared lid with brown or black plasticine, simulating earth.
Step 11 . Insert the opposite free parts of the toothpicks, collecting a bouquet, into this brown plasticine. This is such a wonderful craft.
You get beautiful roses. They are very similar to the real thing, only this is a miniature copy.
Girls will be delighted with this craft that they will make with their own hands. This is a wonderful decoration for a dollhouse.
These roses can be made in any other color.
Making flowers from plasticine
Who wouldn’t want to have a tiny plasticine miracle at home, for example... a graceful flower that would effectively harmonize with the shade of the wallpaper, or follow the contours of the carvings on the furniture? Anyone can make an original decoration for a room. And flowers made from plasticine will certainly come in handy when preparing a DIY product for school or kindergarten.
Charming roses
The queen of the kingdom of flowers - an elegant rose - can be molded in two ways: from flagella and droplets, as well as from plasticine balls. Let's look at both.
Method 1
Make a drop and a flagellum from plasticine of your favorite color.
Give the flagellum a flat shape, properly kneading it with your hands, and stick it around a plasticine drop.
Make another flagellum and, having flattened it, stick it around the middle of the flower. The more flagella you make, the more magnificent the flower will be.
Congratulations! The rose is ready.
Method 2
Download small plasticine balls of approximately the same size.
Shape the balls into flat cakes and place them in one row, as shown in the photo.
Roll the flattened balls into a pretty rose.
This is the kind of beauty you should turn out to be:
Dandelion made of plasticine
A bright yellow dandelion is a ray of sunshine in your palm. Let's make a dandelion out of plasticine and invite spring to visit.
Make a long sausage from plasticine.
Flatten and trim using a stack, cutting off any uneven areas. Use scissors to make a fringe for the future flower.
Roll the flattened and fringed flagellum into a fluffy dandelion.
Hooray! The tiny plasticine sun is ready!
Blooming glade made of plasticine
How about making a rose, daisy, chrysanthemum and calla lily from plasticine and make an original picture for mom? If you like the idea, follow me!
a rose using opened plasticine balls .
The middle will consist of stamens-balls of orange color. Press them lightly against the flower to help them stick better. The rose is ready.
Let's move on to making chamomile .
Make a sausage from white or yellow plasticine. Divide it into equal pieces and make balls out of them. Flatten each ball on one side and pinch the thin edge with your fingers. Like this:
Place the flower-shaped petals on the surface of the future painting (for example, on the lid of a plastic tray), press the wide edges of the petals to the plastic. Make a round center from orange plasticine and use a toothpick to make stamens. Chamomile is ready.
We make chrysanthemums .
Make three balls of different sizes from plasticine of your favorite color. Flatten them and make cuts in a stack.
Place the layers of chrysanthemum into each other, lightly pressing the center of the flower. Using a knife or a stack, straighten the petals, bending some of them upward. Place a “mound” of yellow plasticine stamen balls inside, press lightly.
Now let's make a calla lily from plasticine.
Flatten a white or purple plasticine ball into a thick cake. Using a stack, cut off a little plasticine from the two edges, making one side of the pancake narrower.
The small yellow flagellum will be the stamen, and the long and massive green flagellum will be the stem.
Wrap a calla lily petal around the stem and stamen. From the wide side, press it onto the surface of the painting.
Decorate the flowers with leaves and make stems. Roll thin flagella into rolls and add herbs from plasticine.
Congratulations, your blooming plasticine meadow is ready!
And if you prefer video instructions, watch online how to make a flower from plasticine .