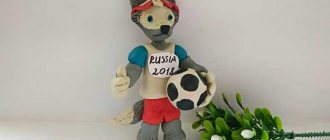
Fans of modeling from plasticine can try their “creative” capabilities in working on crafts on a human theme. Creating various human figures (adults or children, fairy tales or “ordinary” ones from life) at the beginning, the most ordinary ones, will allow you to develop sculpting skills. Gradually, you can begin to make “naturalistic” copies of people in reduced sizes using sophisticated technology. We offer you interesting information about how to mold a person from plasticine - video lessons, assembly diagrams, manufacturing methods and examples of spectacular finished crafts.
- Step-by-step instructions on how to mold a person from plasticine
- Step-by-step photos of how to make light little people with children or beginners
- Video tutorials on modeling
- Sculpting detailed figures
- How to shape a figurine: general recommendations
- How to sculpt the face of a man from plasticine: sculptural modeling to resemble reality
- Video lessons on how to achieve a portrait resemblance in a plasticine person
- What kind of person/character can be molded from plasticine?
- spider man
- iron Man
- Venom
- Father Frost
- Snow Maiden
- Characters from the game Minecraft
Step-by-step instructions on how to mold a person from plasticine
It is better to construct the craft from light plasticine - it is malleable and holds its shape, the finished work looks neat. Let's look at how to mold a person from plasticine step by step:
- A piece of white, pink or beige plasticine is lightly rolled into an oval shape and stacked into three equal parts (stripes).
- The upper third is cut in a stack into three equal vertical “bases” - this is the future head and arms.
- The lower third is divided by a stack into two equal pieces - these are the future legs.
- At the top, the side blanks are lowered down, shoulders and arms are sculpted, given a natural shape, and can be slightly bent at the elbows.
- The middle blank is made round - the neck and head are formed.
- The legs are sculpted - they should, in accordance with reality, be thicker and longer than the arms.
- Natural shapes are added to the figure - a physiological deflection is made in the back/lower back, a rounded “mass” is added to the buttocks area.
- Small details are decorated - feet, hands, nose, eyes, eyebrows and mouth are added to the face.
The basic modeling of a man from plasticine is completed.
You can create a figure in two ways - plastic, when the silhouette is worked out entirely from one whole piece of plasticine, or from separate modules, when the arms, legs, head with neck and torso are molded from separate pieces and then joined together.
Step-by-step photos of how to make light little people with children or beginners
For children, there are many simple options for making a plasticine man. For example, kids will be happy to create the following figures:
- balls are rolled from plasticine of different shades - large and small;
- give the large ball a slightly flattened shape, and stretch out four rays - you get an asterisk;
- a small ball is “planted” in the upper part - this is the head.
A simplified version of the figures is ready.
Girls, who especially love to play with dolls, will eagerly start creating a little man:
- a body is formed from the workpiece in sliders;
- add hands, head;
- decorate the suit with a collar and buttons;
- feet are sculpted and secured.
The baby is ready, add the indispensable and main attribute of the pacifier.
For older children, it will be interesting to learn how to make a man in the form of a teenage boy out of plasticine step by step:
- the body is assembled from 6 modules;
- legs - in the form of a thick tourniquet, bent in half, feet are added;
- they sculpt the head, design the eyes and nose on the face.
Add a beret and mittens.
You can also make a girl using this method by adding a skirt (instead of trousers) and braids.
Video tutorials on modeling
Summary of GCD for modeling in the middle group “Merry Men”
Methodological development of direct educational activities according to the Federal State Educational Standard in educational areas
“Speech development” and “Artistic and aesthetic development”
for children of middle preschool age
"Merry Men"
"Merry men."
Goal: developing children's ideas about body proportions.
Tasks:
Educational:
Teach children to see the proportions of the human body and compare body parts.
Educational:
Develop skills in sculpting sequence, sculpting techniques: rolling, pinching; compare the proportions of body parts; develop communication skills.
Educational:
Develop initiative, cooperation skills, continue to learn how to decorate your crafts.
Integration of educational areas:
Social and communicative development, speech development, cognitive development, artistic and aesthetic development.
Equipment:
A box with different human body parts with different proportions and colors, a box of plasticine for each child, a plasticine board, stacks, room layouts for little people.
GCD move:
| Educational areas | Tasks | Sequence of activities | Expected responses and actions of children |
| Social and communicative development | Create a positive emotional mood, take advantage of a surprise moment | The teacher enters the group with a beautiful box. - Guys, look what our schoolchildren gave me! Let's see what is there? The teacher's box accidentally falls to the floor. - Guys, I think I broke something. The teacher opens the box and shows it to the children. - What is this interesting? | Children approach the teacher and look at the box. Children put forward their versions. |
| Speech development | Activate children's vocabulary, continue to teach how to conduct a dialogue and answer questions, suggesting your own versions. | — Hands of different colors and sizes; - the legs are also not all the same; “I’ll try to collect them now.” The teacher puts the large torso of a man to the small head and asks: Did you connect the parts correctly? What's wrong? Is there a head, is there a torso, are the arms and legs attached? | Children watch the teacher’s actions and answer questions. |
| Cognitive development | Teach children to see the proportions of the human body and compare body parts. | So he sorts through the parts of the man from the box until the children agree that the man is assembled correctly and his body proportions match. The teacher invites the children to try to make a similar person. Choose a piece of plasticine for yourself, take a stack, divide the piece of plasticine in half, and then in one half separate 2 equal parts for the body and head, and the other half for the legs and arms of the person. | Children agree or disagree with the teacher. |
| Artistic and aesthetic development | Develop skills in sculpting sequence and sculpting techniques: rolling, pinching. | The teacher helps children in sculpting and decorating little people. Offers a choice of room layouts for little people, prepared in advance by children and their parents. | Children sculpt their little people and decorate |
| Social and communicative development | Develop communication skills. | Game activity of a teacher with children. | Independent play activities of children. |
Author: Sycheva Oksana Yakovlevna Position: teacher of the 1st qualification category Place of work: MAOU "Komsomolskaya Secondary School" (Komsomolsk kindergarten) Location: Komsomolsky village, Perm region
Date modified: June 23, 2022 Date published: June 23, 2018
Sculpting detailed figures
The plasticine person must have the appropriate dimensions; the body parameters of an adult differ from those of a child. It is believed that in a child’s figure one can “mentally” place his head in a vertical position 3-5 times, and for an adult this ratio is 7-8 times. If they sculpt a fairy-tale hero, then this scheme is not followed.
The more individual, small components there are in a craft, the more complex it is, but also the more impressive. Children in the 6th grade will already be able to easily create an original figurine from a large number of parts if they have a visual assembly diagram of how to sculpt a person:
How to shape a figurine: general recommendations
In order to make a person in motion, you can use the following options:
- use wire - it is given the desired shape, then layers of plasticine are applied, sculpting a silhouette;
- in oval bundles-blanks (for arms/legs), small cuts are cut in stacks - they help to easily bend the limbs at the “joints”;
- the silhouette is assembled from separate modules, fastened with a toothpick or wire - this allows the parts to “move”.
Depending on the gender of the person, the workpiece is given appropriate differences - broad shoulders (for men), feminine shapes (for the fairer sex).
To sculpt a human figure, head and carefully sculpt the face, you will need tools - a classic stack, and with a wavy edge, plasticine sticks, attachments in the form of concave spatulas, wire, toothpicks.
How to sculpt the face of a man from plasticine: sculptural modeling to resemble reality
When sculpting a human head from plasticine, three main criteria are determined:
- location of parts (anatomical);
- maintaining proportions;
- finding and transmitting the features of forms.
If you set yourself the goal of recreating a face/head (on a pedestal), then it is better to choose a frame. Plasticine is already applied to it. Then they determine the location of the main lines and proportions. Create volume by adding plasticine strokes.
They work out small details, taking into account the nuances:
- close-set eyes, squinting;
- shape of the nose, forehead, lips;
- presence/absence of dimples and folds.
The shape of the ears, hairstyle, and neck length are also important. This can be done without a frame, from sculptural plasticine, it is as flexible as possible.
The ratio of high and wide points on the face is determined, and “marks” are placed on the most protruding parts of the face on a plasticine blank. If necessary, adding or removing plasticine (with strokes).
Video lessons on how to achieve a portrait resemblance in a plasticine person
A sculpture created by yourself will be as similar as possible to the original if you use video material from a pro, and do not forget about the tips:
- the shape of the head can be elongated or round;
- It is better to calculate the ratio of proportions in cm; if the scale is not life-size, then it should be reduced (to the required numbers).
You definitely need to pay attention to the features of the head and face and emphasize these nuances in the sculpture.
For greater similarity, it is advisable to create a schematic drawing or use a photo on which a square grid is drawn with a pencil. This will help to “catch” the features of the face.
Sculpting a human figure
Elena Kostina
Sculpting a human figure
Master class “ Sculpting a human figure”
In different preschool education programs, the task is to sculpt a human figure in motion . It can sound differently: “forming the ability to convey characteristic human , create expressive images ... a girl dances, children do gymnastics), etc. A problem arises in the transfer of movements if each arm and each leg are attached separately (lubricated)
.
When you try (and there may be several of them)
to change the position of your arms or legs, they may break off.
For myself, I discovered a method that not only speeds up the creation of figures , makes the figure much stronger and more stable, but also allows you to repeatedly change the position of the arms and legs, convey various movements, without fear of breaking them off.
The quality of work improves, which gives children self-confidence. Children use the saved time to decorate and detail the work. I will demonstrate this method using the example of a soldier and a boy in winter clothes.
Soldier
We roll out a thick cylinder for a tunic, a long cylinder of medium thickness for the legs, a black cylinder for boots. Roll balls for the head, arms, headdress, and details. We cut the top of the tunic and the cylinder for the boots in half.
We use our fingers to form two sleeves, rounding and stretching them. An important point: the arms and torso are one piece.
We fold the cylinder for the pants in half. This is also a very important point: the lower part of the body from the waist with the legs is obtained as a whole piece. We sharpen the lower parts of the pants. We make a dimple at the bottom of the tunic.
Forming “beaks”
on the head and palms. We make dimples in the sleeves, collar, boots.
We collect the parts - the soldier is ready.
Boy in winter clothes
We are preparing a thick cylinder for a jacket, a thin long one for pants, and an egg for boots.
Cut the top of the jacket, cut the egg in half lengthwise, and fold the pants in half.
We make dimples in the sleeves, boots, and bottom of the jacket. We sharpen the bottom of the panties.
Assembling the boy, adding details. Now he can ski...
Can shovel snow...
Didactic manual on sensory Dear colleagues! I present to your attention a didactic manual on sensory education. I took the idea from the magazine “Hoop” No. 3/2012 (p. 20,. Learning to draw a human figure Game “Funny People” All teachers, I think, will agree with me that sometimes it is quite difficult to teach preschoolers to draw a human figure.
Source
What kind of person/character can be molded from plasticine?
spider man
Detailed instructions on how to do it are shown here.
iron Man
Instructions on how to do it are shown here.
Venom
Instructions on how to do this are shown here.
Father Frost
Detailed sculpting instructions are shown here.
Snow Maiden
Modeling of Snow Maidens is shown here.
How to make a caterpillar and a bee step by step
How to make a ladybug
Snail step by step for children (spiral modeling)
How to make a teddy bear
An interesting idea for sculpting: a bird in a nest
We sculpt flowers and compositions step by step
How to make a car from plasticine
Bicycle step by step
Modeling should be interesting for a child. Therefore, choose the most interesting ideas for modeling. Let the child choose what he will sculpt. When the baby is engaged, discomfort, excitement and anxiety go away. When a child creates a favorite cartoon animal, be it a bunny or a kitten, a giraffe or a unicorn, he feels good and proud of his achievements. Therefore, mommies, do not forget to praise your baby for any achievement!
Mental and personal development while sculpting
When doing sculpting step by step, do it in a fun and playful way. Create a story for the beast you create, and then act it out. Use ideas from fairy tales and cartoons, and act out stories from everyday life.
What do you need for a modeling lesson?
You need high-quality plasticine. For kids, choose very soft plasticine. If it is difficult for the baby to sculpt awkwardly, then his interest in such an activity will quickly pass.
Tools for modeling from plasticine:
- modeling board;
- stacks;
- rolling pins, including those with patterns;
- molds for modeling.
How to teach children to sculpt?
Many parents think that children will begin to sculpt and develop on their own. This is wrong. You will need to be shown how to do it, go through basic lessons. In the future, the child will come up with his own characters, but initially show him how to do it.
Learn how to sculpt basic shapes:
- ball;
- egg (ellipsoid);
- hemisphere;
- cake;
- sausage;
- cylinder;
- cone;
- brick;
- tourniquet;
- spiral.
After this, mold the figures step by step. Choose an interesting animal and make it together. Help the child, praise him!
Modeling in this age group usually takes no more than 20 minutes.
