Making various crafts from plasticine is a favorite pastime of all children. They especially like to create figurines of animals, because plush animals, cartoons, fairy tales, games - everything is related to animals. At the same time, children of any age can make figurines of animals from plastic mass due to their capabilities. Both toddlers and older children can make a horse from plasticine.
- Step-by-step instructions: how to make a horse from plasticine
- Video master classes on modeling a horse from plasticine
- Simple crafts for kids and beginners
- Features of sculpting the Dymkovo horse
Step-by-step instructions: how to make a horse from plasticine
This is a step-by-step modeling of a simple version of a plasticine horse, accessible to children of kindergarten age. For the craft, prepare material of brown, black and light beige color, matches and a glass to cut the bars into pieces.
How to make a horse:
- You need to start working from the head. To do this you need to sculpt an oval part. Then give it the shape of a horse's head.
- Make small “cakes” and form them into triangular ears, stick them on your head. Make small round blanks from white and attach them in place of the eyes. Stick small black balls on top - these will be the eyes.
- Make a horse's body from a large piece of mass, rolling it into an oval. Insert a match on one side.
- Cover the match with a large amount of plasticine and attach the head to it to form a neck.
- Roll up 4 identical strands and glue them to the body - these are the legs.
- Attach black round flat pieces to each leg - these are hooves.
- Roll thin flagella from a light color and attach them to the neck in rows on top of each other - this is the mane. Several strands form the horse's tail.
A plasticine horse stands in front of you.
The child should be helped if something does not work out for him.
Video master classes on modeling a horse from plasticine
You can sculpt a horse in different ways, using different colors, using other materials, making complex crafts from sculptural plasticine. Plasticine horses can be used to decorate children's rooms or as gifts for friends and family.
A cute plasticine horse is an interesting and beautiful toy:
Wild West horse. Toy - a beautiful horse made of plasticine:
And this is the Angry Lanky Horse made of plasticine, one of the creations of the Universe, which was created by Trevor Henderson:
Plasticine Rainbow Dash
The cartoon about ponies is very popular among little girls. There are many characters in it, but the one we will sculpt below occupies a special place. Instructions on how to make such a horse from plasticine will be especially interesting for girls.
In our work we will use all the materials we are familiar with, with one exception. You will need a set of plasticine that contains all possible colors.
Instructions on how to make a plasticine pony craft for children:
- Let's start with making the head. For this we need blue. Roll a large and a small ball. We connect them to each other. We transform a small part into a tubercle. Using a stack on this tubercle, highlight the nostrils.
- We do not remove the stack and make holes on the face for the big and cute eyes of this horse. For the eyes you will need cakes of different sizes. We will list the colors in descending order of size. The largest color is black, followed by white, purple, black again, and the smallest white dots complete the eyes. We collect the cakes indicated by color in descending order. Decorate the finished eyes with eyelashes. This plasticine eye sculpting for children may seem difficult due to the miniature parts, so it can be done by an adult.
- Attach triangular ears to the made head. The head work is finished for now.
- Let's start making the body. Take a long block. On one side, make it narrow, then bend the part at an angle to create a neck.
- Take matches. They will be needed for fastening. We sculpt legs from medium blue balls. We pull them out to get cones. We insert a match into the base of each leg for fastening. We attach the legs to the body and the head.
- The horse must be decorated with a fluffy rainbow tail. Each individual hair of the ponytail must be composed according to the shades of the rainbow. We fasten all the parts and attach them to the horse figurine. We make the horse's mane and bangs.
- Those who have already seen the cartoon know that our horse stands out not only with its rainbow tail, but also with its wings. For them you need to make several blue cakes and apply notches on them with a tool. Attach the wings to the horse.
- Almost done. All that remains is to attach its distinctive sign to the horse - a lightning bolt.
You learned how to make Dash the horse from plasticine. The finished figurine looks very attractive. Girls will surely love such a graceful horse. If it’s difficult to make a craft, but you want to make a cute creature, try making a cat out of plasticine.
Simple crafts for kids and beginners
Any child can make a horse from plasticine. Young children do this with the help of adults; older children can work independently. There are a lot of options for sculpting horses. Here are selected photos of crafts that can be created by the hands of small children and novice sculptors. As an example, it is recommended to look at photos of finished horse crafts.
A beautiful toy - a brown horse with a yellow mane.
A simple craft - a horse made of brown plasticine with a yellow mane and tail. It can be sculpted from light plasticine. This is a soft and pliable mass, easy for small children to work with. The mass holds its shape well, it is easy to knead it with your hands and form any part. But it hardens faster than usual, so it’s better to immediately attach small parts to the base of the figure:
The step-by-step modeling of a horse from plasticine for children in grade 2 is presented as follows:
- The body of the animal must be made from a ball, which must be stretched out a little to form a pear-shaped part.
- For the legs you need to roll 4 identical plasticine balls of the same color as the body. Attach them to the base of the craft - the body.
- For the head, roll into a smaller ball. Stick a pink ball to it and form a muzzle.
- Make small ears from cakes and glue them to the head. Using a stack, cut out the nostrils on the horse’s muzzle.
- The eyes need to be created from white small blanks and black balls.
- The mane and tail should be made of thin black flagella. Attach them to the head and body of the animal. Connect them together.
The fancy horse is ready.
Here children can show their imagination and make a horse with a light mane, with tan marks on its sides, in “apples”.
A beautiful horse craft made from light plasticine with a brown mane and “apples”:
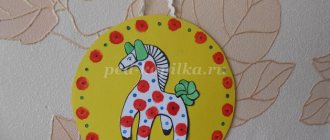
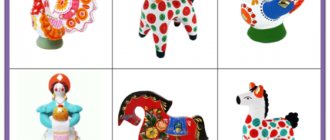
Features of sculpting the Dymkovo horse
The Dymkovo toy is a symbol of joy and vitality, so it is created only from bright colors of the mass. These toys look elegant; our ancestors used them to decorate their homes and give them to each other on holidays. They were sculpted mainly from a mixture of clay and sand, dried, fired in an oven, and then painted in bright colors. The peculiarity of such crafts was that the toy must make some kind of sound: it squeaked, rang, crackled and hummed.
The Dymkovo horse craft will be bright, but will not be able to make sounds. How to make a Dymkovo horse from plasticine for a child with your own hands, step by step:
- Choose the color of the mass for the body and head and divide it into two parts of different sizes. The larger part will be used to make the torso and legs, and the smaller part will be used to make the head and neck.
- Making a horse in the style of a Dymkovo craft means making a craft with short cone-shaped legs and a short neck. For the legs and torso, roll into a thick “sausage”. Cut it on both sides to form the legs of the animal. The “sausage” needs to be bent in an arc, this should be done until the legs stand on the surface of the workplace.
- Roll the remaining mass into a roller and divide into two parts and form them into an oval and a cone. This will be the horse's head and neck.
- Connect the head to the neck, attach it to the body and smooth out the joints.
- Make two small cones - these are the ears of the figure.
- Create the mane and tail from thin flagella, attaching them to the right places. You need to use a bright color of plasticine to make the horse look elegant. Select the hooves at the feet, cut out the nostrils and mouth in stacks, and glue on eyes made of white and black balls.
- The Dymkovo horse made from plasticine is gradually completed by gluing white or other brightly colored blanks onto the body.
To make the horse figurine as close as possible to the Dymkovo style, you can use templates and pictures to work with, which can be used to easily mold any model of the toy.
Plasticine crafts are available for children of any age. They happily sculpt animal figures. The horse is considered one of the popular figures in children's creativity, because it symbolizes kindness and endurance. And this is very important for every person.
Simple plasticine horse
This manufacturing option is good because in the process of constructing a horse with a child, you can repeat the names of the figures and correlate them with the parts of the horse figurine.
What to prepare for modeling:
- plasticine;
- board;
- stack.
Before starting work, we recommend showing your child photographs of horses. Tell your child that this animal consists of a body, a neck that is curved, an oval head and long legs. The horse is decorated with a thick tail and a luxurious mane. Once the child is familiar with the pictures, you can begin to work.
Instructions on how to make a horse from plasticine:
- Prepare the material. If it was not warm, it needs to be warmed up and kneaded.
- Roll into a ball from a single piece. Divide the resulting figure into several parts. Roll each part with a roller. Divide the resulting figures into six cylinders. Try to divide so that each separated element is the same.
- Take one piece from the cylinder and roll it out into a long but thick sausage. This will be the head. The part where the nose and mouth will be located needs to be slightly lengthened. We leave the back of the figure massive.
(Step 2) - You should have a piece of the first cylinder left. We will sculpt a neck from it. We form a figure similar to a crescent. Press the top with your fingers. This place will be intended for the mane.
- Let's start sculpting the body. Take four pieces from the separated plasticine and make an oval shape out of them. Set the workpiece aside.
- From the remaining four pieces we form the legs. They should be thick on top and thin on the bottom. Make hooves from small peas of plasticine.
(Step 3) - When all the large details are ready, you can create the horse figure. Attach the head to the body. We carefully cover all joints, do it evenly so as not to deform the product. We do the same with other parts.
- From the remaining material you need to make ears, mane and tail. Use black to make your eyes. Make nostrils on the head using a stack.
- Let's start shaping the horse. We attach the ears to the head. They should be located with a wide part near the head, and their shape should be pointed towards the top. We coat the parts to remove the joints.
(Step 4) - Place the resulting horse figure on the table. We bend the legs to create a walking horse. All that remains is to add the mane and tail. They are made from thin sausages. If there is no plasticine left, megamaster.info recommends cutting through the mane and tail with a sharp and thin object. To make your horse even more beautiful, you can add bangs.
The instructions on how to make a horse from plasticine are finished. You can admire the result. The finished horse can be used in your collection of plasticine works. If you don’t have one yet, replenish it by making a dog out of plasticine.
