Motivating start to class
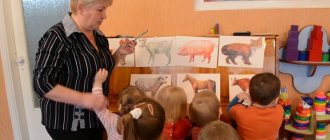
Of course, for any visual activity of preschoolers it is necessary to create motivation. In this case, you can start from the image of an animal (after all, children usually love them very much):
- Ask the children to tell about their pets.
- Talk about the variety of breeds of dogs and cats, show the corresponding pictures.
You can talk about the variety of dog breeds, look at pictures
- Game motivation. For example, preschoolers receive a letter from the queen of a fairyland. All the dogs there disappeared - they were kidnapped by an evil witch. The teacher invites the children to create a dog and a person who will play with it.
- Go from the work of art. The following options are suitable:
- R. Kipling “The cat that walked by itself”
- Mordovian fairy tale “How the dog was looking for a friend” (a very good option, since here in the end it was the person who turned out to be the best friend for the dog, the teacher invites the children to fashion their own best friend and play with him),
The theme of the lesson can be played out by reading the fairy tale “How a dog was looking for a friend”
- Stories about animals by V. Bianki, E. Charushina.
You definitely need to choose an exciting physical education program and finger gymnastics.
Table: dynamic pauses on the topic of the lesson
| Words | Movements |
| Finger gymnastics “Pussy” | |
| In our kitchen, under the table, there is a jug of milk. | make a circle from the thumb and all other fingers of the left hand |
| The cat approached the jar | “go” with the index and middle fingers of the right hand |
| I drank cream on top | Using your index finger, make “lacking” movements in a circle representing a pot |
| She stuck her head deeper into the pot: “I’ll drink some milk for future use!” | put your finger deeper into the pot circle |
| What's happened? Oh oh oh! The cat turns its head | we turn our heads |
| She's drunk too much milk - she can't get out of the pot! | trying to pull your finger out of the circle |
| The pot didn't come off my head. She ran away into the forest with him! | by stamping the fingers of both hands on the table, we show how the cat ran away |
| Physical school | |
| Now the window has opened | hands to the side |
| The cat came out onto the ledge | cat's smooth gait |
| The cat looked up | threw his head up |
| The cat looked down, then looked to the left, followed the flies with her gaze, stretched, smiled, and sat down on the ledge. | children make appropriate movements. |
Step-by-step execution of individual compositions
Let's consider the step-by-step creation of images that a child can play with.
Kitten: modeling using the sculptural method
- From a plasticine ball we draw out parts of the kitten’s body: four legs of the same size, a long tail and a large head.
The paws should be the same size and the tail should be long.
- We work on the image: we give the ears a triangular shape, stretch them out, and playfully bend the tail at the end, smoothing out all the irregularities.
We work on the image in more detail, smooth out unevenness
- The final stage is to make the cat’s eyes. To do this, we flatten two small white balls and mark the pupils with black.
The final stage is making the kitten’s eyes
Kitty: modeling using constructive method
- From plasticine of the same color we prepare two large balls and six small ones.
The basis of the work is plasticine balls of two sizes
- From one large ball we form an oval (the body of the cat), from the other we separate a small part and roll out a sausage (tail), the rest will become the head. Four small balls are transformed into paws, the fifth into ears, the sixth into cheeks and nose.
We use balloons to make all the details of the cat’s image.
- We fasten the parts together. To connect the head to the body, we use a match or a toothpick; all other elements are simply pressed and glued to each other. By the way, using matches you can also attach the legs - then they will be movable.
To connect the parts you can use matches, by the way, then the legs will be movable
- We complement the image with green eyes with black pupils and a pink tongue. Cute kitten is ready. We give him some pose, for example, he licks his paw.
We work on the kitten’s face and give it a certain pose
Funny puppy sitting: step-by-step modeling in a constructive way
- The basis of the image will be a large head. We fashion it from a brown ball, add expressive details on top - a white tubercle and a semicircle. We also make small triangular ears separately.
The puppy will have a big head
- We assemble a curious face: we attach ears to the head, a small white spot, black eyes, and add a brown nose. We form the mouth with a stack.
Assembling the face and decorating it using small parts
- Let's move on to the rest of the body. We remember that the head should be larger than the body - this will make the puppy seem cuter and funnier. We make an oval body from white plasticine, white legs (they will be brown at the tips) and a small brown tail.
The dog's body should not be larger than its head
- We collect body parts. We fasten the head and body with a match, simply press the paws and tail to the body. Add brown pads to the bottom of the paws. We give the puppy a touching pose and defiantly hold out its tail.
We give the dog a cute pose and set its tail beautifully
Video: how to make a dog from plasticine
Video: making a cat from plasticine
OOD progress.
-Children, today we will work with plasticine, and what we will do, now you tell me yourself after seeing the picture.
(on the board there is a picture of a child with a kitten )
— Who is depicted in the illustration?
- I think you guessed it. Children, what are we going to sculpt today?
- Children, in the last lesson, you and I already sculpted a person in motion. And today we will sculpt a scene: a child plays with an animal .
(post a picture and a picture of a kitten )
— What parts does a kitten ? (torso, head, ears, tail, paws - show)
(post a picture of a child )
- What parts does a child ? (torso, head, arms, legs - show)
-Children, we will sculpt a kitten . What color is a kitten's ?
(picture is a hint for sculpting a kitten )
-We take a whole piece of plasticine, roll it into a thick cylinder, make cuts at both ends and pull out the legs, make a head from a ball, pinch off pieces from the plasticine and make triangular ears, a tail from a sausage. Our kitten is ready .
-Children, a child is molded in exactly the same way as a human figure in motion. Remember, we have already sculpted a human figure. Where do we begin to sculpt a human figure?
-Take a whole piece of plasticine, visually divide the piece of plasticine into 2 parts. We make an incision from one end to the middle - these are the child’s , give it a shape, and the upper part is the torso.
(picture is a hint for sculpting a human child )
the child’s head from white plasticine and attach it to the body. We pull our hands and sell the form
— Before we start sculpting , let’s do some gymnastics and stretch our fingers.
Finger gymnastics Rubbing the fingers on the right and left hand.
-Children, remember how we will sculpt a kitten ? Where do we start sculpting a child ?
- Let's start sculpting . Independent activities of children. (during the work, the teacher helps if necessary)
- Children, we finish modeling , our work, we clean our workplace. We clean the modeling board from plasticine , remove the stacks, close the container with plasticine and put it back in place. For those who haven't finished yet, let's finish. We carry our works on a stand.
- What did you and I do today?
-Look at the scene we created.
—Whose work did you like the most? Why?
"Cat and kitten." A lesson for older children in the non-traditional drawing technique “Cat and Kitten.” The unusualness of this method lies in the fact that children are asked to paint with paints using a non-soft squirrel brush.
Summary of a conversation with children of older and preparatory age about the popular expression “Don’t dig a hole for others, you will fall into it yourself.” This proverb came to us from ancient usage. When hunters wanted to catch a large animal, they often dug deep holes from above.
Photo report on graduation in the preparatory group “Our boat is sailing to other shores” So the moment came when it was time to say goodbye, and let the eyes of the teachers fill with tears, and in the eyes of the parents there was anxiety and excitement.
