The role of using non-traditional drawing techniques in the artistic development of preschool children
As mentioned above, the use of non-traditional drawing in kindergarten is beneficial for children. Due to the fact that completely atypical objects can be used in drawing, preschool children are given the opportunity to think outside the box. It turns out that they are having fun and usefully spending their time. They experiment with different painting techniques and try different ways of expressing themselves. Classes develop observation skills, creativity, and artistic taste. The educational process turns into a fun game. Therefore, modern methods of creative activities are increasingly being used in kindergartens. Diagnostics of the use of non-traditional drawing methods in kindergartens shows good results.
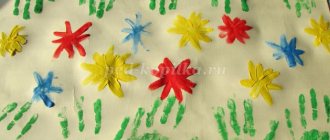
Unconventional spray painting technique
Non-standard methods of drawing are always fun, emotional and creative. The result of such creativity is beautiful and unusual, even if the child has no artistic skills.
Drawing with plasticine
This is a harmonious combination of modeling and appliqué art. You will need wax plasticine (it is softer and easier to spread over the surface), a flat base (cardboard, plexiglass, plastic), a knife and a rolling pin to level the plasticine. The technique is simple: you need to smear plasticine over the workpiece (ladybug, blue sky, snow, trees).
Baby elephant made of plasticine using smearing technique
Smearing is the simplest technique for painting with plasticine. A more complex one involves creativity with plasticine balls.
This video shows how to draw raspberries with plasticine.
In an interesting way, you can draw such a tree with plasticine.
Wood made of plasticine flagella
To do this, you need to fill a regular syringe with soft plasticine and lower it into hot water. The mass will become even more plastic and will be easy to squeeze out. You will get flagella from which you can assemble interesting pictures, as in the example above.
Topics for drawing in kindergarten
The topics of drawing in preschool classes can be very diverse. Typically, educators rely on seasonality. Therefore, for example, in autumn it would be relevant to paint a yellow-red landscape or use fallen leaves in the process itself.
For younger children, it is better to choose well-known objects: animals, flowers, trees. These topics are always relevant, and they can be done with almost any drawing technique.
Note! If you don’t have enough ideas for drawing, you can always use thematic literature with examples of work. Or you can get advice on unconventional drawing methods from more experienced teachers.
Drawing with salt and glue
Excellent drawing lessons for children 3-8 years old can be carried out using salt, colored cardboard, PVA glue, and a brush. The technique promotes the development of fine motor skills and perseverance.
First, you need to print the selected composition on colored cardboard. The child applies glue along the contour, then takes salt and sprinkles it on the desired areas. When the composition is ready, the cardboard is tilted to shake off excess salt.
Next, using a brush and watercolor paint, color is applied to the dried salt.
Bullfinch made of salt and glue, painted with paints
Colorful jellyfish made from salt and glue
The video lesson shows how to paint beautifully with salt and glue.
Types of non-traditional drawing in kindergarten
What is especially valuable about non-traditional methods is that most of them can be done by young children, in contrast to the usual drawing with a brush or felt-tip pens and pencils. For middle-aged children (4-5 years old), more complex techniques are available, which are performed with the help of adults. Children aged 6-7 years can use all non-traditional methods independently.
The following describes various methods for practicing non-standard drawing, as well as recommended ages for children.
Fingergraphy
The simplest and most common method of non-traditional technique is drawing with fingertips. Special finger paints are well suited for this; you can also use gouache or watercolor, after wetting it with water.
All that is required of the child is to dip his finger in the paint and leave a print on the paper. It’s fun to decorate the templates this way (you can print them out or draw them by hand):
- Add leaves to the bare tree;
- On the stem and core - petals;
- For the ladybug, make spots on the back;
- For the New Year tree - toys;
- White spots on the fly agaric cap;
- Butterflies have spots on their wings.
Note! Any picture can be fully colored using fingerprinting or the missing elements can be added.
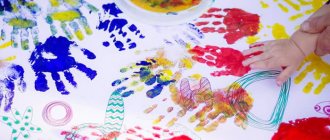
Drawing with palms
This method can be considered the next step after finger painting. The entire palm will be involved here. The same paints can be used as for fingerprinting. Here are some options for drawing with your palms:
- Chick. You should apply yellow paint to your palm and leave an imprint on the paper - you get a body. Then apply paint to the fist and thus make a head for the chicken. All that remains is to add the beak, legs and eyes.
- Fish. To do this, you can apply different colors to your palm, then leave an imprint on the paper and add eyes and fins to the image.
- Tree. To do this, use brown or black palm print paint. Then decorate the resulting tree with leaves using fingerprinting.
- Peacock. This beautiful bird will come from two or more handprints. Then you should draw the head, paws, eyes and decorate the tail.
- Flower. It is worth using bright paint to leave an imprint. Then add a stem with leaves to it.
Cockerel made from a palm print
Note! The open palm most closely resembles a bird. Therefore, using this technique you can make any bird of your child’s choice.
Drawing with cotton swabs (poking method)
This method is reminiscent of fingerprinting, but it uses an alternative tool for making a print - a cotton swab. The mark it makes is small and more round, so this method is good for drawing spots on animals. Another option is to completely paint the image with pokes, thus obtaining a mosaic effect. Using cotton swabs you can draw the following:
- Grains from a mouse or chicken;
- Rowan berries;
- Snowfall;
- Rain;
- Starry sky.
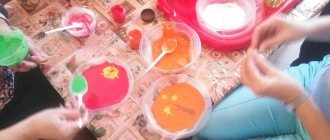
Drawing lessons with colored sand on a light table for children
You can also use a few pokes to create an object of the required shape, for example, tree leaves or flowers.
Note! You can draw with several sticks at once; for convenience, they can be secured with a string.
Drawing with bulk substances
For this method, you can use salt, sand or any cereal. Drawing occurs in stages. First, you should put some design on the paper. Then drop PVA glue into certain places and sprinkle them with salt or cereal. After drying, shake off excess. The result will be an unusual three-dimensional drawing. You can experiment with this method of drawing on the following topics:
- Winter forest;
- Fireworks;
- Snowstorm;
- Pattern on butterfly wings;
- Flowers.
Snow-covered birch tree made with salt
Note! It is more interesting and colorful to use colored grains or sand. To do this, you can use food coloring or buy ready-made colored sand.
Drawing with crumpled paper
For this method it is more convenient to use gouache. You will need a small piece of paper that needs to be crumpled. Then dip this lump in paint (if necessary, add water to the gouache) and begin to apply it to the paper. The drawing turns out airy and light. Here are some ideas of what you can draw this way:
- Lilac branches;
- Dandelions;
- Clouds;
- Snowy spruce trees;
- Blooming meadow.
Lilac branches
Note! In this way you can color the image in an unconventional way. For example, make a shaggy cat or a fluffy owl.
Drawing with threads in kindergarten
Thread drawing can be a little challenging for preschoolers, so it is recommended to do it with older groups. This is a rather complicated technique and little ones cannot cope with it. To create such a pattern, you need to prepare threads (it is advisable to choose thicker ones, for example, wool). Next, you need to cut a thread about 30 cm long and dip it thoroughly in paint. Then you should place the thread on the paper, for example in a loop, and pull it down. For convenience, you can use two sheets of paper to properly press the thread on both sides. Another option is to fold the sheet in half and thread the thread inside. You can create a variety of patterns, for example:
- Abstraction;
- Flowers;
- Snail (the thread for this should be folded into a spiral);
- Butterfly.
Note! Nitography is the most complex drawing technique for children. But the result is very unusual, and the creation process is interesting and will appeal not only to children, but also to adults.
Monotype
This is a technique of creating an image using a print. A suitable method for kindergarten is when a sheet of paper is folded in half and an image is painted on one side. The design is then pressed onto the other half of the sheet, thus creating a symmetrical image. What can you depict using this technique by drawing only half of the image?
- Butterfly;
- Reflection in the water of the landscape;
- Ship with reflection;
- Vase with flowers;
- Sun;
- Tree.
Landscape with reflection using monotype technique
Note! Monotype is interesting because its result can be unpredictable. The resulting drawing always comes out unique.
Drawing with foam rubber in kindergarten
The execution process and the result are ultimately similar to drawing with crumpled paper. For this technique you will need a piece of foam rubber or a dishwashing sponge. Foam rubber does not need to be soaked in water; it should be immediately dipped in paint. Ideas for images using this technique:
- Snowman;
- Christmas trees;
- Tree crown;
- Winter in the forest.
Landscape painted with foam rubber
Using this technique, you can paint animals, then they will look fluffy.
Blotography
The essence of this method is to initially drop paint onto a piece of paper, forming a blot. Then you should supplement it with various details, obtaining some kind of drawing. This method perfectly develops children's imagination.
To get blots or splashes of paint on paper, you can use a cocktail straw. Using the same tube, you can inflate the blot, obtaining the desired image, for example, the following:
- Tree branches;
- The man's hairstyle;
- Any character.
Note! You can supplement the image with the same paints or felt-tip pens, or even plasticine.
Drawing with wax crayons
Wax crayon can be replaced with a paraffin candle. The essence of this technique is that with the help of a chalk you can draw any design, which will then not be painted over with watercolors and will appear on the surface. Examples of possible images:
- Fireworks in the night sky;
- Sea bottom;
- Cloudy sky;
- Stained glass.
Quickly learn the multiplication tables for a preschool child
Note! If you use white chalk, you can make a secret drawing or note, since the image on the paper will appear only after using paint.
"Secret" image
Spray
Creating an image using this technique involves splashing paint onto paper. To do this, you can use a toothbrush or a hard brush. In this case, the splashes are small and distributed chaotically. Therefore, it is better to use stencils to obtain a drawing of the desired shape. This could be a stencil:
- Christmas trees;
- Cat;
- Colors;
- Tree.
Note! In addition, with the help of spraying you can fill in the background of the future drawing. It could be grass, starry sky, snowfall.
Drawing on wet
In this method, paint is applied to a damp surface. As a result, you can get a blurred background for your future drawing. At the preparatory stage, it is better to mark the future drawing with a pencil on a sheet of paper. This should be done before you need to wet it with water. Do not wet it too much; excess water should be removed with a sponge. Watercolor on wet paper will spread evenly from the brush. This way you can let the different colors mix on their own, so the color transition will look even. What can you draw on the raw side, except for a plain background:
- Setting sun in the sky;
- Clouds and storm clouds;
- Flowers;
- Trees;
- Sea bottom.
Note! After the background has dried, you can add any details to the drawing: birds, fish or an outline.
Batik
This is a technique of painting on fabric. For this activity you will need a piece of white cotton material. For kindergarten, the simplest painting option is suitable - knotted. To do this, you need to tie several knots on the fabric, then dip them in paint. After drying, the knots should be untied - interesting patterns will remain on the fabric.
Drawing with traffic jams in kindergarten
Balsa wood stoppers are great for making circular impressions on paper. It is better to take several corks so that you can use each one for a different color of paint and do not mix them. Using this technique you can draw:
- Berries;
- Caterpillar;
- Chickens;
- Leaves;
- Flowers.
Note! If you cut the cork, you can give the prints a different shape.
Stamping
This technique is quite simple to implement and is suitable even for younger kindergarten groups. The idea is to dip a stamp in paint and leave an imprint on the paper. Moreover, you can choose anything as a stamp, for example, the following:
- Leaves;
- Vegetables;
- Fruits;
- Twigs.
Note! It is very convenient to cut stamps of various shapes from potatoes. You can also make stamps from foam sponge.
Ebru
The Ebru technique involves painting with liquid paints on water. Paint and water have different densities, so you can make some kind of pattern on the surface of the water. Then a sheet of paper or cloth is applied to the surface, and the design is transferred to the new surface. Water can be made more dense with a special solution, which is sold in an art store. Thanks to this, the paint does not dissolve in water, but remains on the surface in the form of a film. You can drip the paint onto the water and then use a stick to make patterns.
This technique is suitable for older groups of kindergarten or lower grades of school. Exercises with ebru can be turned into a fabulous game. Children of all ages really like this technique. Without any special skills, already in the first lesson you can feel like an ebru master.
Drawing on water using the ebru technique
Drawing with palms or legs
For this technique, you will need children's palms, plain white paper and gouache (or finger paints are better, as they wash off well). The main blank is created using the imprint of children's palms or feet. Then the adult himself or together with the child completes the small elements.
Rocket in the form of a footprint
Pink flamingo made from handprint
Preschool children will enjoy drawing with their palms. Animals, birds, and natural phenomena are the best.
Interesting video lesson on drawing with palms
How to make notes for a lesson on drawing in non-traditional techniques
The purpose of such a lesson should be to familiarize children with one or another non-standard drawing technique. It is necessary to draw their attention to the features of this technique: how the paint behaves, what happens in the drawing.
Practicing unconventional drawing requires careful organization. The main task is to attract children, especially younger ones. To do this, you should tell a fairy tale or poem appropriate to the activity. Then you need to figure out how this can flow into drawing, for example, you will need to help a chicken hatch from an egg. Children, in turn, will have to draw it with their palm.
Note! At the end of the lesson, you can collect the work and organize a presentation dedicated to one topic. Such exhibitions of works should be organized after each non-traditional drawing class.
Unconventional drawing methods contribute to the creative development of the child. If the kindergarten program does not include visual arts of this nature, then parents should conduct them themselves.
Drawing with natural and other stamps
Another technique for preschool children, which is attractive due to its accessibility and simplicity. Dried flowers and leaves, branches and other natural materials are used as stamps. How to draw? Paint is applied to the natural stamp and an imprint is created on the canvas. It is convenient for novice artists to use fruits and vegetables cut in half, and wooden blocks.
Tulip from a print with a bow
Pattern with lines from a natural stamp with thread
Suitable stamp drawing video tutorial
Also suitable as stamps:
- disposable forks
- combs and brushes
- cotton buds
- cut paper blanks
- bubble wrap
- and much more
Examples of stamps
Examples of stamps for drawing
Example of drawing tulips with forks
Tulips made from imprint with forks
Rosette from a Chinese cabbage stamp
Drawing roses using Chinese cabbage stamps
Drawing with threads
This technique appeared recently, but has already found its connoisseurs, especially among children.
Everything is simple here:
- Take the album and open it.
- Dip a thread of medium thickness into paint or coat it with several paints (gouache)
- Lay out the thread in any shape on the right side of the open album and close it.
- Then you pull the thread from the folded album.
- Open the page where you drew and admire your creation.
This technique is shown very well in the following video.
Drawing on shaving foam
Another non-standard way to use this accessory.
The drawing technique is simple:
- Apply a thin layer of foam to the tray
- Level it with a ruler so that the surface is even.
- Apply paint using dotted movements (preferably undiluted gouache)
- Using a cotton swab, draw patterns on the foam
- If you want to transfer the drawing to paper, then carefully place the piece of paper on the surface of the foam and just as carefully lift it. The design will be imprinted on its surface.
This drawing technique is good because you don’t have to draw a picture, but simply paint with paints, mix them, get new colors. Explain to your child how this is done and he will be delighted. The soft texture of the foam will make the combination of colors even brighter and richer.
Abstract drawing of shaving foam
Bright mixture of colors on shaving foam
Ideas for how to make voluminous appliqués with your own hands from paper balls
Application made from balls of colored paper and cotton wool “Winter”.
Bullfinch on a branch.
Flowers and butterfly.
A very simple flower applique for children in the younger group of kindergarten.
Lamb. Ears can be made from colored paper or cotton pads.
Snowman.
Craft with a child's hand as a gift for Mother's Day.
Three-dimensional painting “Kitten”.
Illustration for the fairy tale “Kolobok”.
Crafts and paintings made from napkins are difficult to store and clean from dust, so it is better to varnish the finished work or frame it under glass in a three-dimensional passe-partout frame.
Drawing on ice
Your child will definitely enjoy this very exciting process. Pre-freeze the water in a small container. Then take out a piece of ice and place it on a plate next to your child.
Use watercolor paints. By lowering a brush with paint onto ice, you can create both abstract drawings and more understandable images.
It is very interesting to watch how the paint spreads over the ice layer and gradually paints it over, mixing with other colors.
Rainbow on Ice
Shaving foam drawing
An unconventional technique that your baby may also enjoy.
We will need:
- 2 parts shaving foam
- 1 part PVA glue
- Dyes (food or gouache)
Mix glue with paint, mix and add foam - you get foam paint.
Apply it to a pre-prepared contour or as you wish, for greater imagination.
Using this technique, natural objects are produced well, and the drawings are soft and voluminous. They will fall off over time, but the texture will remain the same. The result will please you, and even more so the child.
Using foam paint you can paint balls like this
Shaving foam balloons with glue
or watermelon
Watermelon slice made from shaving foam with glue
or this cloud with a rainbow
Rainbow in the clouds made of shaving foam with glue
