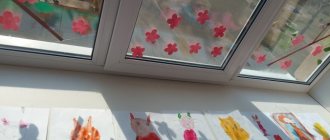
Unconventional drawing in the second junior group
An unconventional way of drawing is, first of all, artistic effectiveness and unpredictability of the result. The technique includes unusual techniques for performing work that do not require special skills. This option can be reminiscent of an exciting activity that will allow kids to unleash their creative potential in a minimum amount of time. This method offers budding artists creative freedom.
An unconventional drawing method for younger children
For example, if a child smears his finger in paint and draws with it, or leaves his palm print on the drawing, the teacher will not punish him. The process is completed only by adding elements to obtain the desired result. Drawing turns into real fun.
What does the use of non-traditional techniques give to students?
Even at an early age, children want to reflect their impressions and explore the world around them through visual activities. Visualization of sensations helps them with this. Therefore, the child strives to make a drawing with one finger on the foggy glass.
Note! Some kids need a stick to draw pictures in the sand or chalk for the asphalt.
Existing non-traditional drawing techniques in kindergarten in the 2nd or 3rd junior group according to the Federal State Educational Standards method, which allow you to quickly see the results of your activities. This technique greatly simplifies the process when solving some teacher problems in methodological terms. Presentation of the drawing contributes to:
- development of creative abilities;
- formation of a non-trivial view of the world around us;
- nurturing independence.
The importance of classes
Even at 3 years old, children find it difficult to hold a brush in their hands. Not everyone is equally interested in visual arts. Therefore, in order to present your child with artistic creativity in all its glory, it is necessary to choose an appropriate theme. The drawing process must be turned into exciting entertainment. Teachers recommend conducting various experiments, for example, using unusual materials (leaves, sand, salt).
The use of alternative non-traditional drawing techniques for children aged 3-4 years has the following meaning:
- Full mental development of the child, increasing self-esteem, overcoming all fears.
- Development of abstract thinking.
- Formation of a holistic perception of the subject.
- Creating all kinds of conditions so that the baby can reveal his creative potential and freely express his individuality.
- Introducing children to the properties of various materials.
- Development of tactile sensations.
Child development through drawing
The benefits for children from such creativity are enormous: fine motor skills develop, which in turn affects the child’s speech and memory.
When painting with finger paints, the child’s nervous system also develops, he learns to sit and walk correctly. By painting with their fingers, children better perceive colors and see the boundaries of their work. In the process of creativity, you can study colors, shapes, counting, paint animals and various objects that you will introduce your baby to.
Let's paint with our fingers!
Even for the youngest children, drawing can become one of the most favorite and useful activities. Children aged 1-2 years cannot yet depict objects. Besides, they are so fidgety! Therefore, the most accessible way to draw for such kids is with their fingers. And really, what could be simpler - dip your finger in the paint and paint... Even a child who is just beginning to draw can produce very beautiful works. It is difficult to spoil a picture in which night stars are poked in random order with your finger or red rowan berries are scattered on the ground for hungry birds.
If creative abilities remain unclaimed, then emotional depression accumulates over the years. Drawing helps to release accumulated creative energy and express your “I”.
Recently, children under the age of one year are being taught drawing more and more often. The youngest artists are six months old. “Why so early?” - many are surprised.
M. V. Gmoshinskaya - Candidate of Medical Sciences, pediatrician, author of a method for teaching drawing to children in the first year of life - believes that it is necessary to start as early as possible.
Drawing helps to establish creative and emotional contact between mother and child, develop attention, memory and thinking through artistic methods. In addition, in the process of creative work, sensory, fine motor skills, and color perception occur. “Unlike all proven methods, we do not show the baby “how to” and “how to do it right,” but rely entirely on his intuition, imagination, desire and even whim,” writes Gmoszynska.
Little artists learn to choose and mix colors from the palette, and they do it themselves. At first, babies simply draw with their fingers, a little later with their palms, and after a year - with brushes. The result depends on the artist’s mood, his “artistic experience,” as well as the mood of those around him.
Drawing at any age is great fun. Unfortunately, most of us almost never draw or do it extremely rarely. By doing this we are greatly impoverishing ourselves. Maybe we should have started drawing earlier too...
Art teachers say that at the age of 4-5, some children are afraid of a white sheet of paper. The teacher has to draw some kind of “squiggle” on the sheet so that the child decides to start his drawing. But with children who started drawing at about a year old, there is never a fear of a blank sheet of paper.
What techniques are used
Modern methodology contributes to the implementation of the educational task when performing work.
Note! A similar technique is considered for children from 3 to 4 years old. In addition, you can organize additional interesting activities with minimal financial costs.
What technique is used in practice?
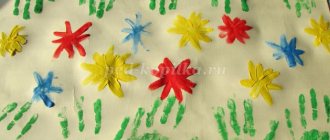
Drawing with cotton swabs
An unusual drawing technique develops a sense of rhythm and color. Cotton swab (stick) - a popular drawing technique is called the “poking method”. When creating a drawing, it is impossible to do without a cotton swab, container, and wet wipes. When creating a new material, little artists place a stick in a container of paint, and then apply imprints to the drawing.
Entertaining math tasks for preschoolers 6-7 years old
Important! Young artists can depict a river, rainbow, grass, rain, snow, sun, tree, sky or something else.
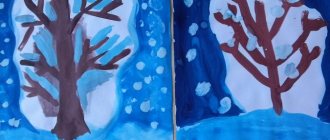
When creating a drawing using a cotton swab on the theme “Trees when autumn comes,” the teacher must show the children how to properly hold this object in their hands.
Instructions: Children receive blanks of tree trunks with branches, cotton swabs, and paints.
Important! To make it easier for the children, you can mark the area of the drawing, indicating the exact location of the foliage.
Finger painting
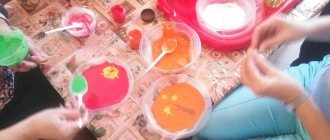
To implement this method, you can do without certain material. For example, a teacher prepares paint in advance with wet wipes.
Note! Implementing teamwork based on this technique is a great idea for both educators and preschoolers.
The teacher takes into account the mental and physical characteristics of the children and prepares a topic for drawing in advance, for example, “Foliage of autumn trees.” The teacher provides the little artists with a template - a large tree.
Other themes are also covered, such as “Winter” or “Summer is Coming.” In kindergartens, the finger painting “Snowflake” is most often created. To perform it, paints and pencils are used.
Instructions: The teacher distributes A4 sheets. The guys must draw a snowflake. To complete the work you will need a blue and white pencil.
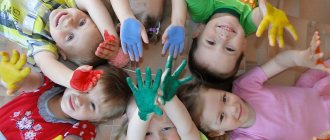
Drawing with palms
This method is not the most accurate, since children must draw with their palms. Before creating a drawing, the teacher must prepare a shallow container of paint. Pour some water inside and drip some gouache.
Note! Using this method, you can easily create collective drawings, for example, “Fish in the Aquarium”, “Our Aquarium”, “Merry Matryoshka”, “Firebird”, “Winter has come”.
Instructions: The teacher shows the children the finished substrate. The drawing is created on a sheet with a blue background. The guys must completely dip their palm into the container of paint. Then the teacher calls on the kids to go to the table where the aquarium is located, stand in a circle and leave their imprint there with their thumb up or to the side.
There is no need to put a mark on the one that the first comrade has already put. The teacher also warns that the fish must be located at a certain distance from each other. Then make an eye for your fish using white paint. Dip your index finger into black paint, make a pupil and carefully draw a line near the mouth.
Drawing with soap bubbles
This technique is the most difficult. Here children will have to show their imagination (open mind). Before starting to draw with soap bubbles using the preschool method, the teacher prepares material in the form of liquid soap, baby shampoo, water, watercolors (food coloring), cocktail tubes, and spoons.
Card index of didactic games in mathematics for the second junior groups
Initially, the teacher prepares the mixture, and then pours the mixture equally into small glasses. You can prepare the paint by diluting soap with water (the ratio should be 10:1). After obtaining the mass, the addition of dye and a little gelatin or glycerin is required. Thanks to these components, the bubbles retain their shape for a long time. The finished mixture will have to be placed in a cool place (away from the sun) and kept for 2 days.
Important! It is recommended to strain the mass through cheesecloth. The finished mixture should be placed in the refrigerator for 10 hours. Having received the material, you can make a outlined and regular print.
Instructions: The teacher invites the children to take a sheet of paper, a container with soap solution, straws and disposable teaspoons. Children must blow into the tubes to create foam. Next, a mass of one color is collected and laid out on a sheet. The balls should be placed far from each other. Once the shape of each print is dry, children can add a string to each ball.
Drawing with stamps
Drawing with stamps can reveal the possibilities of using familiar objects as art material. This method promotes the mental development of the child.
Note! When drawing with a stamp, a child develops an interest in inventive art, which leads to increased self-esteem and the development of coordination of movements.
Foam rubber impression
The main goal of this method is to introduce students to an unconventional method of drawing using the “foam rubber imprint” technique, and to develop the ability to arrange the elements of a drawing on a sheet of paper.
Educational qualities: fosters a love of fine arts and nature.
Developmental qualities: to develop aesthetic perception, a creative attitude to work, attention, memory, spatial thinking, fine motor skills of the hands, a sense of composition, color, color perception, to form in children a stable interest in visual arts, creative imagination.
An example of a lesson plan on non-traditional drawing in a junior group
Summary of a drawing lesson using non-traditional techniques in the first junior group: “Flowers of unprecedented beauty.” The plan for this outline is drawn up by the teacher. Young artists are introduced to a new technique of unconventional drawing - “Painting with a palm and a sponge”.
An example of a note on drawing using non-traditional techniques
The teacher says that when spring comes, all nature wakes up after winter. During this period, all trees and shrubs begin to turn green. The very first spring holiday is Mothers' and Grandmothers' Day. Next, the children are shown illustrations of flowers. In addition, the teacher teaches how to convey the image of flowers, structure and shape using a sponge.
The project is aimed at developing creative imagination in children of primary preschool age through the use of non-traditional drawing techniques. These techniques allow the child to express with interest his impressions of the world around him in his drawings. An unconventional approach to making images is self-education and the development of children's intellect; it encourages the child's creative activity and teaches him to think outside the box.
Preview:
Municipal autonomous preschool educational institution
Combined kindergarten No. 9
Lesson notes for the younger group
on artistic and aesthetic development.
Topic: Drawing with foam rubber “Koloboks”
Pakhorukova Elena Gennadievna
Summary of a lesson on artistic and aesthetic development in the younger group.
Drawing with foam rubber “Koloboks”.
Topic: Drawing with foam rubber “Koloboks”
Goal: to help children master a new way of depicting - drawing with a foam sponge, which allows them to most vividly convey the depicted object.
Educational: cultivate a friendly attitude towards fairy-tale characters
Developmental: create conditions for the development of creative abilities, develop fine motor skills; develop children's creative imagination
Equipment: 1/2 landscape sheet, a set of gouache paints, a piece of foam sponge, a thin brush, a glass of water, a napkin
Educator: Once upon a time there lived an old man and an old woman. They wanted something tasty. The old woman baked a bun and set it to cool by the window. And the bun jumped from there and rolled. Why did he roll? (Children's answers)
Educator: He left his grandmother, he left his grandfather. Who did Kolobok meet in the forest?
Educator: Who else?
Educator: Who else?
Educator: Why did he leave them? (Children's answers: they all wanted to eat it)
Educator: Yes, guys, they all wanted to eat it. So they told him: “Kolobok, Kolobok, I’ll eat you!” " Kolobok is sad and bored alone. He wants to play with someone or at least talk. Kolobok really wants to find himself a friend. Guys, let's roll a Kolobok out of plasticine. Let's make eyes so that Kolobok can see, and a mouth so that he can speak. And let's play with our friends - Koloboks.
Musical physical school
1.Look at the bun, determine its shape, relative size, location, color.
2.Explanation by the teacher of a new way of depicting - drawing with a sponge.
Educator: Guys, look at our bun. Today we will try to depict it on paper in an unusual way: we will draw with a piece of foam sponge. If you dip a sponge in paint of the desired color (yellow), and then lightly press the painted side onto the painted surface, you will get a print that will give the line volume and fluffiness. The next print should be applied side by side, leaving no free space between the previous and subsequent ones. When the outline is ready, fill the space inside with prints.
3.Add details to the drawing: with a thin brush, draw the eyes, nose, and mouth of the bun.
4.If desired, make a bright background around the kolobok in the same way, using another, clean piece of foam rubber.
During the work, the teacher monitors how the children draw: he reminds them not to put a lot of paint on the foam rubber, but only lightly touch the surface of the paint so that the print has an air-colored surface.
The works are hung out at the exhibition and the children, together with the teacher, admire the work done.
Source
