Purpose of the game:
1. Introduce children to national customs
2. Consolidate knowledge about the features of the national costume and its elements.
3. Teach children to find similarities and differences between the national costume and other national clothing.
Preparatory work: “Examination of illustrations in national costumes.”
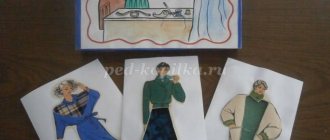
How to play: the child is invited to dress up a cardboard doll in different national costumes. We suggest finding similarities and differences between the costumes. Draw children's attention to the details of clothing.
Didactic game “Dress the doll”
The gaming material is intended for individual and independent study. Children 2-7 years old can play.
The purpose of the didactic game “Dress the Doll” is to expand the understanding of the structure of the human body, secondary sexual characteristics, seasonal types of wardrobe, and the order of putting on clothes.
Tasks:
- developing basic knowledge about the structure of the human body and the division of wardrobe by season and purpose;
- expanding ideas about daily putting oneself in order, about the peculiarities of the seasons of the year;
- fixing the correct order of putting on wardrobe items;
- getting an idea of the division of the wardrobe into girls’ and boys’;
- gaining self-care skills;
- development of attention, logic, imagination, speech skills;
- increased curiosity, desire for knowledge;
- improving visual perception and finger motor skills, preparing for school activities;
- development of communication skills, formation of a positive attitude with organized actions.
For the didactic game “Dress the doll for a walk,” make two dolls of different sexes from cardboard or felt. For each doll, prepare a wardrobe:
- boys' seasonal clothing - two jackets (for autumn and winter), two hats (winter and autumn), sweater, T-shirt, shirt, tights, pants, shorts, cap, mittens, boots, sneakers;
- girls' seasonal clothing - two jackets (for autumn and winter), two hats (winter and autumn), pullover, dress, sundress, top, skirt, tights, shorts, pants, Panama hat, mittens, boots, boots, sandals;
- a set of clothes by color (coat, dress, hat, bows, boots of different colors);
- a set of work suits (doctor, fireman, gardener, builder, pilot);
- a set of national costumes of Russia (Russian, Chukchi, Chechen, Bashkir, Mordovian, Kalmyk, Tatar).
Attach Velcro or fastening inserts to clothing to make it easy to attach to dolls.
Game options
When organizing the didactic game “Dress the doll according to the season,” clearly and emotionally explain the information to the children and show the actions. Once the player has mastered the skills of putting together a wardrobe, move the game from an organized event to a free process.
Name the clothes
Game for preschoolers 3-4 years old. Teaches you to recognize and correctly name wardrobe items.
Show me the thing. The child must name it, tell who (a boy or a girl) and when it should be worn.
Sort out your clothes
The game teaches you to separate wardrobe items into girls' and boys'.
In the story, the dolls were invited to a festive event, but they scattered their clothes around the room, and now they can’t figure out which is whose. The player’s task is to help the dolls sort things out: put them to the right for a girl, to the left for a boy. When the child has distributed the clothes correctly, let him dress each doll smartly.
Choose by color
The game develops the skill of selecting clothes based on the same colors and helps to reinforce the names of colors.
In the story, it’s the doll’s birthday, and she asks you to help her choose other things to match her dress, so that the whole outfit is the same color. For example, the dress is red. This means that the child must find, among the playing materials, a red coat, shoes, and a bow.
Draw an outfit
The game is suitable for preschoolers 3-5 years old, develops artistic skills and fine motor skills.
Invite the student to trace the outline of an item of clothing, then color it. For example, let him draw a beautiful pattern on a sweater.
Dress your doll according to the season
The lesson reinforces the sequence of actions when putting on clothes. The child learns to distinguish between seasonal items, bottoms and tops, and cultivates careful handling of the wardrobe.
Remind your student that there are four seasons and that you need to dress depending on the weather. The activity can be divided by season. During the didactic game “Dress the doll for a walk in winter,” the preschooler must learn that it is cold outside, so it is necessary to dress warmly. Ask what item you need to wear. The child must answer that it is warm.
The gameplay is similar to the other seasons of the year.
National outfit
The manual “Dress the doll in a national costume” develops patriotism and creates an idea of the variety of outfits of different nationalities in Russia. During the game, preschoolers highlight the nuances of clothing and accessories, identify similarities and differences between costumes.
Work clothes
The manual “Dress a doll according to its profession ” forms an idea of the variety and purpose of work suits. Children identify the features of a wardrobe, learn what function this or that item performs. For example, a builder has a helmet; it protects his head from injury.
Making a folk costume for a play doll with your own hands. Master Class
Master Class. Creating a simplified version of a folk (Russian) costume for a play doll with your own hands, 35-55 cm. Lots of letters and photographs. Good day to all readers! I often sew for dolls, especially for kindergartens. One of the latest “orders” puzzled me a little at first. – We need a doll in a red folk costume with a kokoshnik on the corner. Well, sew from several fragments.
Of course, I couldn’t resist and confused the bear with the balalaika))) The bear, they say, is not needed, but a red dress with a kokoshnik is needed.
it is clear that real costumes for a 45-50 cm folk doll are not “pieces” and only the kokoshnik can take months to embroider... Therefore, the task had to be simplified and made as cheap as possible. Budget – 0 rubles 00 kopecks.
They gave me the future “Russian beauty”. A strong Soviet doll, about 50-55 cm tall, with a playful hairstyle, without underwear. Linen is by no means held in high esteem in our garden; even if you put it on a doll, it disappears in the most mysterious way in exactly a week. I checked)))
To begin with, the doll was washed, scent was applied to her hair, and curlers were applied. The most ordinary person of a famous network company)) I love them (these curlers) selflessly, honestly.
I took a photo of the doll next to its Italian figure (45cm) just out of curiosity and as a souvenir.
Our folk costume will consist of an underdress (a white shirt with embroidery and frills) and a red top (on request). We make the kokoshnik last.
Let's start with the T-shirt. This will be a white dress with a cutout at the waist.
Most often I first draw patterns on paper. The most important detail is the top of the shirt (from neck to waist). First, draw separately 1/2 of the shelf (front) and 1/2 of the back. Then we fold the parts of the shelf and back together with shoulder seams and combine them into a common part. The result is half the top of the finished product.
What else to read: Didactic game “Put butterflies on flowers”
Mdyams. I'm sorry, but I made a “disposable” model on paper that was not necessary)))
Then we put this detail on the fabric and draw it, creating a single element on the fabric.
The piece on the right is already circled, so the pattern is upside down, and the left side is outlined in a mirror image. My pencil disappears, so we don't pay attention to the extra lines (pictured left)).
Cut out the part. The clasp will be on the back. Trying on a doll. There is only one part, we will sew only the side seams. Not now!!!
Adjust the fit before sewing. We're not sewing anything yet! Now let's do the sleeves. In the lightweight version, these are just rectangles. We calculate the “doll” sizes. We need the length and width of the sleeve, taking into account the ruffles. It can be scored and scored.
To preliminary assess the result, we place sleeves on each part along the top using machine stitches to create gathers. We tighten the lines and apply the sleeve blanks to the dress blank.
If you are satisfied with everything, you can lay finishing lines on the sleeve parts at an arbitrary height and in an arbitrary quantity. The bottom of the sleeve is formed immediately - lace, elastic. anyway. The sleeves are sewn to the armholes, the cut is complex. Then we join and sand the side seam of the shirt and sleeves. We process the cut. The neck can be fixed. The easiest way is with a lace stand-up collar. We make the skirt in the same way as the sleeves: we measure, cut out a rectangle, decorate the bottom (ruffles, lace, flounces), and process the side slits. Apply to a doll.
Adjust the length. We need to do this now, because we have already processed the bottom of the skirt. We connect the bottom and top of our white dress (bottom.
Now let's process the clasp. She's behind. The options are different. You can make the top with buttons and half the skirt (starting from the bottom edge and sew as one piece).
The red part of the dress. Choose the color scheme of the decoration. In a simplified version, all skirt decorations can be reduced to jacquard braid and a couple of decorative stitches. We put ribbons and braids in stock (and more or less matching in color.
We make the final choice. Decorative stitches (if you sew infrequently and are not sure of the result) are best tried on pieces of fabric. In our case, the fabric is thin, so we sew on the paper. The training results look like this:
To make the task as simple as possible, I decided to abandon the traditional design of an outer dress in the form of a sundress, replacing it with a skirt. Sewing a skirt is easier and faster. On a doll of this size it will look quite “popular”. Trying on an almost finished skirt with a finished hem and side slits.
What else to read: Zoo - lesson plan (senior group)
Adjust the length. “Scrub” again, because the bottom edge has already been processed. We make the folds/gatherings necessary for a good fit. Sew a belt to the top of the skirt. I took a ready-made slope of a suitable color. The skirt was made "with a wrap", i.e., it was wrapped around the waist (under the bust) and tied with a bow. To form “cords” the belt is made slightly longer than the fabric. For some reason I didn’t take a photo of the finished skirt. It will be lower on the doll.
Let's move on to the kokoshnik.
The figurine is drawn by hand on paper randomly, cut out, the doll's head is tried on, set aside, and a new one is drawn. and so on until the manufacturer likes the result))) I made about 5 options, deciding the least bulky and easy to implement. (I know that the girls’ headdress (and judging by the body, our model is a girl of about 7 years old) looked different in Russia))) but they made it clear to me that the kindergarten administration does not care about this historical fact even once. Therefore, we have a kokoshnik)))
Using the pattern approved by us, we cut out blanks from the main fabric (from which the dress was sewn). In quantity 2 pcs.
You can make this structure hold its shape in several ways. The simplest is a thick glue-based fabric (dublerin). The interlining is too thin, we won't take it. I simply duplicated the part of the kokoshnik that will be on the outside, the back part without spacers. Then draw a pattern on the “front” of our headdress. I kept it simple by folding the product under the embroidery machine. So I simply hand-drew the trick with disappearing chalk and used metallic thread to embroider one of the bold decorative stitches on a regular sewing machine.
We are not afraid of the abundance of plaster on the front side of the product. The plaster will disappear in 24 hours, this is special))) The most difficult thing is to connect the two parts of our kokoshnik. Ideally, the bottom should be slightly smaller than the top. One way to achieve this is to decorate the bottom after sewing. We sew, folding the right sides inward. Trim the edges to a reasonable height, trim the excess at the seams. Turn it off and iron it with steam (yes, this is decollation at home, you can also sprinkle a little water)) The unfinished bottom of the kokoshnik tapers and we get the same bend that we need. Of course, this will only work with new all-natural fine cotton fabric. Synthetics hardly shrink. We process the bottom cut with the same bias tape that finished the red skirt. The kokoshnik is almost ready. Can be embroidered with beads. But the fastest way is to glue rhinestones)))
What else to read: Didactic educational game “Nature and Man”
We dress the doll.
“Red folk costume with kokoshnik” is ready. Let's pat ourselves on the head))) We completed the main task - we sewed a simple inexpensive dress according to the stated order. Looking into the future, I will say: the administration was very happy, promised a monument and asked the “leftovers” to sew the same one for another group. Feeling that everything was being done exclusively with personal funds, she lowered her eyes in disappointment...
Our kindergarten is municipal, not pretentious, without fees “for repairs and furniture in euros”, we and our children sincerely like it and therefore let’s pretend that the next photo did not shock you)))
I hope this agreement will inspire you to take on more ambitious projects and give you some ideas for implementation in completely different products.
Many thanks to everyone who studied to the end or at least looked at the photo)))
You can find patterns for doll dresses in our section on Babies
