Experiments with sand
Target:
1. Help children better understand the inanimate world around them;
2. Create favorable conditions for sensory perception, improving such vital mental processes as sensations, which are the first steps in understanding the world around us.
3. Through games and experiments, teach children to determine the physical properties of sand.
4. Teach children to make independent conclusions based on the results of the examination.
5. Nurture the moral and spiritual qualities of a child during his communication with nature.
Experiences and experiments with sand:
No. 1 “Where does sand come from”
Material: stones, sheets of white paper, magnifying glass.
Progress of the experiment:
Take 2 stones and knock them against each other, rub them over a sheet of paper.
- How do you think it's pouring in?
- Take your magnifying glasses and look at this.
- How did we get sand?
- How does sand appear in nature?
Conclusion: Wind and water destroy stones, as a result of which sand appears.
No. 2 “What is sand made of”
Materials: cups of sand, sheets of white paper, magnifying glasses.
Progress of the experiment:
Pour sand onto a piece of paper and examine it with a magnifying glass.
- What is sand made of? (grains – grains of sand)
- What do grains of sand look like?
- Are grains of sand similar to each other?
To get a large pile of sand you need a lot of sand.
Conclusion: Sand consists of small grains of sand that do not stick to each other.
No. 3 “Does sand fall easily?”
Material: trays with sand.
Progress of the experiment:
Offer to take a handful of sand into your fist and release it in a small stream.
- Does it crumble easily?
Conclusion: dry sand easily crumbles and crumbles into grains of sand.
No. 4 “Why is it inconvenient to play with sand in strong winds”
Material: “sandbox” - a jar filled with a thin layer of sand.
Progress of the experiment:
Examination of the prepared “sandbox”. We create a “hurricane” - we sharply squeeze the can with force.
- What's happening and why?
Conclusion: The grains of sand are small, light, do not stick to each other, they cannot hold on to each other or to the ground with a strong stream of air.
No. 5 “Where did the water disappear?”
Material: cups with sand and water.
Progress of the experiment:
Pour water into a glass with sand. Let's touch the sand.
- What has he become?
- Where did the water go?
Conclusion: water is quickly absorbed into the sand.
No. 6 “Sculpting from sand”
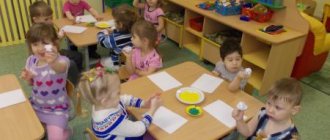
Material: trays with wet sand.
Progress of the experiment:
Let's try to make balls and sausages from wet sand. Leave until dry
- What happens to sand crafts after drying?
Conclusion: You can sculpt from wet sand, but after drying it crumbles.
No. 7 “Wet sand takes any desired shape”
Material: tray with wet sand, various molds.
Progress of the experiment:
Pour wet sand into molds and make figures.
- What kind of figures did you get?
- What kind of sand were you able to make the figures from?
Conclusion: Wet sand takes any shape.
No. 8 “Traces and prints remain on wet sand”
Material: trays with wet and dry sand.
Progress of the experiment:
Offer to leave handprints on dry sand.
- Are the prints clearly visible?
The teacher wets the sand, mixes it, levels it, and suggests leaving handprints on the wet sand.
- Is it working now? (Look, every finger is visible)
Conclusion: There are traces and imprints on wet sand, but not on dry sand.
Final event: “Sand Country” (drawing with dry sand)
Materials: dry sand, sheets of paper with drawn pictures, glue sticks.
Procedure: Suggest using a glue pencil to outline the entire drawing, and then pour dry sand onto the glue.
- Shake off the excess sand and see what happened.
Conclusion: You can paint with dry sand.
Techniques for drawing on a light tablet
1. pouring
. The sand is clenched into a fist and passed through the fingers. The technique is suitable for drawing lines.
2. Pinch
. The child connects the thumb, middle and index fingers, picks up a little sand and scatters it. The method allows you to convey tones and shadows.
3. Palm
. With an open palm, the child levels the layer of sand, erases the drawing, and leaves prints.
4. Fist
. The child squeezes his palm and forms a spot on the sand layer with the back of his hand.
5. Finger painting
. This method allows you to create lines of different thicknesses and points, achieving image clarity. As a rule, children begin to work with their index finger. Encourage your child to use all fingers on both hands and make parallel movements. This stimulates brain activity.
6. Drawing with tools
. Drawings, lines, and ornaments are created using a comb. Pay your child's attention to how the pattern changes depending on the pressure applied.
Sand painting materials
To learn to draw on sand, you need to purchase a list of materials and equipment. All of them are affordable, you won’t have to fork out a lot of money. Here's what the young artist will need:
- table with sides and a lighting device at the bottom;
- sand;
- antistatic agent in a can;
- additional equipment - art brushes, sticks, sieve, templates;
- a wide and flat brush for sweeping grains of sand from the corners of the table.
An antistatic agent is necessary to prevent sand grains from sticking together, which is inevitable when quartz material is used repeatedly. The spray should be sprayed before each lesson. A regular antistatic agent is suitable, preventing synthetic clothing from sticking to the body.
You can buy a table or make it yourself. Homemade design - sides connected in a rectangular shape with a bottom made of frosted glass or plastic up to 5 mm thick. It is necessary to fix the lamp from below so that diffused light is obtained. The lighting can be anything: in the warm and cold range, even colored. The legs of the table should not wobble, otherwise when drawing you will not be able to draw neat lines.
The finished table is a structure with sides and a bottom in the form of an illuminated tablet. The optimal format is 130x70 cm, but for a child 70x50 cm is enough. The height of the sides should be at least 6-7 cm, but from the side of the drawer it is only 3 cm, otherwise it will be inconvenient to draw the lower elements. It is necessary to leave indentations for sand 10-15 cm wide on the right and left sides. It is advisable that these areas be in the same plane as the space for drawing, this makes it more convenient to use many techniques. But some ready-made tables have tray recesses on both sides.
Any sand will do. You can buy an aquarium one at a pet store, and a special one for creativity at a supermarket in the children's section. You can contact a children's and adult creativity studio where sand animation is practiced, if there is such an institution in the locality. They probably won't refuse to sell a small amount of sand. The fraction of the material can also be any. It is advisable to get different ones, since fine sand is convenient for creating tones and halftones, and coarse sand is convenient for creating large image details.
If there is a river near your house, you can dig up sand on the shore. You just have to filter it through a fine-mesh sieve, then rinse. The washing procedure looks like this:
- Pour 4-5 kg of sand into a bucket. This is the standard amount for drawing.
- Fill with water to the edge of the bucket.
- Stir gently with your hand or a large spoon.
- When dust and dirt particles rise to the surface and heavier grains of sand settle to the bottom, carefully drain the water.
- Repeat the procedure until the drained water becomes crystal clear.
- Dry the cleaned material on the balcony if the weather is sunny, or on a radiator, or in the oven.
You can replace sand with semolina, finely ground salt, and to create darker and more contrasting elements of the image - ground coffee.
Bulk material should be renewed once every 3 months, and if the child draws every day, then once every 1.5 months. If this is not done, the sand will become less pliable, since with constant friction the grains of sand are destroyed and the structure of the material softens.
Sand animation for preschool children
The highest skill is shooting sand animation, in which the artist continuously creates images that smoothly flow into each other. And he does this by making the minimum possible number of movements. This is a complex art that requires the master to act quickly and have impeccable artistic skills.
Real animation is unlikely to be within the capabilities of a preschooler, but something simple, for example, a tree that is bare in winter and blooms in summer, he can easily depict after practicing for 3-4 lessons.
Introducing a sand painting master class for children:
- Spread the material evenly.
- Place the pad of your finger on the sandy surface and move upward. Thin the line by gradually raising the pad. You will get a tree trunk.
- Draw branches with your little finger. Make them curved rather than straight so they look natural. It will turn out to be a tree in winter.
- Now make it summer. Sprinkle sand in a wide layer on the ends of the branches - this is the crown. Also sprinkle horizontally under the tree - this is grass.
- Randomly poke your fingers along the crown, pressing to different depths, to make leaves. Draw blades of grass by running your fingernail vertically under the tree.
- Adjust the contour of the tree crown and remove excess sand.
- The animation can be continued by making it autumn. To do this, place a few spots under the tree with your fingers - these will be fallen leaves.
Using this method, you can make a film in kindergarten, for example, on an environmental theme. You just need to attach a video camera above the table so that it films the drawing process.
Benefits of the lesson
Sand as an art material has several advantages. And most importantly – a relaxing, therapeutic effect. The child gets rid of the effects of stress, and emotional stability returns to him. Sand painting is used to treat sleep disorders, neurotic disorders, and anxiety in children. Sand art is also useful for healthy children; it allows them to calm down after failures, get rid of low self-esteem and the phobia of becoming a loser. The child sees that a bad drawing can be corrected at any time.
The second benefit of sand painting for children is a developmental activity. The technique improves finger motor skills, sensory perception and creative thinking. Drawing usually involves both hands, which has a positive effect on the development of both the right and left hemispheres of the brain. For schoolchildren, fiddling with sand improves writing skills. It is useful to use the technique with children for whom studying is a burden. In this case, sand painting becomes a good addition to homework and allows you to consolidate school knowledge through art.
The third benefit of drawing on sand is the revelation of artistic potential and the manifestation of imagination. The technique has no restrictions and strict rules. You can draw with your hands and various devices. The loose texture of the material allows you to create images of any complexity and degree of detail. Drawing with sand is available for toddlers, middle school preschoolers, and schoolchildren.
Games and art therapy exercises
Sandy beach
Invite your child to imagine that he is on the seashore on a sunny day, grains of sand tickle his palms, he can hear the splash of waves, and there is silence all around. Let the baby touch the sand, take a handful while taking a deep breath and squeeze his fingers as hard as possible. As you exhale, the child gradually pours out the sand and relaxes.
Target:
development of tactile sensitivity, regulation of muscle tension, development of self-control.
Paths
Start with simple straight stripes. Then move on to broken, broken and wavy lines. Invite your child to draw a path home for their favorite fairy-tale character.
Target:
improvement of coordination of movements and orientation in space.
Additional exercises: “Rain” - for practicing drawing vertical lines. “Ladders” - this exercise teaches you to combine vertical and horizontal lines.
Sand doodles
Two people are playing. One person closes his eyes while the other person draws a simple doodle in the sand. Then the first participant opens his eyes and can complete the scribble, turning it into some kind of understandable image. Then the players change roles.
Target:
development of imagination.
My favorite toy
A child draws his favorite toy with sand and then describes it in words without naming it. The adult or other children present must guess what thing is being talked about.
Target:
development of coherent speech and communication skills, formation of the ability to understand each other.
Animal portraits
Invite your child to draw with sand animals expressing joy, delight, anger, fear, sadness, surprise. Ask the little artist to tell us who he depicted, what mood this character is in, what feelings he is experiencing, what happened to him and why, how you can help him.
Target:
acquaintance with basic emotions, learning to determine the emotional state, help in understanding one’s own feelings, development of coherent speech.
Puzzles
Make a wish for any object: an animal, a bird, a plant, a piece of furniture, a toy. Invite your child to guess what you have in mind based on the clues. If a pear is wished for, it can be described as follows: it is a fruit; grows on a tree; looks like a light bulb. The child must draw his answer on the light table.
You can make guesses and describe events. For example, celebrating the New Year, going to visit. Change roles so that the child has the opportunity to come up with riddles himself.
Target:
development of logical and associative thinking, imagination.
Gardener
“Turn” the light table into an orchard and invite your child to plant it with different plants. The kid makes drawings and tells what grows where. Ask him to describe fruits, vegetables and berries by color, shape and taste. Try to draw together the trees and shrubs on which fruits are ripening.
Target:
acquaintance with the world around us and broadening our horizons, developing thinking and coherent speech.
Complete the picture
Using sand on a light table, draw circles, squares, triangles and ask your child to complete the picture so that you get a sun, a ball, a house, a flag, a piece of cheese.
Target:
development of figurative memory and imagination.
Dressy socks
Children play in pairs or with an adult. The participants’ task is to draw two socks so that they make a set. To do this, you need to agree on what pattern will be on the socks, and try to depict it the same way.
Target:
developing the ability to work in a team, negotiate and come to a common decision, developing the skill of mutual assistance.
Footprints
Invite your child to imagine what the footprints of certain creatures, such as a hippopotamus or a spider, look like and draw them in the sand. Discuss the resulting prints: who left them, what his name was, where he was going, where he was from, what emotional state he was in. You can also depict traces of large raindrops or car tires, or use sand rollers.
Target:
acquaintance with the outside world, development of speech and imagination.
Writing on the sand
Prepare letters or numbers cut out of cardboard for the game. You can use large symbols from magnetic sets. Hand your child a letter or number and ask them to sculpt it out of sand. Rake the sand with the edges of your palms and form a letter. Check the sand letter with the original and start making the next one. So a whole City of Letters will appear on the light table!
Letters and numbers can not only be sculpted, but also written. Let the child draw the desired image with his finger first. Then you can use the stick, holding it like a pen.
Target:
consolidation of the graphic image of letters and numbers, formation of graphomotor skills.
Photographer
You need to play in pairs. Both participants look at each other carefully, trying to remember the features and hairstyle. After this, the children begin to draw a portrait of a friend with sand - take a photograph. When the “snapshots” are ready, discuss how accurate they turned out.
Target:
development of communication skills, mindfulness and social activity.
Journey through a fairyland
Let your child use his imagination and draw a fairy-tale kingdom on the light table. Give the young entertainer time to create, and then ask him to tell him the name of the country, who lives in it, what the character of these characters is, what events take place in the fairy tale.
Target:
development of imagination, logic and coherent speech.
In search of treasure
To play you will need small objects or stickers. Together with your child, draw a diagram map on a piece of paper with conventional images of a tree, river, mountain, forest, house. Using this map, create a sand painting.
When the drawing is ready, ask the child to turn away and hide a small “secret” in any part of the image. Place a cross in the appropriate place on the paper diagram. Give the map to the little treasure hunter and offer to find the treasure.
Target:
learning to draw maps, development of spatial thinking, logic, imagination.
Sand games are diverse. Choose a light table for sand painting, and let the activities help your child learn about himself and the world!
