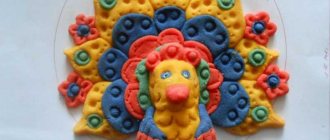
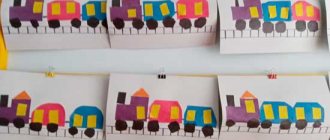
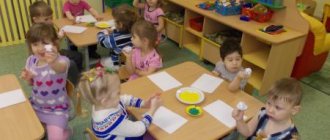
Types of applique classes in the senior group
Familiarizing children with folk ornaments and methods of decorating surfaces with patterns of varying degrees of complexity forms the basis for teaching decorative appliqué in kindergarten.
In classes in a preschool institution, decorative applique with a ribbon and central-radial composition is used. In a strip construction, individual elements can be repeated horizontally or vertically many times in the form of a frieze, border or border. The pattern can be simple, consisting of one element, or complex, in which a separate motif is repeated after two or three elements. In a central-ray composition, the pattern develops in the direction from the center of the decoration evenly to the edges, corners, sides, depending on what shape it is located on: a circle, a rectangle, a square (skullcaps, carpets, pillowcases, etc.).
A composition in the form of a flower bouquet or a colorful flowerpot can be used in decorative appliqué. Such decorations are often found in Ukrainian and Polish cuttings made of multi-colored paper when making large-sized wall decorations. They are characterized by a special decorativeness and elegance, which is emphasized by the symmetrical arrangement of the constituent elements.
The construction of ornamental elements according to the laws of composition depends on the shape and purpose of the objects, as well as historically established national traditions of ornamentation.
To reproduce different types of ornaments, preschool children must learn to evenly fill the background space with individual elements and highlight the main and auxiliary parts of the applique. In order to develop children's eye and ability to create balanced compositions, it is advisable to use visual teaching techniques or limit themselves to verbal instructions if preschoolers are well aware of the methods of cutting out and pasting individual elements. At the same time, it is important to direct the child’s thoughts to search for independent ways to complete the pattern and its creative interpretation. Every time children should be convinced of the possibility of creating new, original combinations of patterns, which is an important incentive for their active, creative attitude towards meaningful activities.
How successfully preschoolers will master the methods of constructing ornaments largely depends on the interaction of two types of activities - decorative appliqué and decorative drawing. This combination of ornamental creativity helps to consolidate the learned techniques and transfer them to another, more complex type of activity, which differs in the technique of making patterns.
A beautifully selected color scheme of a pattern is the most important means of aesthetic education of a child, developing his ability to perceive color and its harmony. Therefore, it is necessary to purposefully develop in a child a sense of color, the ability to select bright and soft colors, using not only spectral colors, but also a variety of halftones and shades, smooth color transitions.
Summary of a lesson on appliqué for children of older mixed age groups. "Volume snowflakes"
Summary of a lesson on appliqué for children of older mixed age groups.
"Volume snowflakes"
Additional education teacher T.N. Sulgina.
Target:
create conditions for the applicative image of “Volume Snowflakes” with older children.
Objectives: Educational:
Continue to introduce children to the appliqué technique.
Learn to create an image of “Volume snowflakes”, making a composition of several parts, fastening them together. Continue to introduce children to seasonal natural phenomena. Developmental:
Develop fine motor skills while working with paper.
Educational:
To cultivate a love for inanimate nature, the ability to see beauty in the environment.
Materials and equipment:
2 pieces of A4 paper for each child, brushes, PVA glue, napkins, scissors, pencil.
Preliminary work:
drawing snowflakes, watching snowflakes while walking, reading poems about snowflakes.
Progress of the lesson:
1. Organizational part
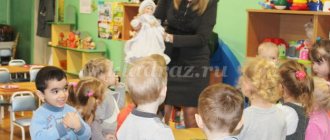
Calm music sounds. The Snow Queen (teacher) enters. Queen: Hello, guys! Children greet the queen. Queen: How beautiful it is here, almost like in my kingdom. It's always winter in my country, and beautiful snowflakes are always flying in the air. They spin and dance. Now I’m visiting you and I really miss my snowflakes. (The Queen becomes sad) Guys, let’s work together to make a magical country like mine here?! And I will help you with this. The children express their desire to help the queen. Queen: Today I will show you how to make a three-dimensional snowflake. First you need to get your fingers ready for work!
Finger gymnastics “Snowflakes”
I stand and catch snowflakes in my palm (Rhythmic strikes with the fingers of the left hand, starting with the index finger, on the palm of the right hand.)
I love winter, and snow, and snowflakes (Rhythmic strikes with the fingers of the right hand, starting with the index, on the palm of the left hand.)
But where are the snowflakes? (When asked, clench your fists)
There is water in the palm, (to answer - unclench.)
Where have the snowflakes gone? Where? (For the first question, clench your fists, for the second, unclench your fists.)
The fragile pieces of ice-rays melted. (Small shaking with relaxed palms.)
As you can see, my palms are hot.
2. Practical part
Queen: Guys, let’s remember what a snowflake looks like (shows the finished “Volume Snowflake”). Look how beautiful and big it is, what beautiful and elegant rays it has. Queen: So, to create such a three-dimensional snowflake, you must first prepare 2 sheets of paper of the desired shape, and then assemble our three-dimensional snowflake from them, like a construction set.
We take a sheet of paper, fold it in such a way as to make a square (I show the finished drawing visually on the easel), cut off the excess part. Fold the resulting square in half, corner to corner. What geometric figure did you get? That's right, a triangle! On our triangle with you, we use a pencil to mark these checkmarks, take scissors, cut our checkmarks on the triangle. Now we unfold the workpiece, the workpiece is almost ready, all that remains is to glue the middle petals into the middle. That's almost the entire skeret of a three-dimensional snowflake.
Physical exercise "Snowflakes-ballerinas"
Children run in a circle and spin with the words: To the music of the blizzard, friends are spinning, snowflakes are spinning - Winter ballerinas. Tired of spinning (children crouch). They sat down on the ground and listened to the music of the Winter Blizzard. They only rested for a moment - And again the wind made them spin (children spin) in a cheerful ballet.
We've had a little rest, now let's continue. Please make the same blank from the second piece of paper (do it).
Guys, our snowflake is almost ready, let’s glue two of our blanks together in half, just watch carefully, the petal should have its own house so that the snowflake is not rare. It should turn out fluffy.
When our snowflakes are dry, all that remains is to tie a ribbon to decorate the room with our snowflakes.
3. Summary of the lesson
Queen: Well, we got a lot of snowflakes! Look at them. What are they? Children's answers (beautiful, similar to the Kolelev snowflake, not quite similar, etc.) Thank you guys, now I feel like I’m at home, among many snowflakes! Goodbye! (leaves)