Summary of the drawing lesson “Bus”. Middle group
Yulia Essina
Summary of the drawing lesson “Bus”. Middle group
Abstract on the educational field “artistic and aesthetic development”
Drawing ( middle group )
Topic: " Bus "
Educator: Essina Yu. V.
Goal: to teach children to convey rectangular, square and round shapes in a drawing, to draw an object large , in accordance with the size of a sheet of paper, to maintain proportions.
1. To develop children’s knowledge about transport and its types; convey the shape of the main parts of the parts, their size and location.
2. Form rules for painting with paints: in one direction (from left to right or from top to bottom)
with the entire brush, tearing it off the paper and each time bringing it to the outline.
3. To develop interest in drawing , artistic taste, attention and logical design in drawing , creative thinking and imagination.
4. Continue to develop the ability to evaluate your own drawings and the drawings of other children.
5. Cultivate a desire to help other people.
Equipment and materials: pictures depicting various types of transport, album sheet, gouache, water jar, brush, napkin for each child.
Methods and techniques: a surprise moment, a teacher’s story, looking at illustrations, showing actions, asking questions to children.
Preliminary work: conversations about transport, looking at illustrations depicting transport, looking at transport toys.
Visual arts lesson on the topic “Bus”, middle group
Lesson summary for visual arts in the middle group
" Bus"
Target
: teach children to convey rectangular and round shapes in a drawing, draw an object large, in accordance with the size of a sheet of paper, and maintain proportions.
Tasks
:
1. To develop children’s knowledge about transport and its types; convey the shape of the main parts of the parts, their size and location.
2. Form rules for painting with paints: in one direction (from left to right or from top to bottom) with the entire brush, tearing it off the paper and each time bringing it to the outline.
3. To develop interest in drawing, artistic taste, attention and logical design in drawing, creative thinking and imagination.
Handout:
Landscape sheet, gouache, bus drawing algorithm, toy bus, video presentation depicting transport (plane, helicopter, bus, trolleybus, tram, ship).
Preliminary work
:, conversations about transport, looking at illustrations depicting transport, looking at transport toys.
Progress of the lesson:
Organizing time:
The guys came to visit us. But we need to guess what type of transport they arrived on. To find out, you need to solve the riddle. The teacher asks you to guess the riddle:
A strange house rushes along the road -
Round rubber feet.
filled with passengers
And the tank is filled with gasoline... (bus)
- Children, let's look carefully in the group and find out if we have a bus.
When the children find the bus, they sit in a semicircle on chairs near the TV.
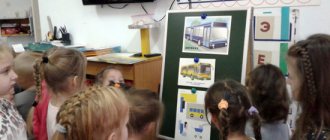
Main part: Video presentation “transport”
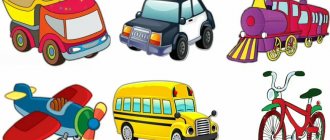
- Now I will show you pictures of transport, and you will say the name of this transport. (I show and the children name). Well done. Now let's remember the types of transport. What type of transport is a ship?
(Water)
- Why?
(Because he floats on water)
- Well done. Bus, tram and trolleybus - what type of transport is this?
(Terrestrial because it moves on the ground).
- Fine. Plane and helicopter - what type of transport?
(
Aerial because they fly through the air).
- Right.
Today we will draw a representative of a terrestrial species - a bus. Let's look at and touch our bus, remember what parts the bus consists of, I will show the parts of the bus, and you will name them. (
Wheels, windows, doors, headlights).
- Fine. Why does a bus need windows?
(
So that people can see where they are going).
— Why does the bus need doors?
(
To board and disembark passengers at stops).
- That's right, but why does he need wheels?
(
To move along the road).
— Why do the bus have headlights?
So he can ride in the dark).
- Well done.
- Show and name the geometric shapes that the parts of the bus look like:
What shape do the doors look like? ( rectangular
)
What shape do windows look like? ( square
)
What shape do the wheels look like? ( round
)
- Well done!
It's time for us to go to the creative workshop. Let's go.
Outdoor game "Bus":
Our bus goes on and on, spinning and spinning its wheel. (rotate clenched fists)
Our bus goes and goes, Turns, turns the steering wheel, the steering wheel
(we depict how we turn the steering wheel)
Our bus goes and goes, With windshield wipers, bzhik-bzhik bzhik-bzhik
(parallel with both hands left and right)
Our bus goes, twists, turns the wheel.
Doors open, doors close. (we bring our palms together and separate them)
Our bus goes and goes, Spins, spins the wheel.
Our bus is coming and going. Everyone beeps beep (we press on our nose).
Children do the exercise and sit down at the tables. Demonstration of an algorithm for drawing a bus on a magnetic board.
Explanation and demonstration to children how to draw a bus from geometric shapes, showing the sequence of the image of the bus. (draw in the air)
1. First, let's draw a rectangle. We paint it from left to right with the entire bristle of the brush. This will be the main part of the bus. 2. From the upper left corner, draw an arc to the upper right corner with the whole brush. The result is a solon of a bus, then we draw vertical straight lines to make the windows. 3. Now we draw two wheels (circles). We paint the wheels black in a circle.
- Let's paint the buses in different colors, think about what two colors you want to choose and take the jars of paint on the table.
Children's work.
- Now think about how you would like to decorate and complement your drawing, for example, you can draw a road along which a bus is traveling or the sun in the sky.
Bottom line
:
Children show their works and talk about them.
Encouraging children.
Summary of drawing lesson “Bus”
Daria Afonina
Summary of drawing lesson “Bus”
"Bus". Lesson summary for an early age group.
Goal: To introduce children to passenger transport - a bus, and to give them an idea about it.
Objectives: -To strengthen the ability to hold a brush correctly;
-Develop attentiveness and perseverance, memory;
-instill interest in drawing;
-Develop the ability to carefully color a drawing without going beyond the contours;
How to draw a truck
First I want to offer a simple option. I think every parent will be able to show their child the drawing sequence, and then he will try it himself.
1. Using a simple pencil on a sheet of paper, draw two rectangles: a large one and a small one, like this.
2. Next we draw the upper part of the cabin and two wheels.
3. Draw small details on the cabin, wheels, headlights. Erase the extra lines.
4. If desired, you can color with colored pencils, felt-tip pens or paints.
The result is a cargo van like this.
The entire sequence of images can be viewed in the gallery by clicking on any picture, moving along the arrows to the right or left.
How to draw a truck step by step
The second option is suitable for older children. I will show you in detail step by step how to depict another truck.
1. To make it easier to draw, first draw thin horizontal lines at the same distance in the center of the sheet.
2. Draw the truck cabin, guided by the lines.
4. Next we draw the wheels.
5. Add additional body and cabin parts.
6. Draw the cabin, body, wheels, headlights. Erase the extra lines.
7. Color with whatever you like. We did it with paints.
The entire sequence of images can be viewed in the gallery by clicking on any picture, moving along the arrows to the right or left.
Now you know how to draw a truck and can show your child the whole process step by step. I wish you creative success and a great mood!
Read here how to draw a cat.
If this article was useful to you, please share it with your friends by clicking on the social media buttons.
Source
Let's move on to the process
You will need a sheet of white paper, a simple medium-hard pencil, and an eraser. To add color, you can use colored pencils, felt-tip pens, or even shade the drawing with a ballpoint pen or a simple pencil.
Step 1
First, let's draw an oval. This egg is a sketch of the outline of our future car.
Step 2
Using an egg-shaped pencil sketch, you need to outline the outlines of the Ferrari body. At this stage, special attention should be paid to the recesses into which the wheels will later need to be “inserted,” as well as the contours of the hood and rear fender.
Step 3
Now let's take on the hood. Draw the headlights (upper and lower) step by step, add volume to the body using two arcs, and mark the hood line with one stroke.
Step 4
It's time to draw the windows - front and side. Under the side window, again mark the door with two arcs. After that, add a mirror on both sides.
Step 5
The penultimate stage is the wheels. Since at the previous stages you have already designated the places where the wheels will be located, now there will be no problems with this.
To add realism to the image, depict disks.
How to draw a sports car with a pencil for children
Tomboyish boys have a weakness for all kinds of technology. Play with racing cars, make a tractor or an excavator out of a construction set - what could be better?
Well, if you draw, then, of course, a car! It is not easy to draw such a complex object the first time, so children often turn to their parents for help.
And while dad can still help the child in this matter, then mom, who is accustomed to drawing houses and dogs for her baby, may not be ready for the needs of the grown-up toddler. However, every parent can learn to draw a car with a simple pencil for children!
On the topic: methodological developments, presentations and notes
By developing the cognitive interest of preschoolers through various types of activities, including visual arts, it is possible to achieve a significant increase in the level of ideas about the world around children. During the course
To cultivate a moral and aesthetic attitude through the depiction of animals.
This lesson introduces children to nature (trees and shrubs), allows them to teach children how to draw trees and shrubs correctly. The following methods were used in the lesson: gaming, verbal, practical.
Lesson notes on visual arts (modeling - experimentation). Topic: “Tili-tili dough...”
Lesson summary on visual arts (preparatory group) TOPIC: “Fairytale autumn forest.”
Source
Notes on drawing in the middle group “A truck is rushing down the road”
Yulia Prokopenko
Notes on drawing in the middle group “A truck is rushing down the road”
Objectives: teach children to draw a truck from several parts (cabin, body and wheels, learn to draw straight lines, teach children to draw in a certain sequence. Learn to use a brush and paints correctly. Learn to complement your composition with details.
To cultivate children's creative imagination, thinking, and memory.
Equipment: sheets of paper (half, a jar of water, medium , gouache, oilcloth (on the table, napkins. Children's cars, and a large truck .
Course of the lesson: Children sit on chairs on the carpet in a semicircle, the teacher sits in the center. The teacher makes riddles about cars, special cars, the children guess the riddles, there is a short discussion with the children about the purposes of these cars (police, fire, ambulance)
what color they are, what they are needed for, where they are in a hurry, what specific signal they give. All this is accompanied by an examination of special machines.
Truck riddle :
