What you will need
To use step-by-step instructions for children or adults in drawing a tree, you need to select the appropriate tools and materials.
Any materials can be used; the choice will depend on the design and technique:
- Simple pencil;
- Eraser;
- Colored pencils or markers;
- Paints;
- Paper or cardboard on which the drawing will be created.
Birch
To know how to draw a birch beautifully, you need to follow the following instructions:
- The drawing should always start from the trunk, no matter what kind of tree is being drawn.
- The master class for beginners states that it is rare that a tree has a perfectly straight trunk. Birch is no exception.
- The barrel can be any length as desired. Its spreading nature also depends on the choice of the artist;
- You also need to think about what kind of landscape will be drawn against the background of the tree.
- If there are any elements that need to be added to the drawing, then you need to take this into account in advance;
- Let's imagine that there is a fairly standard landscape outside with calm, windless weather, so the trunk can be drawn slightly curved, rather than bowed by the wind;
- At the first stage, the trunk is depicted schematically, now you need to finish drawing its shoots for the branches;
- The next step in the master class on how to draw a tree with a pencil is drawing the branches. They need to be drawn from those processes that were drawn earlier.
- It must be remembered that the trunk becomes thinner towards the top, therefore the branches should decrease with height;
- Now you need to draw small thin branches to the thick branches; in birch they are usually directed downwards;
- You need to draw black strokes of bark on the tree trunk;
- If you mean a summer landscape, then you need to draw foliage. If it’s winter, then everything is much simpler. There is no need to draw foliage, the drawing is already completed.
Step by step drawing of spruce
The Christmas tree is a favorite tree for children of all ages. Even kids want to learn how to draw it. Depending on the age, there are options for beginning artists on how to draw a coniferous tree with a pencil step by step.
For kids, there is a spruce tree drawn from triangles. An older child will be able to cope with a more complex image. In any case, the spruce is shaped like a large triangle.
- Like all trees, the trunk is narrowed at the top and widens at the bottom.
- The lowest branches of the spruce are drawn curved downwards. The middle is filled with branches perpendicular to the trunk. Small upper branches look up.
- The main branches branch into smaller ones. Small needles cover both large and small branches.
The drawing of an evergreen tree is ready.
Oak
You can also draw an oak tree step by step with a pencil. It will differ from birch in both its trunk and the width of its crown.
The progress of the drawing will also differ:
- First, you need to schematically depict a hexagon, thus outlining the future crown of the tree and adding sticks to it, within which the trunk will be located;
- Now you need to draw a real trunk to the polygon, and within its trunk draw irregularities and different lines in order to thus indicate the crown;
- The next step in the drawing is clearly finishing the drawing of the trunk, creating shadows on it;
- Now you need to finish drawing branches and leaves on the crown, carefully drawing each element. If the landscape is summer, then there are leaves, and if not, then just a trunk and a snow cap;
- The final stage will be the simplest, you just need to carefully erase with an eraser the lines with which the oak was drawn.
Blooming apple tree branch
The apple tree in bloom looks great. You can first make a sketch with a pencil, as in the picture below. Flowers appear before leaves, so a bare branch or the entire tree is drawn, as in the previous paragraph, and then large flowers with five petals and small unopened buds mixed in are drawn.
The flowers are depicted quite close to each other, and in the middle of each draw a bunch of stamens with rounded ends. It is advisable to draw flowers in different ways: some look forward, others turn sideways. The buds are drawn differently. A thin stalk extends from the main branch; then a bed of sepals is drawn, from which small petals extend, tightly adjacent to each other.
Simple tree
To know how to draw a tree easily, you can follow the following instructions.
All steps are described in great detail, you just need to follow each one carefully:
- At the first stage, you need to schematically draw a tree trunk and its crown;
- Then the trunk should be overgrown with branches, the same schematic as everything at the beginning of the drawing;
- The next step to know how to easily draw a regular tree is to draw the foliage. Foliage should be indicated by wavy lines;
- Now you need to erase the line with which the foliage was indicated schematically. Now you need to draw each element in more detail;
- Each branch is also drawn carefully to be as similar as possible to a real tree;
- The bark should be drawn on the trunk, and each branch should be framed with leaves;
- Now you need to draw the soil on which the tree itself directly stands;
- Now you can start painting the tree. Trunk, foliage, crown - all this needs to be filled with color;
- All that remains is to draw strokes on the bark and foliage and add some additional elements to the drawing.
Let's add color
Whatever way you choose to depict this tree - with a round crown or with individual leaves - the picture needs to be brightly colored.
You can use several shades of the same color to make the design more natural.
Now you know how to draw an apple tree step by step with a pencil. Beginning artists will definitely find our advice useful. Take a sheet of paper and try to repeat the sample drawings yourself. Good luck!
Pine
If you don’t know how to draw a pine tree beautifully, the following master class with very detailed instructions will help you with this problem. Such step-by-step drawings are useful because they are suitable for any level of training.
There are practically no differences in the technique of drawing pine; it is drawn similarly to other trees.
But there are still some features that should be taken into account:
- The first stage is familiar - you need to draw a trunk. It will be slightly thicker at the bottom than regular wood. The top will be much narrower than the base;
- Now you need to draw a crown, which will not be a single whole, but scattered ovals that are distributed throughout the tree trunk;
- At the third stage, you can already draw in detail each branch, drawing each needle on the branch;
- When the branches and needles are drawn, you can start painting the trunk.
- The top of the tree will always be lighter than the bottom because more light will fall on it;
- The tree is finished. It also remains to draw the surrounding landscape, if necessary.
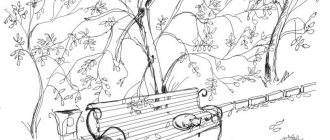
Photos of tree drawings
0