If you are the parent of a preschooler, you have probably already thought about starting school. How to help adapt to new conditions, master writing, counting and reading.
In this material we will help you understand the main aspects of developing writing skills, find out possible mistakes and how to avoid them. We'll tell you about exercises and educational games that will help prepare your hand for writing.
Formation of writing skills in children
Writing is one of the ways of speaking. The process of developing a skill is long and complex. It starts at the age of two or three and continues until the age of seven, when children enter first grade. Many parents start preparing their children for school in advance. They buy notebooks with copybooks of letters, and do not understand why many days of hard training do not produce results.
It is important to know the difference between preparing to write and learning to write. In preschool age, full-fledged writing is impossible due to age-related characteristics of the structure of the nervous system. At this stage, the emphasis is on general physical development and strengthening the muscles of the hand, on developing perseverance, coordination of body movements, concentration, and visual orientation.
Writing skills are developed in three stages:
- analytical - thinking about each movement and analyzing it, for example, how it is more convenient to take the handle, with what force to press, etc.
- synthetic – combining elements into a holistic process, conscious thinking about each step, visual control of each action;
- automation means that the skill has been formed: the child, without thinking, completes written tasks, hand movements are smooth, effortless.
In preschool age, the child gains graphic experience, learns to use written objects and observe hygiene rules. The child acquires the skills to correctly tilt a notebook, write individual letters and words of the required size and at the required angle, and correct body position while writing.
Why prepare your hand
Many parents do not even suspect that it is necessary to prepare their hands for writing. The better developed the fine muscles of a child’s leading hand, the easier it will be for him to master the skill of writing at school. Otherwise, the consequences will be sad: a first-grader at school will become very tired, will not have time to complete the teacher’s assignments, and will become upset when he sees the successes of his classmates and his own failures. Therefore, preparation is absolutely necessary.
But it is important to take into account one circumstance: preparing your hand for writing and learning to write are not the same thing. The child will learn the second at school, but our task, as parents, is to deal with him first. Don't force your preschooler to pore over copybooks, but train his arm muscles.
What about before?
Don't think that preparing your hand for school is a newfangled trend. In fact, the best teachers in both the 19th and 20th centuries were puzzled by the development of “manual skill” in their students. Under their guidance, children were engaged in paper folding, construction using sticks, matches, peas, buttons, modeling and much more. The famous Maria Montessori also paid great attention to manual dexterity. And in our ordinary lives, you and I did a lot of things that prepared our hands for writing: we whittled sticks, cut out figures from wood, folded paper airplanes, boats and frogs, pulled threads between our fingers in a bizarre way...
What is important for preparation
In order to facilitate the process of developing writing skills, reduce stress and not cause a negative attitude towards school, it is necessary to train the hand from the age of three.
General physical development
Good physical fitness plays an important role in the formation of beautiful handwriting. Strengthening the muscular system promotes endurance and allows you to sit at your desk during the lesson. Strong back muscles prevent curvature of the spine and maintain correct posture. Developed muscles of the shoulder girdle and arms relieve rapid fatigue, trembling and muscle spasms.
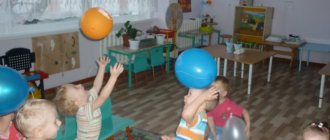
The child develops physically during active games on the street, riding a bicycle or scooter, jumping on a trampoline or inflatable slide, etc.
Motor skills
These are coordinated movements aimed at performing some action.
Motor skills are divided into:
- large – this is coordination of movements, maintaining balance, awareness of the position of the body in space: walking, running, standing up, sitting down, lying down, turning;
- fine - precise movements of the fingers.
To develop writing skills, it is equally important to pay attention to the development of both types of motor skills. When writing, the small muscles of the hand and the large muscles of the body are used to keep the body in a straight position.
Orientation in space
It will be easy for a child to navigate in a notebook or on a piece of paper if he knows such concepts as right-left, top-bottom, side, center, corner. To do this, when talking with your baby while dressing and undressing, walking, bathing, feeding, pay his attention to what the right and left arms or legs are doing. Ask what is seen ahead and what is left behind.
Graphic skills
In the process of drawing, the muscles of the hand are trained. Hatching, coloring, and drawing in cells develops the skill of observing boundaries, writing hygiene, and the ability to navigate in space.
"Skillful Hands"
An integrated approach to developing skills, which includes various kinds of crafts, appliqués, modeling, design, knitting and embroidery. Fine motor skills, spatial orientation, perseverance, concentration, and accuracy are improved.
Graphic dictations
Graphic dictations are very useful for preschoolers. They not only develop attention and teach how to navigate on a sheet of paper, but also prepare the hand for writing. And children, as a rule, really like such tasks. For them, these are not lessons, but an exciting game with a prize in the form of a funny figure at the end, if everything is done correctly. Please note that most graphic dictations begin and end at the same point, i.e. The figures are obtained with a closed contour.
It rarely takes more than 10 to 15 minutes to complete even the most difficult graphic dictations. Even the busiest parents will probably be able to fit them into their busy work schedules. And the benefits will be enormous.
How to conduct graphic dictations:
- We use only a simple pencil or pen. Working with felt-tip pens has its own nuances and does not teach the correct pressure.
- We read clearly, without repeating, so that the child gets used to listening carefully and remembering the task.
- We gradually increase the pace.
- At first, you can write the letters “L” (left) and “P” (right) in the corners of the sheet. When the child becomes confident in navigating the sheet, discard this hint.
Graphic dictation “First-grader”
Attention! Before performing the dictation, ask the child to step back 4 cells to the left and above, and put a dot in this place. This is the beginning and end of the drawing that will be obtained as a result of performing a graphic dictation. We start work from this point, and we must return to the same point. If this does not happen, it means there was a mistake somewhere.
3 grades to the right, 1 cl. left up diagonally, 1 cell. to the right up diagonally, 2 cells. down, 1 class. to the right up diagonally, 2 cells. down, 1 class. left up diagonally, 3 cells. down, 1 class. left, 1st cell. down, 2 cells to the right, 1 cl. to the right down diagonally, 2 cells. down, 2 cells to the right up diagonally, 2 cells. left up diagonally, 1 cell. up, 1 cl. to the right down diagonally, 1 cell. to the right up diagonally, 1 cell. to the right down diagonally, 1 cl. to the right down diagonally, 1 cl. to the right up diagonally, 1 cell. down, 2 cells left down diagonally, 3 cells. down, 2 cells left, 2 cells up, 2 cells left down diagonally, 1 cell. left, 2 cells up, 1 cl. left up diagonally, 2 cells. down, 1 class. left down diagonally, 1 cell. down, 1 class. to the right down diagonally, 1 cell. down, 1 class. to the right down diagonally, 2 cells. down, 1 class. left, 3 cells down, 1 class. to the right, 1 cl. down, 2 cells left, 4 cells up, 1 cl. left, 4 cells down, 2 cells left, 1st cell. up, 1 cl. to the right, 3 cells. up, 1 cl. left, 2 cells up, 1 cl. to the right up diagonally, 1 cell. up, 1 cl. to the right up diagonally, 1 cell. up, 1 cl. left up diagonally, 2 cells. up, 1 cl. left down diagonally, 3 cells. down, 1 class. left down diagonally, 1 cell. left, 1st cell. up, 1 cl. to the right, 4 cells. up, 1 cl. to the right up diagonally, 2 cells. to the right, 1 cl. up, 1 cl. left, 3 cells up, 1 cl. left down diagonally, 2 cells. up, 1 cl. to the right down diagonally, 2 cells. up, 1 cl. to the right down diagonally, 1 cell. left down diagonally.
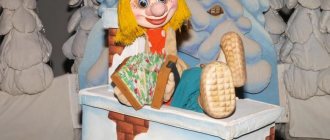
The result should be a figurine of a first-grader with two bows and a bouquet of flowers.
Did it work? Well done!
Something incomprehensible came out, but the circuit is not completely closed? Dont be upset! This is just an excuse to practice one more time. You can come up with graphic dictations yourself or use those that are easy to find on the Internet or in stores.
Exercises to prepare your hand for writing
There are many interesting activities for preschoolers that help prepare for writing:
- drawing with pencils on paper;
- prettification;
- tracing drawings along the contour;
- the use of special notebooks with copybooks of loops, hooks, figures, lines;
- shading of figures;
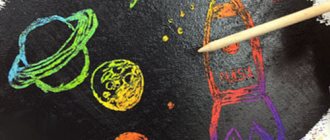
- drawing with multi-colored crayons;
- different types of mosaics;
- construction games with parts of different sizes;
- cutting with scissors;
- sorting beads, buttons by color or size;
- threading laces through holes;
- braiding braids from multi-colored ropes;
- winding ropes and knitting threads into a ball;
- spinning the spinning top toy, spinning top;
- stringing beads on a thread;
- simple embroidery elements;
- fastening and unfastening buttons, snaps, zippers;
- finger painting using paints, dry crumbly finely ground cereals, flour;
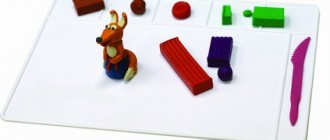
- modeling from plasticine, dough;
- games in the sandbox or with kinetic sand;
- gluing small parts using tweezers;
- drip drawing using a pipette;
- opening and closing the lock with a key;
- unscrewing and tightening screws and nuts with fingers and a screwdriver;
- sewing on a button;
- making applications from colored paper, pasta, natural materials (beans, peas, leaves, flowers, sticks, straws, matches, etc.);
- origami;
- drawing using stencils;
- finger theater games.
Exercises for developing fine dynamics inside the palm
- Coins. Give the child 3-4 coins in his hand. He must, holding all the coins in his palm, place them on the table ONE AT A TIME. With undeveloped manipulations, the coins will fall, since it will be difficult for him to move some fingers, squeezing the others, and shift the coins inside the palm without helping with the other hand, body, etc.
- Beans - take a small cola bottle. Beans are placed into it in layers - brown and white. It turns out very beautiful. The child takes 3-4 beans in his hand and gradually drops them one at a time into the bottle. You can add a third layer - I added hummus grains (in Russia, I think they are called Iranian peas or Turkish peas). You can just use peas, but larger ones are better. Encourage the child to lower them one at a time so that the beans do not spill.
- "Walks" on a pencil. The child takes a pencil (preferably a long one) in his hand, takes it usually, but by the very tip, and tries with one hand, without the help of the other and without putting the pencil on the table, to “reach” the opposite end and back.
In general, you can play with any small objects according to the same principle - several objects on the table, the child collects them one by one in the palm of his hand, then lays them out one by one. It’s worth starting with 3, sometimes even 2 items. There's no point in giving more than six. Coins, buttons, large beans, beads (not small beads) are suitable.
My daughter and I have been doing this for about a month now. Every day 5 minutes on each “topic”. The results are already there - my handwriting is noticeably improving, I can write faster in class, and I can accomplish more.
Alexandra (Ima),
Exercises
Regular exercises will help strengthen your hand muscles and add confidence in writing:
- "Blooming Flower"
The hands are clenched into fists and connected together. The thumbs are straight, touching the lateral surfaces. Then the fingers are straightened, the palms are slightly moved away from each other, the wrists are connected. Reminds me of an unopened bud. The flower begins to open - without separating the wrists, the hands are moved to the sides, the fingers are spread out.
- "Duckling fingers."
The palm is open, fingers spread. The index finger is curled into a hole at the base of the thumb. The pads of the first finger alternately touch the middle, ring and little fingers, like the beak of a duck.
- "Tight hugs."
The fingers of both hands are spread out, pressing the tips against each other with force for 5 seconds. Then they cross into a lock, pressing their palms tightly. Count to 5. After the exercise, shake your hands to relax the muscles.
- "Chair".
Place your palms together, fingers together, looking up. The right hand slides downwards along the left. When your fingertips reach the top of your left palm, you need to stop. By pressing at the base of the fingers of the left hand, the hand bends at the wrist joint. In this case, the fingers remain in a vertical position. The curved palm resembles a chair with a backrest.
- "Welcome handshake."
The index, middle and ring fingers of the right hand are pressed against the palm. Each finger of the left hand is greeted with the thumb and little finger, as if shaking with both hands during a greeting.
Learning to write beautiful and even letters is not an easy task for a preschooler. It's good to start developing fine motor skills and writing skills from the age of 4, so here's a selection of great exercises.
1. Finger gymnastics
This is a great way to develop fine motor skills. Depending on the age of the child, it can be more or less difficult. It is important that the text you pronounce is easy to remember, and that the movements of your fingers and palms are accessible to the baby.
Tell your child:
“Show me your fingers. How clever they are! Let's play with them: I will read poetry and show them how to play. And you repeat, okay?”
The sun hid behind a cloud, no ray of sun came out. (One palm with extended ray fingers is curled into a fist and covered with the second palm.)
The rain is knocking in drops, like a grandfather grumbling.
(The palms are connected. The fingertips of the left and right hands knock on each other.)
Here is a grasshopper, hopping and hopping from a petal to under a bush.
(The index finger of the right hand (grasshopper) jumps along the fingertips of the left hand.)
The ant backs away, hides in the anthill.
(The index and middle finger of the left hand (ant) runs along the right hand, reaches the fist of the “anthill” and hides in it.)
The caterpillar crawled and froze on the branch.
(The hands of both hands are placed on the table and depict the movement of a caterpillar - the base of the palm is pulled towards the fingers, then the fingers move forward.)
The wind swirled the leaves, put nature to sleep.
(Rotate the hands left and right.)
2. Massage pause
This is the name of a warm-up for the palms using rubber massage balls or sticks. As a rule, massage breaks are carried out between writing or drawing sessions so that the fingers can relax and rest. The massage break, like finger gymnastics, is carried out accompanied by simple, funny poems that are easy to remember.
Prepare: a rubber massage ball with pimples (for yourself and your child).
Tell your child: “To give your fingers a rest, let’s roll the ball!” Take it from the table. You see how prickly he is, like a hedgehog. I will read poetry and show you how to play with a ball. And you repeat after me.”
The kitten sat down in the corner, found a ball for himself (Roll the massage ball between our palms.) And let’s play with it, roll it on the floor with our paw. (We roll the massage ball on the table in a circular motion.) I rolled it with my left stick, I rolled it with my right paw, (Movements according to the text.) I rolled it between my paws, I tossed the ball and caught it. (Movements according to the text.) 1, 2, 3, 4, 5, We will squeeze the ball. (Squeeze and unclench the massage ball between your palms.) Like funny kittens, it’s fun to play with. (We transfer the massage ball from hand to hand.)
3. “Beads for Mom”
Stringing beads is a very useful and favorite activity for children. “By making beads for mom,” we solve a lot of methodological problems: first of all, we develop fine motor skills, and we can also remember the days of the week (by putting on the beads, we say the days of the week), the months of the year, counting to 20 and back, etc.
Prepare: lace and beads.
Tell your child: “Let’s make beads for mom (grandmother, doll). She will be very pleased! Take the cord in your hand, choose the bead that you like best, and put it on the cord. Well done!"
4. "Sunny"
Prepare: a yellow cardboard circle with a cheerful face (circle diameter 8-10 cm) and 8 yellow or red clothespins.
Tell your child: “Somehow our toys are sad. They probably miss the sun, because it hasn’t appeared for so long. I know how to cheer them up! Let's make a little sun ourselves using clothespins. Take a cardboard circle and attach rays of clothespins to it. This is how bright the sun turned out. Now our home will always be warm and cheerful!”
5. "Flower Dew"
Prepare: a glass of water, a pipette, a picture of flowers (it’s better to take a laminated one).
Tell your child: “A butterfly recently flew to me and said that it was very thirsty, and it was so hot in the forest that there wasn’t a drop of dew left on the flowers. I promised to help her. Let's drop a few drops of dew on each flower in the picture. We will drip the dew using a pipette. To draw water into it, you need to press the rubber cap with three fingers, lower the pipette into the water and release the cap. Now that the pipette is filled with water, carefully remove it from the glass, bring it to the flower and again press the rubber cap with three fingers. Do you see? Droplets of water are now on the flower!”
6. “Help Masha”
Prepare: a plastic ice mold consisting of square cells, children's tweezers, beads in a box.
Tell your child: “These are the beads of Masha’s doll. To prevent them from rolling away and getting lost, Masha decided to sort them into cells using tweezers. Help her". The child takes tweezers, uses them to grab each bead and places them in a separate cell. Beads can be sorted into cells according to color, shape and size.
7. “Raspberries for a bear”
It's no secret that mosaic is a game that is very useful for developing fine motor skills. It is very important to buy the right mosaic, in which the tiles can be easily inserted into and out of the field. Children from 5 years old can be asked to assemble letters or simple figures from mosaics, younger children can lay out “paths”, build “fences”, and very young children can simply insert chips of the same color into a mosaic field.
Prepare: mosaic field, yellow and red chips.
Tell your child: “It has become dark outside, and the doll Masha is afraid to leave the house. Let's make stars out of a mosaic to make the doll light and safe! To do this, we will insert yellow chips into the field, these will be our stars.” When completing the second task: - Our teddy bear is hungry. He loves raspberries very much! Let's insert red chips into the field - these will be raspberries for the bear, he will come and eat.
8. “Sweep the path”
Everyone has seen rubber “bulbs” in the pharmacy, but not everyone knows that with their help fine motor skills are excellently developed.
Prepare: a small rubber bulb, a piece of thin white paper, a sheet of yellow cardboard. Tell your child: “Autumn has come, the grass turned yellow, and then the first snow fell. Tear small pieces from the white paper and throw them onto the yellow sheet. This is the first snow... That's how much snow there is! And now we need to remove it. Let's do it with the help of the breeze. The breeze will blow from the pear if you press it hard. Try". The child points the nose of the rubber bulb at the pieces of paper and presses the bulb firmly. A puff of air blows pieces of white paper off the cardboard. - Well done! The paths are clear again!
9. "Help Cinderella"
Prepare: a bowl in which buckwheat is mixed with beans, and one empty bowl.
Tell your child: “The wicked stepmother gave Cinderella a very difficult job: she mixed buckwheat and beans and demanded that Cinderella separate them in one night. And Cinderella really wants to go to the ball! Let’s help her - take all the beans out of the buckwheat and put them in an empty bowl.” The younger the children, the easier the tasks: little ones take beans out of buckwheat or rice, older children - seeds, even older ones - peas.
10. “Vegetable garden”
Prepare: a cardboard card 5x10 cm, soft brown plasticine, a plate with pea or bean seeds.
Tell your child: “Let's imagine that we have a garden and we decided to plant peas. To do this, you first need to make a bed. Ours will be made of plasticine. Take brown plasticine, knead it, roll it into a ball, then into a thick sausage and attach it to a cardboard card. We have a garden bed. Now we will plant pea (bean) seeds in it. To do this, take a pea, place it at the beginning of the bed and press it into the plasticine with your index finger. Well done! Now we step back a little from the pea and plant the second, then the third, the fourth... The pea bed is ready!” Then you can water each pea with water using a pipette.
How to teach a child to hold a pen correctly
It is important that the child learns how to properly hold a pen and pencil before entering school. Correcting mistakes and retraining the grip is difficult. Incorrect position of the fingers, tilt of the pen and rotation of the hand make handwriting uneven and illegible, cause rapid hand fatigue, and affect posture.
What a correct grip looks like:
- the handle lies between the thumb and middle finger, pressed on top with the index finger;
- the distance to the writing rod is about two centimeters;
- a straight line can be roughly drawn through the hand, wrist and elbow joints;
- the top of the pen or pencil points to the child's shoulder.
The most common mistakes
Preschool children, when they begin to master working with stationery items, make the following mistakes:
- The child holds a pencil or felt-tip pen with his whole hand, clenching it into a fist.
- In a three-finger grip, the thumb is bent and directed perpendicular to the index finger to its middle phalanx.
- The pen rests on the ring finger and is held by the middle, index and thumb.
- The brush bends inward, with the top edge of the object pointing away from you.
- The child holds the handle with all fingers (like a pinch).
- The fingers are located near the stylus, or far away so that the hand hangs over the table.
- When moving, it presses on the paper too much, leaving tears, or too lightly.
Methods to avoid mistakes
The following methods will help you avoid mistakes in learning to retain written objects:
- It will be easier to grip a pencil correctly if you hold a small piece of paper with your ring and little fingers.
- Draw a dot on the middle finger that will indicate the location of the pen.
- The finger game “building a house” will focus on three-finger holding: the handle is held between the middle and thumb; the index finger rises freely and can hit the handle like a hammer.
- Be sure to focus on the direction of the top of the pencil towards the child’s shoulder.
- To generate moderate pressure, use soft pencils or felt-tip pens.
- For optimal removal of fingers from the lead, mark a line on the writing object where to hold it.
Is your child ready for school?
How to determine if a child is ready to write? For this purpose, teachers have compiled many tests. For example, the Kern-Jorasick “School Maturity” test (easy to find on the Internet) is aimed, among other things, at determining whether the future student’s hand is properly prepared.
You can ask your child to complete the following tasks:
- Show your preschooler a drawn circle with a diameter of 3 - 3.5 cm. Ask him to draw exactly the same one. When evaluating assignment performance, consider the following:
- The child must draw a figure close in size to the original one.
- The circle should resemble a circle (even if not perfectly smooth), not like some other geometric figure.
- The line should be solid (continuous), smooth, and fairly confidently drawn.
- The pressure should not be too weak.
- The child’s movements when completing the task should be free and confident.
- Ask your preschooler to shade any simple silhouette (cloud, ball, pear). If your child has not done shading before, show him a sample. The child can choose the direction of the shading (horizontally, vertically, diagonally). When evaluating the results, consider:
- Evenness and parallelism of lines. Accuracy of execution.
- Precision of movements.
- Maintain approximately the same spacing between lines.
Note! If the small muscles of the hand are not well developed, then the child will turn over the sheet on which he is working, because it will be easier for him to do this than to arbitrarily change the direction of movement of the hand.
Even if your child doesn’t start school this year, do these tests and you will see whether your baby’s hand needs to be prepared more carefully and purposefully. If yes, then use the methods suggested in the article or come up with your own. And everything will work out for you.