Poultry
As a rule, children's acquaintance with the world of birds begins with poultry, because this is most expedient. Therefore, already in kindergarten, children know perfectly well what poultry is and what they look like.
It is advisable to start getting acquainted with this type of creativity with familiar images, so it will be much easier for the child to consolidate the acquired knowledge in memory.
Poultry includes ducks, chickens, geese, turkeys; all of them are quite easy to make from paper, cardboard or other improvised means that you decide to use in the craft.
The easiest way to assemble a craft is from paper or cardboard, because it is a hard material from which absolutely any shape can be cut.
For the craft you will need:
- Base (colored cardboard)
- Watercolor or gouache
- Plasticine
- Glue stick
- Cotton pads, napkins
Assembly
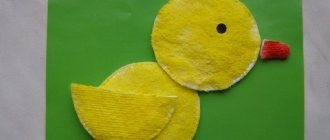
Let's start assembling the small chicken.
The assembly instructions are very simple; the body will be a solid cotton pad, which needs to be glued to the base using a glue stick.
Next, to complement the image, giving it an increasingly realistic look, you need to place another cotton pad a little higher; it will serve as the head of the craft. Please note that these 2 cotton pads should be touching each other.
At this stage it is necessary to paint the workpiece using yellow paint. It is worth remembering that cotton pads absorb moisture well, so you should try to squeeze out the brush, leaving only paint with less water on it.
Once they are carefully painted yellow, you need to give them some time for the paint to dry.
When it is dry, you can begin further assembly. To make chicken wings, you need to take a new cotton pad and use scissors to cut it into 2 equal parts. Only one half is needed for this craft.
It should be placed on the body so that the rounded part of the disk is at the bottom. The part of the cotton pad itself should be located exactly in the middle of the body.
The wing also needs to be carefully glued, wait until the glue dries, and then paint it yellow, like the rest of the parts. All that remains is to make the beak, eyes and legs.
For the beak and paws, red or burgundy plasticine is used. A part of the desired shape is carefully molded from it, after which it is glued to the base with a slight movement.
To make an eye, it is recommended to use a black felt-tip pen; you just need to gently press once on the desired place, and an even circle will be ready.
This completes the assembly of a simple craft; the time spent on manufacturing and combining all the parts does not exceed 30 minutes, which is very convenient.
How to make notes for a lesson on application
The lesson on the applicative type of art creation includes three stages:
- introductory to familiarize yourself with the topic, appeal to the experience of children - up to 3 minutes;
- the main one for carrying out preparatory work, preparing materials and tools, completing tasks and physical education for 10–15 minutes;
- the final one for assessing children’s work and reflection - up to 3 minutes.
Table: Kasatkina M.V. lesson notes on appliqué (work in pairs) on the topic “Birds on a branch” (fragments)
| Stage | The essence |
| Introductory | The teacher holds a book in his hands and invites the children to come up (the children stand in a semicircle around the teacher). - Guys, there is a riddle about a bird hidden in this book, listen carefully, I’ll read about it to you now, try to guess who we are talking about? … > |
| <… The teacher puts a picture of a titmouse on the easel. — Guys, is the tit a migratory or wintering bird? Children give the answer and prove it. - Look at what a wonderful tit flew in and sat on a branch (shows a sample). | |
| Educator: - Guys, it’s easier for both animals and birds to overwinter when they are together, so let’s not leave our tit alone and place a whole flock with her. - Tell me what the bird has? Children name the components of the bird's body. | |
| Basic | The teacher displays a mnemonic table on the easel depicting the sequence of carving a bird. - Guys, there are geometric shapes of different colors and sizes on the tray, let's tell you what parts we will cut out the tit from (from a black square - the head, from a yellow rectangle - the body, from a black rectangle - the wing, small parts - the tail, the eye and beak are already ready, you will finish drawing the bird’s legs with a pencil). If necessary, the teacher shows ways of working. |
| - Before we start work, we will rest. Children stand in a circle. Finger gymnastics “Flock of Birds” is carried out. When naming birds, bend your fingers. Sing, sing along, ten birds are a flock. - This bird is a nightingale, this bird is a sparrow. This bird is an owl, a sleepy little head. This bird is a waxwing, this bird is a corncrake. This bird is a little gray feather. This one is a chaffinch, this one is a swift, this one is a cheerful siskin. Well, this is an evil eagle. Birds, birds, go home! (Clench your fingers into fists.) | |
| The teacher removes the sample. — Guys, you will again do the work in pairs, so help each other, consult. Don't forget that before gluing, you should first place the birds on a branch. And please be careful with scissors, and our magic helper table will remind you how to work with them. The teacher sets up a mnemonic table “Working with scissors.” | |
| - Now get to work. Children perform the appliqué in pairs, the teacher helps, controls the children, helps. | |
| Final | At the end of the work, the teacher offers to clean his workplace and places a sample on the easel. “Our titmouse won’t be sad now, bring your work and we’ll have a whole flock of titmice.” Children exhibit their works and admire them. |
| Quote via: https://nsportal.ru/detskiy-sad/applikatsiya-lepka/2017/02/17/moi-zanyatiya | |
At the end of the lesson, the teacher should thank the children for their work and praise the results of their creativity
Video: lesson on collective application on the topic “Migratory Birds” in the senior group
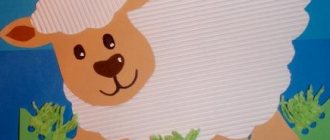
Chickens and geese
These poultry have abundant plumage, which also needs to be indicated on the applique. Depending on the age of the child, applique with these birds can be of different types.
For the little ones, the same approach is used as when making chicken. As a final step, the child will need to place cotton wool on it, which will imitate plumage.
For older children, for example, for the second or third year of being in kindergarten, pre-prepared bird templates are used. They are printed on paper and given to children. And they, in turn, must correctly fill the template with cotton wool where it is needed.
The remaining parts should be colored with felt-tip pens, pencils or colored pens, whichever is more convenient for you.
For this craft you will need:
- Glue stick
- Outline drawings of birds
- Paints, pencils, pens
- cotton wool
- Scissors
Swan Princess
Secure a plasticine barrel on a blue base (this can be a sheet of thick paper or plasticine). Cover it entirely with white bird down.
The neck and head are also sculpted from plasticine. Wrap a white napkin coated with glue and let dry.
Make a crown and attach it to your head. Connect all the parts.
To make the composition look complete, decorate the base along the edges with small black boulders (pieces of plasticine), and draw waves with paint.
Crafts addition
So that the craft does not seem empty, you need to create the right environment for the birds. For example, for a chicken craft, you can create scattered food around it.
To imitate it, real seeds glued to the base of the craft are perfect. However, gluing small parts is a very painstaking job that requires maximum care.
In addition, working with small parts is not recommended for children under 3 years of age without parental or teacher supervision.
You can also create a small house, make grass, sun and clouds. You can add virtually anything, the child must imagine the environment himself, there is no need to interfere with his creative impulses.
It only makes sense to guide him, telling him how to correctly make this or that detail for his craft.
Creating a house
The simplest thing would be to make one or more small bird houses in the background. To do this, you first need to cut out a square or rectangle that will serve as the base.
Next, you need to make a roof; for this, a triangle is cut out in size suitable for a square or rectangle. Its color may differ from the base, at the request of the child.
All this is glued to the base of the craft using a glue stick. Next, you need to make windows; for this, small squares are cut out of white or blue paper, which are then glued to the walls of the house.
To make frames, you can draw classic crosses on top of the window blanks with a pencil or felt-tip pen. All that remains to be done is the chimney, an integral attribute of village houses.
For this purpose, you need to cut a small strip from the same paper from which the roof was cut. Next, you just need to glue it to the roof in any place where it will be most convenient.
“...Golden chain on that oak tree...”
Instructions on how to make crafts based on fairy tales may consist of several general recommendations:
- use available materials;
- fantasize;
- For compositions, choose bright, voluminous scenes.
One of the most striking compositions is a learned cat on an oak tree with a gold chain.
Step by step guide:
- Prepare a sheet of thin plywood (base).
- Glue a thick straight branch, 15 cm high, vertically onto the base. Make the crown from dry oak leaves (just attach them with glue to the top of the branch).
- Cover the base with moss, dry blades of grass and small twigs.
- You will have to buy a cat (you can look for the right size and fluffiness among decorations for keychains). We plant it next to a tree.
- The final touch is to wrap a chain around the oak tree (look at your place or buy it in the jewelry department).
If an exhibition of crafts based on fairy tales is held in a kindergarten or school, this composition will definitely not go unnoticed.
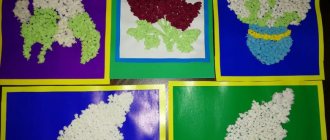
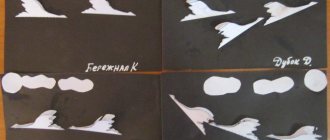
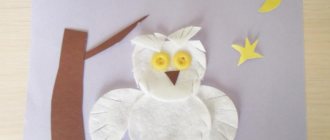
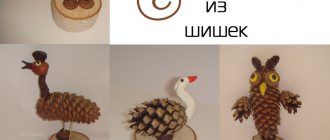
Photos of applications in the form of birds
Mermaid
On a sheet of thick paper, draw an outline of a girl in profile to the waist. Cut out the workpiece. Make hair from yellow silk or satin threads and glue it on. Fashion a tail from plasticine.
Prepare a medium-sized, beautiful stone. Attach the tail to it so that it hangs almost to the very edge of the stone, then carefully stick the upper part of the craft into the tail.
Small sequins attached to the tail will add naturalness to the character and further decorate the craft.
Materials for work
The set of materials depends on what kind of craft will be made, because they have their own characteristics. The main materials will be plasticine, glue, colored paper, paints and brushes. Materials for crafts can also be natural materials: acorns, dried flowers and leaves.
Thumbelina
In every girl's playroom there is a play that the child has already played with. What if you give the toy a second life? Let's come up with a craft!
From any bright fabric, cut out ovals with one pointed tip, 3 sets of five pieces. Let the blanks in each set be 2-3 cm smaller than the previous one. These are petals.
Note!
DIY airplane craft: the best options for creating an airplane from paper, cardboard and plastic. 120 photo ideas
- DIY crafts for March 8 step by step - a review of the most beautiful crafts for International Women's Day (120 photo ideas)
Diaper cake for a girl - 180 photos of ideas for original diaper cakes + DIY instructions with examples of finished products
Sew the base of the flower in the form of a round pillow, sew the petals to it so that the small ones are on top.
Sew a new dress for the doll and place it in the center of the flower. The craft is ready!
Cat's ears
A little-known fairy tale. This is good. A craft is a great opportunity to get acquainted with the original creativity of a storyteller. Photos of crafts based on fairy tales can be found on the Internet. While looking through them, you will definitely come across “cat ears”.
The composition can be implemented in the form of an application.
Paint the base sheet with dark blue paint. Stick silver stars and a month in the upper half. Cut and paste Christmas trees and hills.
Place two triangles – ears – in the center of the sheet. To make the craft look impressive, the ears should be made of bright red silk. They can be cut into sharp corners along the edges to make them look more like lights.
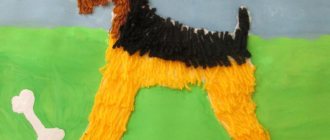
To avoid boredom, the bear needs friends
When the child has learned to make a simple bear, you can complicate the task. To do this, he is asked to make bears for friends. An example is shown in the photo below.
To awaken children's interest in such an idea, it is necessary to captivate them with an interesting story about forest inhabitants.
You can combine them into groups that will make one application together. You can add other forest inhabitants to the craft.
Princess on the Pea
A multi-layer applique made from pieces of fabric looks best. In this case, it is not necessary to conduct a master class on creating crafts, everything is quite simple.
On a colored sheet of paper, draw a bed (railings and base) with a simple pencil. Glue twine to the outline. Glue the pea. Cut several elongated ovals (mattresses) along the length of the bed. Use pieces of different fabric. Glue them on top of each other.
Paint a princess on top.
Kolobok
Crafts based on the fairy tale Kolobok, a mandatory activity in any kindergarten. The kolobok theme can be played with so many materials that it’s simply dizzying.
The largest kolobok can be made from a pumpkin and placed outside (our answer to Halloween).
Find a stump of suitable size. Place a pumpkin on top of it. Glue the chestnut nose, paint the eyes and mouth.
Two long potatoes will serve as legs. You can put an old hat on the top of your head.
If you need a smaller craft, you can make a bun out of plasticine, it’s not at all difficult, and place it on a cardboard base decorated in a forest theme, with moss, dry blades of grass, acorns, and rowan berries.
Three piglets
The plot of this craft provides wide scope for imagination. The composition will, of course, be based on three little pigs. They can be made from completely different materials. Plasticine, foam balls and even chicken eggs will do.