A new cycle begins - observing a parrot in a corner of nature.
Observation. “How many wings do birds have and how do they fly?”
Goal: to clarify children’s ideas about the two methods of movement of birds in space, about their structure (legs and wings), about the features of the wings (they open - and then are clearly visible, fold and press against the body - in this case they are invisible, birds fly through the air with the help of open wings - they flap them, push off from the air and fly; a person does not have wings, he cannot fly).
The teacher organizes observation at the moment when flying birds appear in the sky. Invites children to depict the flight of birds. Discusses with them what a bird looks like in flight and on the ground, why birds fly but humans don’t.
In his free time, the teacher reads to those who want to, E. Charushin’s story “How the boy Zhenya learned to say the letter “r.” After reading, he talks to the children about crows: how they walk, how they fly, how they croak. He asks each child to croak - he finds out who should learn to say “r” just like Zhenya.
A cycle of observations of a parrot living in a corner of nature begins (if another bird lives in the group, the teacher, by analogy, himself creates a cycle of observations).
Observation 1. “How is a parrot different from sparrows?”
Goal: to clarify children’s ideas about the characteristic features of the appearance of a parrot, about the structure of its body, and to teach comparison techniques.
The teacher invites everyone who wants to look at the parrot and say what it is like, what it has (head, tail, legs, eyes, beak). Then he asks to remember the sparrows that fly to the feeder, to say what they are like, how they differ from a parrot. If preschoolers find it difficult to answer, the teacher shows a color picture of sparrows, asks them to look at it and at the parrot and say how the birds are different from each other.
In conclusion, the teacher himself sums it up: “These birds are not only different, but they are also similar to each other. Both sparrows and parrots have one head, one tail, two legs, two wings. What else do they have the same? Of course, both sparrows and parrots are birds, so they are similar to each other.”
Observation 2. “What and how does a parrot eat?”
Goal: to clarify children’s ideas about the structural features of a parrot’s beak (thick, curved) and how it pecks food, to show that a parrot needs a variety of food so that it does not get sick and feels good.
The teacher first invites the children to look at the parrot's beak and say what it is like. Then he shows a saucer on which crumbs of eggs, cottage cheese, some kind of porridge, grated carrots, a piece of white soaked bread, pieces of cabbage or apple are pre-arranged in small portions. The children examine and name the food, and the teacher clarifies: “The parrot needs to be given not only a grain mixture, but also a variety of foods so that it feels good and does not get sick. We all love him, so we will take care of him. I’ll put the saucer in the cage, place the grain mixture separately, see what it’s like. Not at all like fish food. And you watch what the parrot will do, where it will start, how it will peck.”
The teacher puts out the food and, together with the children, observes what is happening in the cage, quietly commenting on the behavior of the birds. Before dinner, you should go back to the cage and see what is left on the saucer; what the parrot ate completely - what he especially liked, and what he left. (On this day, the parrot should not be fed until observation begins.)
Observation 4. “How does a parrot eat greens?”
Goal: to continue to instill in children a love for the parrot, a desire to see it always healthy, to give an idea that in winter, animals, like people, lack vitamins, so they can get sick; oat greens are a vitamin food that will be very useful for the bird.
The teacher puts a box of green oats in the cage, the children observe the behavior of the bird and comment on it. The teacher says that in winter everyone lacks vitamins and so does the parrot. This causes the body to become weak and diseases arise. To prevent the parrot from getting sick, it is necessary to treat the bird with greens, specially growing them in boxes.
In his free time, the teacher continues reading the works of E. Charushin: he reads again the story “How the boy Zhenya learned to say the letter “r” or the story “Yashka”.
Observation 5. “What kind of legs does a parrot have?”
Purpose: to clarify children’s ideas about the structural features of a parrot’s legs (two legs, short, bare: not covered with feathers, each leg has four toes with curved claws, two toes point forward, two to the back, with the help of its legs the parrot walks along the bottom of the cage, on a perch, climbs on a net (rods), climbing with such fingers and claws is very convenient - they easily cling to everything, the parrot scratches its body with its feet, sometimes holds food).
While examining the cage's occupant with the children, the teacher invites them to look at their hands and count the fingers, which are all directed in one direction except one. Asks the children to independently observe the actions of the bird and find out why it needs legs and what it does with them.
Observation 6. “How does a parrot bathe?”
Purpose: to show children how a bird bathes in water, the uniqueness of this procedure (the bird climbs into the water with its feet, crouches, flaps its wings in the water, shakes itself, after bathing it arranges the feathers with its beak so that they lie beautifully and evenly, bathing is good for the bird - it becomes beautiful and healthy); cultivate interest in observations.
The teacher shows the children how he places a saucer of water in the parrot's cage. He asks them to quietly observe what the bird will do. If the parrot starts to bathe, the teacher comments in a whisper on his actions. If swimming does not take place, he talks about how other birds bathe (a canary in a cage, sparrows on the street).
Observation 7. “What kind of feathers does the parrot have?”
Purpose: to clarify children’s ideas that the body of a parrot is covered with feathers of different lengths (long feathers on the tail and wings, short feathers on the head and chest), the feathers are different in color and pattern, the parrot’s plumage is very beautiful, you can admire the bird, the feathers are light .
For this observation, the teacher collects in advance the feathers that have fallen from the parrot in order to use them as handouts. The observation begins with the teacher inviting the children to admire the bird. Emphasizes that beauty is created by its plumage. Then everyone examines the parrot and determines that the feathers are different. At the end of the observation, the teacher hands out a feather to the children. They examine the feather and “weigh it” on their hand (very light). The teacher explains why it is necessary for birds to have light feathers.
Observation 8. “What does the parrot see?”
Purpose: to clarify children’s ideas that with the help of its eyes the parrot can clearly see all the surrounding objects in the cage and outside it; it can be frightened by new, unfamiliar, large objects; the parrot must be treated with care: do not run near the cage, do not wave your arms , do not place large toys near the cage.
The teacher invites the children to count how many eyes the parrot has, see where they are located (on the sides of the head, which gives a wide view), and what shape they are. Then they ask for feedback on what they think the bird sees in and outside the cage. He says that the parrot is very observant, he sees everything that happens in the room: who is doing what, what objects are taken and put down, what new people come. Then he suggests conducting an experiment: one child moves away from the cage and shines a flashlight (on a sunny day, you can make a running “bunny” using a mirror). Children quietly and carefully watch the parrot (not the flashlight) to see if he notices the flashlight.
At the end of the observation, a conclusion is made about how to behave around the cage so that the attitude towards the parrot is gentle.
Observation 9. “Can the parrot hear?”
Purpose: to give children the idea that a parrot hears well, because it has ears, but they are not visible - they are on the head under the feathers, the parrot not only hears words, but can also repeat some of them; the bird may become frightened by loud unexpected sounds; You must treat the parrot with care - do not shout near the cage.
The teacher, looking at the parrot with the children, asks if it has ears. After negative answers, he suggests checking whether the bird hears. In complete silence, one of the guys rings the bell (plays a metallophone, tambourine), the rest watch the bird. It is discovered that the parrot turns its head towards the sound and listens. The teacher tells where the parrot's ears are and why they are not visible. He explains that he can be frightened by sharp sounds and must be treated with care. Then he reports that the parrot hears human speech and can repeat those words that are often and equally pronounced. He suggests working together to teach the parrot how to say hello. He tells and shows how to teach a parrot: cover the cage so that he does not get distracted, then clearly, loudly, always say the same way: “Good morning, Gosha!”, repeating this phrase 4-5 times. He agrees with the guys that every morning he will cover the cage, and they will say a greeting. He explains that when the parrot learns these words, it will repeat them.
In the following days and weeks, the teacher and children communicate with the parrot and try to teach it to speak. When the bird learns to say greeting, the teacher can begin to hand-feed it with his favorite food, demonstrating to the children a good relationship with his feathered friend, a new form of communication with him.
Progress of the lesson:
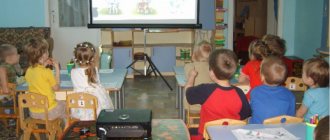
Children sit on chairs.
Educator - Guys, Mishka came to visit us. He says he knows nothing at all about houseplants . Let's tell him a little (children: "let's"
). Bear, sit down more comfortably and listen carefully.
Educator - Look and tell me what’s on my table? (children's answers)
.
— What are these indoor plants ? (children’s answers, for example (geranium, ficus)
.
What are their leaves in shape, size, color, surface? Do plants have flowers ?
What are they and how many are there? (children's answers)
.
Educator - Guys, look carefully and tell me what kind of indoor plant I am holding in my hands ? That's right, it's a ficus, let's look at it.
Teacher - What size is it? (children’s answer: “big, looks like a tree”
When answering the teacher’s questions, the children establish that the stem of this
plant is straight , tall, the leaves are large, oval in shape, and dark green in color.
Educator - What else can you say about the sheet? (offering to touch the leaf)
- What does it feel like? (children's answers: smooth, shiny)
.
After this, they summarize: what everyone said about the plants , how the plant as a whole .
The teacher invites the children to also talk about other plants , compare them with each other in size, shape and color of leaves and other characteristics.
Teacher - Well done, guys! You see, Mishka, how much the guys know.
Mishka - Yes, well done! Thanks to you guys, I learned a lot about plants . How do they differ from each other, what kind of leaves do they have, what color. I used to think that all plants are the same , but it turns out that this is not true at all.
Teacher - Guys, I have a surprise for you. I brought you a new indoor plant , would you like to meet it? (the children’s answer is, of course, N E T)
. Are you Mishka?
Educator - Then watch and listen carefully. OK? I am holding in my hands a new plant called “Balsamin”
, but people simply call it
“Ogonyok”
.
Teddy bear laughs at the name "light"
Educator - Yes, Mishka, don’t laugh, this flower is called “Ogonyok”
.
Do you want to know why? (children's answers)
. Because it has a lot of small red flowers.
Bear - Well, now it’s clear.
Educator - Guys, look at the flower and tell us about it the same way you talked about other plants . (Children look at the “light”
, describe it).
Educator - I like you, “light”
?
He will remain in our group. What place will we find for it? (children's answers)
.
That's right, "light"
grow well there is a lot of light and sun. Now let’s compare the “light”
and another
plant - a friendly family . Are they similar? How are they similar? What kind of leaves do they have? (children's answers)
.
By asking questions, the teacher encourages children to characterize each plant as a whole , and comparing it with others makes it possible to clarify the characteristics characteristic of each plant . At the end of the lesson there is a didactic game.
Educator - Now we will play with you. Want to? (children’s answer:….)
One of the children "drives"
, and other children hide some
plant .
The child, turning around, must guess which plant was removed . At the end of the lesson, the teacher evaluates the children’s knowledge, the children put small plants in their places .
Educator - Well, Mishka, the guys and I told you about indoor plants . Did you like it?
Bear - YES! Thank you very much guys. Now, I can tell my friends a lot about houseplants .
Card 30
INTRODUCING A NEW HOUSEPLANT (CLIVIA, ZEPHERANTHES)
GOAL: To introduce children to a new indoor plant that has an atypical structure, different from the previous ones. Identify distinctive features of appearance (similar to grass)
.
Exercise children in the ability to answer questions, compose a simple description of indoor plants , teach them to compare them with each other.
Involve in caring for indoor plants : watering plants , wiping the wide leaves of ficus and long leaves of clivia
Card 31
OBSERVATION – RESEARCH 8 . DOES THE PLANT NEED TO WATER ?
GOAL: To develop in children a selective approach to watering plants in one of the following ways : by touch (wet soil is sticky, dry soil is loose)
.
Develop sensory experience (looking at samples of wet and dry soil)
D/game “FIND THE SAME”
GOAL: To consolidate children's knowledge about indoor plants . Learn to recognize plants from a photograph , picture , model. Learn to explain your choice by comparing a photo and an object.
Involve in caring for indoor plants : watering plants , wiping the wide leaves of ficus and long leaves of clivia
Card 32
LET'S HELP A GREEN FRIEND
GOAL: Continue to develop an attentive and caring attitude towards indoor plants , consolidate knowledge about the structure and functions of plant . Form the concept that a plant is alive : it grows . Demonstrate transplanting a plant from a small pot to a larger one. Teach children to compare objects by size and use the words “more”
,
"less"
.
Instructions and joint work of children and the teacher to replant the remaining indoor plants : collect soil in a pot, put the equipment back in place.
Card 33
«Houseplants are our friends»
Target:
— develop children’s cognitive interest in natural objects;
- develop a positive attitude towards natural objects, careful handling skills;
— teach children to identify individual parts of plants ;
— expand the circle of observations of adult labor ;
- cultivate hard work .
Integration of educational areas: work , communication, cognition, socialization, safety, reading fiction.
Materials and equipment: group of indoor plants , watering can with water, wet cloths.
MAGAZINE Preschooler.RF
Joint activities of the teacher with children in a corner of nature - caring for indoor plants (senior group).Target:
- To consolidate children's knowledge of how to care for indoor plants and the sequence of work.
- Clarify the duties of those on duty in a corner of nature, knowledge of equipment for work.
- Systematize children's knowledge about indoor plants and continue to instill the necessary skills for caring for them.
- Continue to teach how to plan joint work.
- Instill interest, develop curiosity, and the desire to care for the plants and animals of a corner of nature.
- To develop responsibility for the assigned task and the ability to complete it.
Equipment:
Indoor plants from a corner of nature, aprons, rags, sticks for loosening, a basin of water, oilcloth, spray bottle, scissors, watering can.
Previous work:
Observations and care of indoor plants in a corner of nature. Reading poems, riddles. Conversations about plants.
Progress of the lesson:
Children sit in a semicircle so that everyone can clearly see a corner of nature.
Educator:
-Guys, you are now in the older group, and if so, then you, as big ones, are entrusted with independent duty in a corner of nature, two at a time.
A plant is the most natural decoration of a room; they require constant and individual care.
Reading riddles:
Green, with thorns, Looks like a hedgehog, And the flowers are satiny White, yellow, red. (Cactus)
Up the steep wall, A centipede crawls along the cast concrete, Carrying leaves with it. (ivy)
They purify the air, create comfort, turn green on the windows, and bloom all year round. (Geranium)
Educator: So, please tell me, what plants are there in our corner of nature? What are their names? (children call)
Educator: - Well done, you know everything! Tell us how we care for our plants?
Children: water, loosen the soil in pots, cut off dry leaves, spray and wipe them.
Educator: - How can you find out that a plant needs watering (by color - the earth is gray, to the touch - dry).
-Polina, please show us how to water indoor plants correctly. Children, pay attention: the spout of the watering can touches the edge of the pot; you need to pour water carefully so as not to wash out the roots. Well done Polina, thank you.
Educator: - After all the flowers are watered, what needs to be done? (fill watering cans with water so that it can settle and warm up until tomorrow).
Educator: - Correct! Guys, tell us what we use when working in a corner of nature besides watering cans? (aprons, rags, basin, oilcloth, scissors).
Educator: What kind of water do we water our green friends? From the tap? (No! only settled water or rainwater).
Educator: - That's right, you can't water indoor plants with tap water - it's cold and the plants will be uncomfortable. In the washroom there is a basin with water for watering plants.
Educator: - Children, why do we loosen the soil in pots?
Children: so that the water and air needed by the roots passes through the ground more easily.
Educator: - Correct, but how should you loosen the soil? (be careful not to damage the roots, otherwise they will begin to rot and the plant will die). Alena, show us how to do it (closer to the edge of the pot, around the plant).
Educator: - Guys, think and tell me what indoor plants we spray (tradescantia, asparagus, begonia, ivy). Our attendants will spray these plants with a spray bottle. Nastya, show us how to do this. Look, children, you need to spray not only from above, but also from the sides and below. You are right, well done.
Finger gymnastics “Flower” .
A tall flower has grown in a clearing, Hands in a vertical position, palms
Pressed together, round your fingers
On a spring morning I opened the petals. Spread your fingers to the sides.
Beauty and nutrition to all petals Rhythmic movement of fingers
together - apart.
Together they grow roots underground. Place the backs of your palms on
table, spread your fingers.
Educator: And now, we need to split into three subgroups.
- Children at the first table will be treated dry
- Children at the second table in a wet way
- The children at the third table will spray.
Think, take the necessary equipment, and get to work.
Educator: - So, we have finished the work, what do we do next?
Children: We put everything back in its place, wipe the oilcloth, wash and dry the rags.
Educator: - Well done! You all answered the questions correctly and showed good knowledge about our green friends.
And, at the end of our work, listen to the poem that Julia prepared for us:
"My little green flower
He grew up on the window. Each leaf pulls towards the sun, like palms. He grew up and was surprised
What appeared in our group. Although the flower is small, it is remote.”
Educator: Popular wisdom says: “He who grows flowers brings joy to himself and others.”
Reflection “Magic Flower” .
Guys! If you were interested today and you like to take care of plants, then attach red flowers to our plant. And if you were bored - yellow ones. I am very pleased that you liked our lesson.
| Next > |
Summary of a lesson on observation and work in a corner of nature “Planting seeds for seedlings” in the senior group
Summary of a lesson on observation and work in a corner of nature. Planting seeds for seedlings in the older group
Priority educational area:
Cognitive development –
the formation of primary ideas about objects of the surrounding world (vegetable plants, plant seeds), about the properties and relationships of the surrounding world (seeds - plants; vegetables - vegetable garden; shape, color of cucumber, pepper, tomato, beans, pumpkin seeds), generalize and clarify children’s knowledge about growing plants, develop the ability to distinguish and name the seeds of different vegetables; lead children to understand the conditions necessary for the successful development of plants; cultivate an interest in plant life and respect for nature.
Educational areas in integration:
Social and communicative development -
formation of readiness for joint activities with peers (ability to negotiate, distribute roles).
Physical development -
development of fine motor skills of both hands, introduce children to methods of sowing seeds depending on their size (one per hole, one per groove, “pinch”).
Speech development –
enrichment of active vocabulary (seeds, seedlings, grow a plant, soil, hole, groove, pinch, sprouted seeds, sprout), development of coherent monologue speech when describing the progress of work.
Vocabulary work
: seeds, seedlings, grow a plant, soil, hole, groove, pinch, sprouted seeds, sprout.
Preliminary work:
Introduce children to the variety of vegetable seeds and teach them about the process of preparing seeds for sowing. Show what is necessary for plant growth (light, heat, moisture). Introduce the stage of growth and development of vegetable crops (cucumbers, tomatoes, beans, pumpkins, peppers), a container for planting seeds, and soil.
Materials:
watering cans
aprons
seeds
cards-schemes
Progress of classes:
Educator: Today we will get acquainted with very interesting living creatures. They are so small that we sometimes don’t notice them.
(scatter seeds of different plants on a tray). What is this?
Children: seeds
Educator: Look how different they are (children look)
Educator: Why do you think they are not similar?
Children: because these are seeds of different plants.
Educator: That's right, here are the tomato seeds, they are small, dark, round, a little velvety. But the pepper seeds, they are also round, but yellow and hard, and these are cucumber seeds. What are they?
Children: Oval, almost white, with a sharp tip.
Educator: All seeds are different, and all eyes are alive. Now the seeds are “sleeping”. This may continue for a whole year or more, but in each of them lies a huge “power of life.” If you create the necessary conditions, this force will help the seed to sprout, the plant to grow, bloom, and bear fruit. What is needed for a plant to grow from seeds?
Children: First you need to plant the seeds, then water them.
Educator: What will happen if a pot with a plant is placed in a dark but warm place? Children: It will not grow well, it will be paler.
Educator: What if it’s in a cold place?
Children: Will not grow at all.
Educator: What if you don’t water it?
Children: It won't grow.
Educator: Now let's play. What the plant will be like and what stages it will go through in its development. Here are cards depicting different phases of plant growth. Here is 1 seed, find this vegetable on the cards and arrange them according to the phases of plant growth. And tell us about completing the task.
Children: The seeds were first planted, then a sprout sprouted from it, then leaves bloomed, an ovary appeared and vegetables grew.
Educator: Can we plant the seeds in the garden now?
Children: No, because it's cold.
Educator: But we can grow seedlings for the garden in a group: Let's plant tomato seeds, what do we need for this?
Children: A box with soil, water, seeds.
Educator: Let's make grooves in the ground, now we'll spill them, put the seeds in the groove, cover them with soil and water them again.
The children do the work.
Educator: To make the seeds germinate faster, you need to cover the box with cellophane. Where should I put the box?
Children: To the window, to the light.
Educator: We found the right place, now our task is to remember to water the plant and watch them.
Result: Well done to everyone, they worked hard today. Tell us what new things you learned today and what you liked?