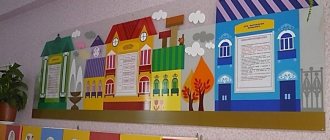
Design of thematic zones and corners in kindergarten
Contained in sections:
- Group design 3852
Includes sections:
- Safety, life safety. Safety Corners and Centers 289
- Book corner, center. Design examples 254
- Musical corners and centers in kindergarten 187
- Patriotic corner. Local History Corner 564
- Speech corner. Speech development corner 80
- Sensory room. Corners and centers for sensory development 369
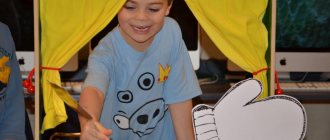
- Theater corners and centers in group 330
- Corners of mood, emotions, solitude 418
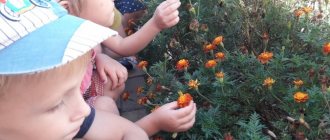
- Nature corner and observation calendar 1561
- Corner of creativity and ISO 206
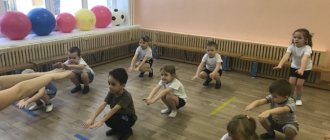
- Physical education and sports corners in groups 348
By groups:
- Senior group
- Preparatory group
- Middle group
- Junior group
Showing publications 1-10 of 6070. All sections | Corners and centers in groups
New
Photo
The best
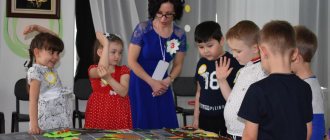
Patriotic corner in the junior group
Patriotic corner in the junior group . It is necessary to cultivate love for the Motherland and family from a very early age. At this age, it is important to instill in children a sense of patriotism. The children are still small, and the corner is aimed at nurturing a love of nature, family and antique objects. Target:…
Orthodox corner in kindergarten
“Education is the most sacred of all holy deeds.” Theophan the Recluse. Love for your family, friends, nature, Motherland - all this arises in the heart in early childhood. Helping children realize their involvement in God’s world, teaching them benevolent and virtuous behavior is...
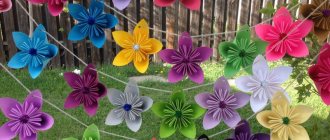
From circles
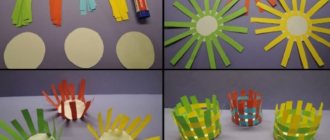
Crafts for kindergarten in the form of umbrellas are a hot topic, because every season teachers come up with new tasks for children. To make this accessory from circles, you need colored paper (coated paper will turn out more beautiful and brighter). Using a compass, draw 8-10 circles of the same size. If desired, you can make a rainbow, one-color or two-color version. The resulting circles should be folded in half - these are blanks for crafts.
Now you need to take one folded circle and grease it with a glue stick on top, leaving the lower tip untouched. Place another circle on the sticky side and glue well. Next, connect the next piece. Do the same with all the circles. When the main part is finished, you need to make a handle for the umbrella. For this you will need colored wire. It can be purchased at craft stores. You need to leave the main part straight and twist the tip inward. Attach it with hot glue to the head of the umbrella.
Corners and centers in groups - Corner of solitude during the period of adaptation to a preschool educational institution
Publication “A corner of solitude during the period of adaptation in...”
“Use of the “Retreat Center” during the period of adaptation to Kindergarten” Ekaterina Evgenievna Maslennikova, teacher of the first junior group of MBDOU “Kindergarten No. 5” Slide 1 A child’s adaptation to Kindergarten largely depends on his emotional state. Manage your emotions...
Image library "MAAM-pictures"
Patriotic corner in the middle group
What should be in a patriotic corner? The Patriotic Corner (also called the “Russian Corner”) contains material in the following sections: Knowledge about the state. Small homeland: native land (region, autonomy, city, village. Folk traditions and culture. Family is the most important thing in…
Methodological recommendations for the creation and use of a corner of privacy and relaxation in a kindergarten Methodological recommendations for the creation and use of a corner of privacy and relaxation in a kindergarten Requirements for a corner of privacy • The corner of privacy should be small in size. • The colors used in the corner should be pastel shades, calm and not flashy. • Should not…
Project “Nature corner as a means of environmental education for younger preschoolers” Problem: Development of environmental education for younger preschoolers using the educational environment of a kindergarten. The goal of the project: to create conditions in the kindergarten group for the development of environmental education of younger preschoolers. Project objectives: -to form children’s basic...
From cones
You can also make an umbrella in the form of an applique of cones. It can also be made in any shade desired and even with the addition of additional decorations. First you need to make blanks: four cones. To do this, take a sheet of paper and cut out one large, even circle. Next, divide it with a ruler into four equal parts and cut it out. Cut along the lines. You should get four blanks, such as in the photo below.
Roll each piece into a cone.
Then take a blank sheet of paper of any color and glue the blanks to it so that their ends converge in one place. Add an umbrella handle and decorate it as desired.
Craft from napkins
Crafts in the form of umbrellas are easy to make with your own hands.
An umbrella can be made from napkins in origami style and made with applique. If desired, you can add lace ribbon and other decorations to them.
In order to make a three-dimensional umbrella, you will need colored craft wire and just one napkin. It should be folded into a cone and glued. Thread the wire in the center and bend it from the bottom. Additionally, you can decorate the base of the umbrella with drawings, rhinestones or colored ribbons.
Application
Children's cards always turn out the cutest, so you can invite your child to make them. To prevent the product from looking boring, you should try to diversify it with appliqué.
For this work you will need:
- markers;
- colored and white paper;
- glue;
- scissors.
Fold a white sheet of A4 paper in half and iron it to form a spine. Unfold the sheet and set it aside.
Now you need to take the red paper and fold it into an accordion.
Glue the center of the accordion onto the spine, and then the rest.
All that remains is to finish drawing with a black felt-tip pen the handle of the umbrella, the man in the raincoat and the rain that goes around the umbrella.
This card can be folded if you glue the accordion umbrella strictly in the center. If you wish, you can write there a congratulation on some special day, or not write anything and give it just like that.
Umbrella made of leaves - step-by-step production
To make a beautiful decorative umbrella from leaves, you must have:
- old umbrella;
- leg-split;
- dry leaves;
- PVA glue;
- decorative elements of autumn (optional).
First you need to remove the cover from the old umbrella, leaving only the frame. Anything removed from the old item can be thrown away or used in addition to decorative items on the new item.
Wrap the base generously with twine. Now you need to take a lot of dry leaves and plant them on glue, and add decorative elements like cones, acorns, pumpkins, etc. around the entire perimeter.
After drying, the leaf umbrella is ready. The method is simple, does not take much time, and every child can definitely repeat it.
Decorative umbrella made of fabric and knitting needles
An umbrella for little fashionistas can be made from scrap materials.
To do this, you need to take thin knitting needles (6 pieces), fabric, plasticine and glue.
Place the metal sticks together and tie them with twine at the bottom. Bend them at the top to form a base.
After this, make a handle from plasticine and secure the end of the knitting needles. If you want something more reliable, you should resort to using plastic (baked polymer clay). It is a little more difficult to knead and work with than with plasticine, but after baking it will harden and will not lose its shape.
Cut a piece of round fabric of a size that fits the individual workpiece. If desired, it is possible to treat the edges or the entire fabric with paints, lace, rhinestones or artificial flowers.
The entire length of the handle can be decorated with decorative beads and ribbons.
After the fabric is glued, it is recommended to remove excess glue with a napkin from the inside of the umbrella so that there are no stains left on it.
In the final version, the umbrella craft should look something like this:
Origami umbrellas
Folding origami develops not only children's mental activity, but also fine motor skills. To work you will need:
- rectangle measuring 10 by 20 cm;
- square 20 by 20 cm;
- glue and scissors.
First you need to take a square and bend it from one corner to the other diagonally. The fold must be carefully smoothed. It won't be difficult for a child to do this. Next, you need to return the square to its “body” and similarly bend the second corner diagonally. It needs to be straightened out again. Now fold the square in half to make a rectangle.
You can see three triangles on the workpiece; the side ones should be bent inward.
The result should be something like this:
By connecting the edges of the triangle, you need to find the middle. Fold the side edges towards it. This must be done with all four corners. Immediately straighten each triangle. The part that protrudes must be bent first outward and then inward.
We get an umbrella hat.
Now you need to take the prepared rectangle, it is needed for the umbrella handle. It will turn out more beautiful if you take colors that go well together, for example, blue with pink, green with yellow, red with black or white, etc.
The picture shows which shades look best together (they are opposite each other on the Itten color wheel).
Roll a tube out of a rectangle (you can glue it if it falls apart) and fold the bottom edge. At the tip of the umbrella, you need to cut off the top to place the handle there.