Basic principle: how it works
The basis of such theater is “playing” with shadows. The performance is created by light sources. The figure or object is illuminated and a shadow appears on the screen. That is why creating such a theater with your own hands will not be difficult.
Black and white representations are not the only option. Scenes can be “painted” in different colors. You will need colored light bulbs or filters that are attached to the light source. For example, for an evening city scene - a dark blue filter, for a morning scene - shades of yellow.
Stages of creating a shadow theater
Making a shadow theater for children with your own hands combines two stages: preparing the stage and creating characters. The approximate time that needs to be spent is about 30-40 minutes. But if you start decorating and creating puppet characters, it will take a little more time.
For the theater to “work”, you will need:
- Choose a suitable light source.
- Make a screen out of a sheet, whatman paper or white paper.
- Take care of the frame (made of cardboard or an artistic stretcher).
- Correctly position the light source, screen and characters.
Cardboard screen for shadow theater
Any theater begins with a hanger. But shadow theater begins with the screen. You can do it in different ways.
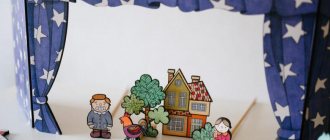
The first (and easiest) way is to make a screen out of a box. To do this you will need a cardboard box, colored and parchment paper, glue and scissors:
- It is necessary to trim the high walls of the box and carefully cut out the bottom. This will create a base for the screen.
- The base must be covered with colored paper.
- Cut out a rectangle of suitable size from parchment paper. It needs to be glued to the inside of the base, thus covering the bottom.
The front side of the screen can be decorated - beads, colored stones, feathers and much more are suitable for this.
Selecting a lighting fixture and a suitable screen
When creating a shadow theater with your own hands, you need a light source: an ordinary flashlight, a table lamp or any other adjustable lamp. You can even use mobile phone lighting.
A translucent white plane is used as a screen. The size is not limited - it all depends on the light power. For the screen, materials that are at hand are suitable: tracing paper, a thin white sheet or a simple Whatman paper. And if this is not the case, you can fasten sheets of snow-white paper together.
To make the scene look more impressive, you will need a frame for the screen. It is made from an artistic stretcher or cardboard. For example, a do-it-yourself shadow theater for children is done this way: choose a suitable box and cut out the bottom.
Then take parchment paper, cut it into a rectangle and stick it to the bottom of the box. All that remains is to decorate the layout as you wish. You can also stretch fabric over a small frame.
Master Class. DIY shadow theater
DIY shadow theater in kindergarten
DIY shadow theater. Master class with step-by-step photos
Master Class.
Making a teaching manual with your own hands Topic of the lesson : Master class. Shadow theater
Author : Sukhovetskaya Oksana Aleksandrovna, teacher of the speech therapy group of the Child Development Center - kindergarten No. 300 “Ryabinushka”, Novosibirsk. Description of material : In this master class you will learn how to make a shadow theater. Shadow theater will help children get acquainted with the theater in a fun way, show their imagination, and develop speech activity. This methodological guide will be useful for children of primary and senior preschool age, as well as for school-age children, teachers and parents. The manual can be used both in individual work and in group work. A master class will help prepare this manual. Material : to create a theater we will need: - a ready-made screen (or you can make it yourself, I will not dwell on this in detail); - fabric: white (tracing paper can be used), colored for the scenes; - threads to match the fabric; - Vilcro ribbon (linden) - cocktail straws; - barbecue sticks (large); — holniten (rivets); — fastenings for electrical wires; - sewing hooks. Tools for work : - hammer; - nails; - stationery knife (cutter); — hole punch for belt; - scissors; — press for eyelets; - awl; - glue gun; - ruler; - pencil pen; — super glue “Moment”; - sewing machine. The result of the master class helps : Stimulate children and their initiative in theatrical activities.
Develop imagination, creative abilities, develop the articulatory apparatus. To form in children a persistent interest in theatrical activities, a desire to participate in a common action, to encourage children to actively interact and communicate, teaches them to be able to communicate with peers and adults in various situations, to develop speech and the ability to actively build dialogue. Develop play behavior, aesthetic feelings, and the ability to be creative in any task. “The theater is a magical world. He gives lessons in beauty, morality and ethics. And the richer they are, the more successful the development of the spiritual world of children is...” (B.M. Teplov)
"Magic land!"
- this is what the great Russian poet A.S. Pushkin once called the theater. The feelings of the great poet are shared by both adults and children who have come into contact with this amazing form of art. A special role belongs to the theater in solving problems related to the upbringing and development of a preschool child. Through theatrical and playful creativity, we can develop children’s emotional responsiveness, intellectuality, and develop children’s communication skills, artistry, and speech activity. In the daily life of a kindergarten, teachers use various types of theaters: bibabo, finger, tabletop, planar (flannelograph or magnetic board), puppet theater, book theater, mask theater, etc. I want to tell and show how to make a complex and at that At the same time, a very interesting shadow theater. Shadow theater is an ancient theater. Since time immemorial, shadow paintings have been shown in India, China, Java and Turkey on the street at night under the light of an oil lamp. Props required for this theater: a light source (for example, a headlamp, table lamp, filmoscope), a screen with a white screen, silhouette puppets on sticks. At the first stage of work, to make silhouettes, we need the following: a stationery knife (cutter), scissors, a hole punch for a belt, a press for eyelets, rivets (rivets)
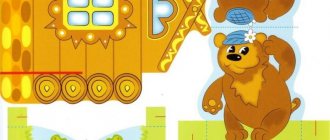
Silhouettes can be prepared on the computer or drawn yourself. I found ideas for silhouettes on the Internet, printed them on regular A4 sheets
Then we paste the printed silhouettes onto black paper. I immediately prepared silhouettes of the characters and scenery.
Now these silhouettes need to be cut out. We cut out small internal details using a stationery knife, and cut out the silhouettes themselves with scissors.
To prevent the silhouettes from bending, I laminated them. If this is not possible, you can use thick cardboard to stiffen the figures.
The next step is to cut out the already laminated double-sided silhouettes.
Since I really wanted the characters (silhouettes) to have movable elements (for example, they could walk), I made separate elements for the silhouettes: arms, paws, legs. To set them in motion, the parts must be fastened in a certain way. Both wire and threads with knots at the ends are suitable for fastening. But I wanted some grace, or something. Therefore, I connected the parts using a belt hole punch and rivets.
Using a hole punch for the belt, I punched even holes in the fastening points, choosing a diameter such that the rivets would not fly out and would move freely. Previously, in the places of fastening, I marked out points with an awl, aligning the paws so that in the future they would not warp. Then I used a grommet press to connect the rivets (this press was the right size for the rivets).
Now you need to attach the sticks to the figures, by which the puppeteers will hold them. It is important to me that the theater is compact. Therefore, my sticks will be removable. The sticks that the silhouettes will use are barbecue sticks. Wooden, round in shape.. We match these sticks to the size of corrugated cocktail tubes. It is very important that the sticks in the tubes do not dangle, but sit very tightly. And we need a glue gun to secure it.
Using scissors, cut off the part with the corrugation (accordion) from the tube, leaving 1.5 cm uncorrugated ends
Using a glue gun I will attach the tubes to the silhouettes. There are two mounting options: horizontal (with corrugation) see on the wolf; vertical (just a piece of tube 2 cm) see on a pig.
To understand in the future which fastenings will be convenient for you, insert the sticks into the tubes.
Try to move the silhouettes, play with them. In principle, I liked both mounts. At the same time, I realized for which silhouettes I would use only vertical fastening, and for which I would use horizontal fastening.
The silhouette figures are ready. Now let's do the decorations. We had already prepared the base when we glued the silhouettes of the scenery onto black paper, cut it out, laminated it and cut it out again. Now we need to strengthen the silhouettes and at the same time make a system for attaching to the screen. We glue barbecue sticks to the silhouettes using a glue gun with the pointed end down.
In order to fully take advantage of our prepared silhouettes, let’s prepare the screen. Luckily for me, our group had such a screen. We will make the main design changes inside the screen. We will need simple tools:
On the bottom strip of the window we will mark places for plastic fasteners.
Let's fasten the plastic fasteners with nails (these fasteners are usually used by electricians to secure wires to the walls), and at the same time we'll try on how the decoration sticks will fit in. The fasteners must be firmly fixed and not loose, otherwise all our decorations will not be positioned correctly. We attach sewing hooks to the top strip of the window using Moment super glue. We need them to place on them such decorations as clouds, sun, moon, birds. We attach Vilcro tape (linden) under the hooks. It is better to attach it to a furniture stapler so that it does not come off. On the bottom bar above the fastenings for decorations, we also fix the Vilcro tape.
From the outside it all even looks interesting. The versatility of the manipulations is that all these fasteners can be used not only for shadow theater, but also for performing any other puppet show.
We will attach the white screen to the Vilcro tape. We will make the screen from a piece of white calico. Using a measuring tape, measure the width and height of the window. (instead of fabric, you can use tracing paper, unfortunately, it is less reliable) Cut out a rectangular piece and carefully trim the edges. We will sew vilcro tape on the top and bottom - its second half. Now the screen can be placed on the screen. It will be held taut by the Vilcro tape. Outwardly, the screen now seemed boring to me. So I decided to transform it. Curtain curtains will decorate our theater.
Let's sew a lambrequin from a narrow rectangular strip of fabric. The lambrequin will cover the top crossbar of the window.
From rectangles with processed edges you will get a curtain in two parts. Both sides can be assembled. You can make a removable fibula so that the curtain can completely cover the window or be open without obstruction. I covered the bottom of the screen with self-adhesive film to match our curtain.
For comparison: what was and what has become
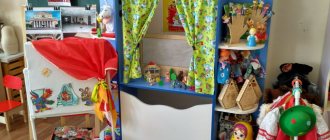
Our theater is almost ready to show the performance. All that remains is to install the necessary light and invite actors and spectators. In order for the audience to see the performance, we will need two light sources. Regular headlamps will serve as a light source. They are safe and easy to use.
I attached the lanterns to the screen doors. My flashlights have a rotating mechanism that will help us choose the direction of the light. At the same time, performances can be watched both in daylight and in a dark room. The silhouettes will be equally visible in both cases.
Let's call the actors and spectators.
The actors will be behind the screen and “puppeteer”, showing and telling amazing stories and fairy tales. We invite you to our performance! Enjoy watching! And have fun working with this material! Silhouettes of characters and scenery can be downloaded
Here
We recommend watching:
Photo report from the fairy tale “The Scarlet Flower” Synopsis of a theatrical lesson in the second junior group Synopsis of a joint theatrical activity in the preparatory group on Russian folk tales Synopsis of a lesson on theatrical activity in the senior group
Similar articles:
Thumb-boy, where have you been? (Games with preschool children to develop fine motor skills)
The fairy tale “At the behest of the pike” in a new way. Role-based script for older preschoolers
Design of a speech therapy room at a preschool educational institution
DIY educational panel for kindergarten
Characters for the theater
Shadow theater varies depending on the characters. There is, for example, finger theater - shadows from hands are used. The fingers are folded to form the desired ones. This kind of theater is good for children - it develops hand motor skills. For such performances, a small “stage” is suitable.
The puppet theater looks bigger. This implies a performance with additional decorations and figures. Stencils can be used to create a shadow theater with your own hands for children. The size of the dolls is approximately 10 cm (height and size can be easily changed due to distance and approach).
The figures are created from cardboard, fixed on wooden skewers or also on cardboard. You can do it differently: cut out paper figures and stick them on cardboard. It is important to coat the material with glue, but not generously, so that the base does not deteriorate.
The dolls need to be dried under pressure, and then additionally coated with a layer of PVA glue on top. A semi-dry brush is required. It is advisable to paint cardboard dolls with black paint - they will be more noticeable.
Puppets for shadow theater
The material for the first dolls was animal skins. They were made so thinly that they were almost transparent. Figures were cut out of skins and paint was applied to them. Traditionally, the height of theater puppets did not exceed 30 centimeters. All figures were movable. With the help of thin long rods, the dolls were controlled by a person hiding behind the screen.
Position of screen, light source and characters
The screen is placed between the audience and the lighting fixture. The light source is placed slightly to the side, not too close to the screen itself. Then the shadows will be clearer. Distance – about 25 cm.
The shadow changes depending on the distance between the figure and the light source. To make the wolf, for example, appear larger, you need to move the character further away. For the first productions, it is advisable to use a few characters - two or three are enough. With practice, you can create more complex representations.
Complicated version
You can create a shadow theater for children using templates with your own hands in half an hour, but if you have more time, it’s worth thinking through additional details. For example, add decorations. They are created from cardboard and attached tightly to the screen using tape or paper clips. Then the decorations will not fall unexpectedly.
It’s easy to “revive” the figures - make them more mobile using soft wire. It is used to wrap arms, legs, wings and other parts.
It’s easy to “play up” an evening with a performance: decorate the curtain and draw bright tickets. And if several performances are planned, print out programs for spectators. And, of course, you need an intermission, during which you can treat the audience to delicious home-cooked food.
The Legend of the Shadow Theater
In ancient times, around 200 BC, the Chinese emperor lost his beloved wife. The inconsolable ruler was sad, abandoned state affairs, and stopped talking. The affairs of the empire were in decline. The courtiers invented a variety of methods, but any attempts to force the emperor to leave his chambers were unsuccessful.
But one day the chief courtier asked the ruler to go into the rooms of his wife, who had died of a serious illness. In the chambers, the emperor saw the silhouette of his beloved sitting behind the curtain. Suddenly she stood up, her profile clearly emerged against the background of the sun behind the thin fabric. So, with the help of shadow theater, the courtier was able to cure the ruler of melancholy.
The emperor liked the performance shown to the courtier so much that he asked to repeat it every evening. He even invited spectators. The doll, which was a unique copy of the wife, walked, played musical instruments, and sat by the window. Suddenly the emperor realized: the fabric was only a temporary barrier between them, and his beloved was waiting for him in another world. A little time will pass and they will be together again. Realizing this, the sovereign became cheerful and again took up state affairs. And shadow theater began its march across the earth, it spread to Asian countries: India, Turkey. Together with the army of Genghis Khan, this art reached Europe and Russia.
Scene selection
The best place to start is with folk tales. They have a simple plot and not many characters. By the way, in China, where shadow theater comes from, up to a thousand figures could be used during one performance.
Before giving a performance, you need to understand the mystery of shadow theater. For example, in order for a doll to disappear unnoticed (or suddenly appear), you need to turn it with its edge towards the screen and remove it.
Before giving a performance, you need to learn the secrets of shadow theater. For example, in order for a doll or decoration to disappear unnoticed (or suddenly appear), you need to turn it edge-on towards the screen and move it.
So that the audience does not languish while waiting for the “actors,” the dolls must be arranged in order in advance. When creating a theater on sticks with your own hands using a template, it is worth adding additional effects - sound. You just need to choose the right music. And if you move the light source, you can depict bad weather, a storm or snowfall.
Shadow theater has not changed much since ancient times. The lighting setup and use of silhouettes are exactly the same. But now for home performances it is much easier to find and print the necessary stencils. And in the past, dolls were created by masters who worked on the figures down to the nuances.
Large screen for shadow theater
The previous manufacturing options are suitable for small theaters, in which the roles are “performed” by small figures. What if the actors are people? We need to make a big screen! The most budget option is white raincoat fabric. Of course, its density varies. But choosing the right material is not so difficult - you just need to take a flashlight and check how the shadow is transmitted. Then you just need to stretch the fabric onto a frame made of metal or wood. You can start rehearsals.

